
If you’ve ever planted beautiful flowers only to watch them struggle a few weeks later, girl, the problem probably wasn’t the flowers—it was the soil, and today I’m sharing exactly how to prepare soil for flower bed the right way so your garden can absolutely thrive.
I Learned the Hard Way That Pretty Flowers Need Great Soil
I used to think gardening was all about buying the prettiest flowers from the garden center. Honestly, I believed I could dig a tiny hole, pop the plant in, water it, and somehow end up with one of those dreamy Pinterest-worthy flower beds.
Spoiler alert…that did not happen.
My very first flower bed looked amazing for about two weeks. Then everything started drooping, leaves turned yellow, and I remember texting my friend Jess saying, “Why do my flowers hate me?” Lol. She laughed and asked the one question I hadn’t even considered.
“Did you prepare the soil?”
Apparently, the answer was a huge deal.
Once I actually learned how to prepare soil for flower bed properly, everything changed. My flowers stayed healthier, bloomed longer, and honestly looked so much more vibrant. I couldn’t believe the difference good soil made.
Now I get why gardeners always obsess over the dirt. It isn’t glamorous, but it seriously makes every single flower happier.
If you’re wondering how to prepare soil for flower bed before planting, don’t worry. I’m walking you through every step I personally use, the mistakes I made, and the little tricks that make your flower beds look professionally landscaped without spending a fortune.
Trust me—your future self will thank you.
| Without Preparing the Soil | After Proper Soil Preparation |
|---|---|
| Weak flower growth | Strong healthy blooms |
| Poor drainage | Balanced moisture |
| More weeds | Easier maintenance |
| Plants struggle | Plants establish faster |
| Fertilizer washes away | Nutrients stay available |
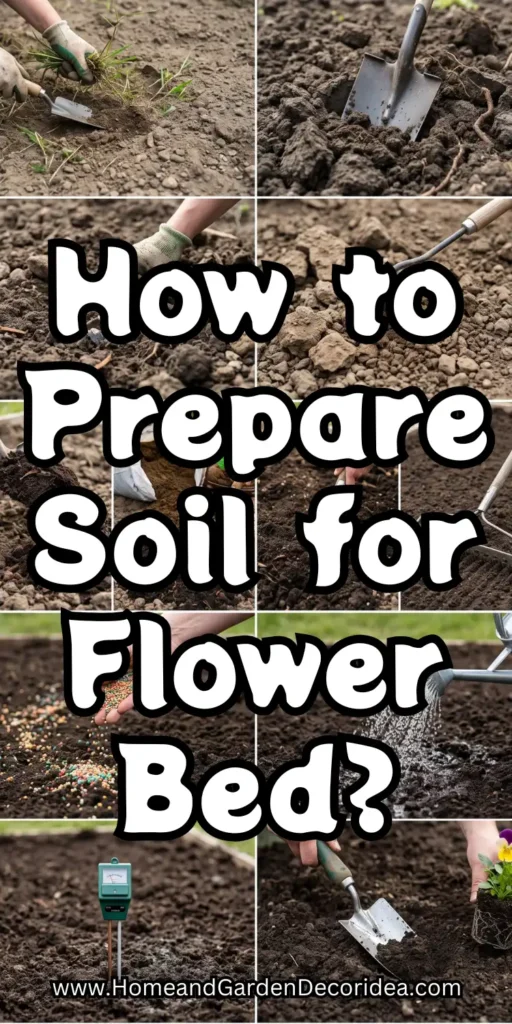
Why Learning How to Prepare Soil for Flower Bed Changes Everything
Before we get into the actual steps, I want to explain why this matters so much.
When people think about beautiful flower beds, they usually focus on colorful blooms. I totally get it because that’s the fun part. But underneath every stunning garden is healthy soil doing all the hard work.
Think of soil like the foundation of a house.
If the foundation is weak, nothing built on top lasts very long. Flowers work exactly the same way. Healthy roots need air, nutrients, moisture, and room to grow.
That’s exactly why learning how to prepare soil for flower bed is one of the smartest things you can do before spending money on plants.
I honestly think this is one of the biggest gardening secrets that beginners overlook.
Even better? It’s one of the most popular gardening topics on Pinterest lately, and I keep seeing TikTok creators showing dramatic before-and-after flower beds simply because they improved their soil first.
I’m seriously obsessed with those transformations because they’re actually achievable.
Start by Choosing the Perfect Spot
The first step in how to prepare soil for flower bed isn’t grabbing a shovel.
It’s choosing the right location.
I know that sounds boring, but trust me. Picking the wrong spot can make even the healthiest soil struggle. I learned this after planting flowers next to a huge tree that secretly stole all the water and nutrients.
Never again.
Most flowering plants absolutely love sunshine.
A location with at least six hours of direct sunlight usually produces fuller blooms, stronger stems, and brighter colors. If your favorite flowers prefer shade, that’s different, but most flowering annuals and perennials love soaking up the sun.
I also pay attention to drainage.
If water sits in one area after heavy rain for hours, that’s a sign you’ll need to improve drainage before planting. Standing water can quickly cause root rot, and trust me, that’s not something you want to deal with.
Before committing to your flower bed, spend a day simply watching the space.
Notice where the sunlight moves.
Notice where puddles collect.
Notice whether large trees compete for space.
It sounds simple, but this tiny habit has saved me so much frustration later.
Quick Location Comparison
| Feature | Great Choice | Avoid If Possible |
|---|---|---|
| Sunlight | 6–8 hours daily | Constant shade |
| Drainage | Water drains within a few hours | Standing puddles |
| Trees | Several feet away | Directly under mature trees |
| Accessibility | Easy to water and maintain | Difficult to reach |
Pro Tip: Take a few pictures of your yard throughout the day. You’ll instantly see where sunlight naturally lands, making it much easier to decide where your flower bed should go.
Remove Everything That’s Already There
Now comes the part nobody gets excited about.
Cleaning.
But honestly, this step is absolutely worth every minute because skipping it almost always creates problems later.
When learning how to prepare soil for flower bed, you want to give your new flowers a completely fresh start.
That means removing existing grass, weeds, roots, rocks, old mulch, and anything else competing for space.
Years ago, I tried planting directly over grass because I thought the flowers would “figure it out.”
Girl…
The grass absolutely won.
The weeds grew faster than my flowers, and it became a constant battle.
Now I spend extra time clearing everything before planting, and maintenance is so much easier afterward.
If you’re dealing with stubborn grass, a flat shovel works beautifully.
For areas full of weeds, make sure you remove as much of the root system as possible. Otherwise, they’ll happily grow right back.
It’s a little extra work upfront, but you’ll save yourself weeks of pulling weeds later.
I honestly can’t recommend this enough.
Test Your Soil Before Adding Anything
This might sound like something only professional gardeners do, but it’s honestly one of the smartest parts of how to prepare soil for flower bed.
Think about it.
You wouldn’t take medicine without knowing what’s wrong first, right?
So why randomly add fertilizers without knowing what your soil actually needs?
A simple soil test tells you things like:
- Soil pH
- Nutrient levels
- Organic matter
- Possible deficiencies
The results make choosing compost or fertilizer so much easier.
I remember testing my soil for the first time and discovering it was much more compacted than I expected. No wonder my flowers struggled.
Once I corrected those issues, my garden looked completely different the following season.
This is honestly one of those small investments that pays off every single year.
Loosen the Soil Deep Enough for Healthy Roots
Now we’re finally getting into the fun part.
One of the biggest secrets behind how to prepare soil for flower bed is giving flower roots plenty of room to spread.
Healthy roots equal healthy plants.
Whenever I make a new flower bed, I loosen the soil about 8 to 12 inches deep.
This allows oxygen, water, and nutrients to move much more freely through the soil.
Compacted soil acts almost like concrete.
Roots have to fight just to grow, which means your flowers spend more energy surviving instead of blooming.
Using a garden fork is one of my favorite methods because it loosens the soil without completely destroying its natural structure.
If your soil is especially hard, you can also use a shovel or tiller.
Just don’t overwork wet soil because it can become even more compacted later.
Oh my…this one lesson alone completely changed the way my flower beds performed.
It’s amazing how much happier flowers become once their roots have room to breathe.
Add Plenty of Compost Because It’s Pure Garden Magic
If there’s one thing I never skip when thinking about how to prepare soil for flower bed, it’s adding compost.
Seriously, I can’t say enough about it.
Compost is basically nature’s way of creating healthier, richer soil. It improves drainage, helps sandy soil hold moisture, loosens heavy clay, and feeds your flowers over time. It’s like giving your garden a big, nourishing hug before planting.
The first time I mixed homemade compost into one of my flower beds, I wasn’t expecting miracles. But by mid-summer, the flowers were noticeably bigger, brighter, and blooming like crazy. My neighbor actually asked what fertilizer I was using, and honestly, most of the credit went to the compost.
Whenever possible, I aim to mix about two to four inches of compost into the top layer of soil. Don’t just sprinkle it on top—work it in well so the roots can enjoy all those amazing nutrients.
This is honestly one of the easiest ways to give your flowers the best possible start.
Why Compost Is Worth Every Scoop
| Benefit | Why You’ll Love It |
|---|---|
| Improves drainage | Prevents soggy roots |
| Holds moisture | Less frequent watering |
| Adds nutrients | Healthier blooms |
| Encourages earthworms | Naturally healthier soil |
| Improves soil texture | Easier root growth |
Pro Tip: If you don’t make your own compost yet, don’t stress! Bagged compost from your local garden center works wonderfully too.
Know Your Soil Type Before You Try to Fix It
One thing I wish someone had explained sooner is that not all soil is created equal.
When learning how to prepare soil for flower bed, knowing your soil type makes every decision easier. You don’t want to treat sandy soil the same way you’d treat heavy clay.
I remember squeezing a handful of damp soil after it rained because a gardening video suggested it. At first, I thought it looked silly…but wow, it actually told me a lot.
Once I understood what kind of soil I had, I stopped wasting money on products I didn’t even need.
Different Soil Types at a Glance
| Soil Type | Characteristics | Best Improvement |
|---|---|---|
| Clay | Heavy, sticky, slow drainage | Lots of compost and organic matter |
| Sandy | Loose, dries quickly | Compost to hold moisture |
| Loamy | Soft, crumbly, balanced | Maintain with compost yearly |
| Rocky | Lots of stones | Remove rocks and enrich soil |
Honestly, loamy soil is the dream because it already has a nice balance. But don’t worry if yours isn’t perfect.
The great news is that almost any soil can become healthier with patience and organic matter.
Improve Drainage Before Your Flowers Move In
Have you ever watered a plant only to notice puddles sitting around it forever?
Girl, that’s a huge sign your drainage needs some love.
One of the biggest reasons people research how to prepare soil for flower bed is because poor drainage quietly causes root rot, fungal diseases, and weak plants.
Flowers don’t like sitting in soggy soil all day.
I learned this lesson after planting beautiful petunias in an area that stayed wet after every storm. They looked gorgeous for about a week before everything went downhill.
Now I always improve drainage first.
Mixing compost into the soil usually helps a lot. Raised flower beds are another amazing option if your yard naturally holds water.
Honestly, raised beds have become one of the most popular gardening trends lately, and I totally understand why.
They’re practical, pretty, and much easier to manage.
Check the Soil pH for Happier Flowers
Okay, I know the words “soil pH” sound super scientific.
I used to skip this part because it felt intimidating.
Turns out, it’s actually pretty simple.
The pH level affects how easily flowers can absorb nutrients from the soil. Even if your soil has plenty of nutrients, your plants might struggle if the pH isn’t balanced.
That’s why checking pH is another important step in how to prepare soil for flower bed.
Most flowering plants prefer slightly acidic to neutral soil, which is great because that’s fairly easy to achieve.
If your soil test recommends adjusting the pH, make changes gradually instead of all at once.
Gardening definitely teaches patience.
Thankfully, flowers reward that patience with gorgeous blooms.
Mix Everything Thoroughly Instead of Layering
Here’s a mistake I made more than once.
I used to dump compost on top of the soil and call it a day.
Oops.
The nutrients stayed near the surface while the roots kept growing underneath.
Now I mix everything together really well before planting.
When you’re learning how to prepare soil for flower bed, blending compost, organic matter, and any recommended soil amendments creates a consistent environment for the roots.
Think of it like baking a cake.
You wouldn’t leave all the flour sitting at the bottom of the bowl, right?
The same idea applies here.
Taking an extra ten minutes to mix everything evenly makes a surprisingly big difference.
Remove Large Rocks and Old Roots
This step isn’t the most exciting, but it’s absolutely worth it.
As you loosen your soil, you’ll probably uncover rocks, old roots, construction debris, or random pieces of wood.
I swear every time I dig a new flower bed, it’s like uncovering hidden treasure…except the treasure is usually an old brick or giant rock. Lol.
Removing these obstacles gives roots more room to spread and helps water move through the soil more evenly.
It’s another small detail that contributes to healthier flowers in the long run.
Water the Soil Before Planting
One thing I didn’t realize for years is that dry soil isn’t the best place to introduce new flowers.
Once I’ve finished how to prepare soil for flower bed, I lightly water the area before planting.
Not soaking wet.
Just evenly moist.
This helps the soil settle naturally while creating a welcoming environment for young roots.
Planting into bone-dry soil often makes new flowers work harder than necessary during those important first few days.
Giving them moist, fluffy soil feels like rolling out the welcome mat.
Don’t Add Too Much Fertilizer
This one surprised me.
I honestly believed more fertilizer meant more flowers.
Nope.
Too much fertilizer can actually encourage leafy growth instead of beautiful blooms. In some cases, it can even damage young roots.
That’s why I always follow the recommended amounts instead of guessing.
When learning how to prepare soil for flower bed, it’s much better to build healthy soil first and use fertilizer as a supplement—not as a shortcut.
Healthy soil does most of the heavy lifting.
The fertilizer is simply there to give your plants an extra boost when needed.
Compost vs. Fertilizer
| Compost | Fertilizer |
|---|---|
| Improves soil structure | Provides concentrated nutrients |
| Feeds soil organisms | Feeds plants directly |
| Long-lasting benefits | Often works more quickly |
| Helps retain moisture | Doesn’t improve soil texture |
| Great foundation | Best used as a supplement |
Pro Tip: If you’re unsure how much fertilizer to use, start with less. You can always add more later, but it’s much harder to fix over-fertilized soil.
Let the Soil Rest Before Planting
This is one of those little gardening tricks that doesn’t get talked about enough.
After finishing how to prepare soil for flower bed, I like to let everything sit for a day or two whenever possible.
It gives the compost, moisture, and soil amendments time to settle together naturally.
I know it’s tempting to plant immediately—I definitely get impatient too—but waiting just a little bit can create a more stable environment for your flowers.
Honestly, it’s kind of like letting cookie dough chill before baking.
Sometimes a little patience really does make everything turn out better.
By the time you’re ready to plant, your flower bed will be soft, nutrient-rich, and ready to support healthy roots from day one.
Plant Your Flowers the Right Way
After you’ve finished how to prepare soil for flower bed, it’s finally time for the fun part—planting!
Honestly, this is my favorite moment because all the hard work starts coming together. Every time I place those first flowers into fresh, fluffy soil, I can already picture how beautiful the bed will look in a few months.
Try not to crowd your flowers, even if it’s tempting. I know we all want that lush, full look right away, but giving plants enough room helps with air circulation and allows them to grow into their mature size.
I always check the plant tags for spacing recommendations. Trust me, those extra few inches make a huge difference later in the season.
Add Mulch for a Finished, Professional Look
If compost is the secret hero of a flower bed, mulch is definitely the finishing touch.
After learning how to prepare soil for flower bed, adding a layer of mulch helps lock in moisture, reduce weeds, and keep soil temperatures more consistent.
Plus, let’s be honest—it just makes everything look polished.
I’m seriously obsessed with the clean, landscaped look mulch creates. It’s one of those details that instantly makes a flower bed look like it belongs in a home and garden magazine.
Whether you choose shredded bark, pine straw, or another natural mulch, aim for a layer that’s about two to three inches thick. Just keep it a few inches away from the stems so your plants stay healthy.
Popular Mulch Options
| Mulch Type | Best For | Benefits |
|---|---|---|
| Shredded bark | Most flower beds | Long-lasting and attractive |
| Pine straw | Cottage gardens | Lightweight and budget-friendly |
| Wood chips | Larger beds | Great weed suppression |
| Leaf mulch | Eco-friendly gardens | Adds organic matter over time |
Pro Tip: Refresh your mulch once or twice a year to keep your flower beds looking fresh and to maintain weed control.
Water Deeply After Planting
One of the biggest mistakes I made as a beginner was giving my flowers tiny little sips of water every day.
Turns out, they needed a good, deep drink instead.
After completing how to prepare soil for flower bed, water thoroughly so the moisture reaches the root zone. Deep watering encourages stronger roots and helps new plants settle into their new home.
I usually water slowly so the soil absorbs the moisture instead of letting it run off the surface.
It’s such a simple habit, but it really helps flowers establish themselves faster.
Watch Your Flower Bed During the First Few Weeks
Your work isn’t completely finished after planting.
The first few weeks are when your flowers are adjusting, so I like to check on them every day or two.
Honestly, it’s become one of my favorite little routines. I’ll grab my morning coffee, walk through the garden, and admire any new blooms while keeping an eye out for weeds or dry spots.
Catching little problems early is so much easier than fixing big ones later.
Plus, it’s a great excuse to spend a few peaceful minutes outside.
Common Mistakes to Avoid When Learning How to Prepare Soil for Flower Bed
Girl, if I can save you from making the same mistakes I did, I’ll happily do it.
Here are the biggest lessons I’ve learned over the years.
Skipping Soil Preparation
Buying gorgeous flowers won’t make up for poor soil.
Healthy soil should always come first.
Ignoring Drainage
Standing water can quickly damage roots.
If water doesn’t drain well, improve the soil or consider building a raised flower bed.
Overusing Fertilizer
More isn’t always better.
Too much fertilizer can lead to lots of leaves but fewer flowers.
Forgetting Organic Matter
Compost isn’t optional in my garden anymore.
It’s honestly one of the easiest ways to improve almost any soil.
Planting Too Close Together
I know it’s tempting.
But giving flowers room to grow results in healthier plants and fuller flower beds over time.
Seasonal Tips for Preparing Flower Bed Soil
One thing I love about gardening is that every season offers a chance to improve your soil.
Spring
Spring is perfect for refreshing flower beds with compost and checking drainage before planting new flowers.
Summer
Avoid heavy digging during extremely hot weather. Focus on watering, mulching, and maintaining healthy soil moisture.
Fall
Fall is actually one of my favorite times to improve soil. Adding compost now gives it months to break down before spring arrives.
Winter
Even during winter, you can plan new flower beds, gather compost, and prepare for next year’s projects.
My Favorite Checklist for How to Prepare Soil for Flower Bed
Whenever I start a new flower bed, I mentally go through this checklist.
| Step | Complete? |
|---|---|
| Choose the right location | ✓ |
| Remove grass and weeds | ✓ |
| Test the soil | ✓ |
| Loosen the soil deeply | ✓ |
| Add compost | ✓ |
| Improve drainage if needed | ✓ |
| Adjust soil pH | ✓ |
| Mix everything thoroughly | ✓ |
| Water the prepared soil | ✓ |
| Plant and mulch | ✓ |
Following this simple routine has honestly made gardening feel so much less overwhelming.
Frequently Asked Questions
How deep should I prepare soil for a flower bed?
For most flower beds, loosen the soil about 8 to 12 inches deep. This gives roots plenty of room to spread and improves drainage and airflow.
Can I plant flowers without preparing the soil?
You can, but I honestly don’t recommend it. Preparing the soil helps flowers establish faster, stay healthier, and produce more blooms throughout the season.
Is compost better than fertilizer?
I think they work best together. Compost builds healthy soil over time, while fertilizer provides nutrients when plants need an extra boost.
How often should I improve my flower bed soil?
I like adding compost at least once every year, usually in spring or fall. Regular soil improvement keeps flower beds healthy for years.
What’s the easiest way to improve poor soil?
Adding organic matter like compost is one of the simplest and most effective ways to improve almost any soil type.
Final Thoughts
Learning how to prepare soil for flower bed completely changed the way I garden.
I used to think success depended on buying the prettiest flowers or the fanciest fertilizers. Now I know that the real magic happens beneath the surface.
Healthy soil creates stronger roots, brighter blooms, and flower beds that keep looking beautiful season after season.
If you’re starting your very first flower bed, don’t worry about making everything perfect. Every gardener learns through experience, and every season teaches something new.
So grab your shovel, put on your favorite playlist, and enjoy the process. Before you know it, you’ll have a gorgeous flower bed that’s not only Instagram-worthy but also healthy, thriving, and built to last.
And when your friends start asking how your flowers look so amazing, you’ll smile because you’ll know the secret was learning how to prepare soil for flower bed the right way from the very beginning.

Leave a Reply