
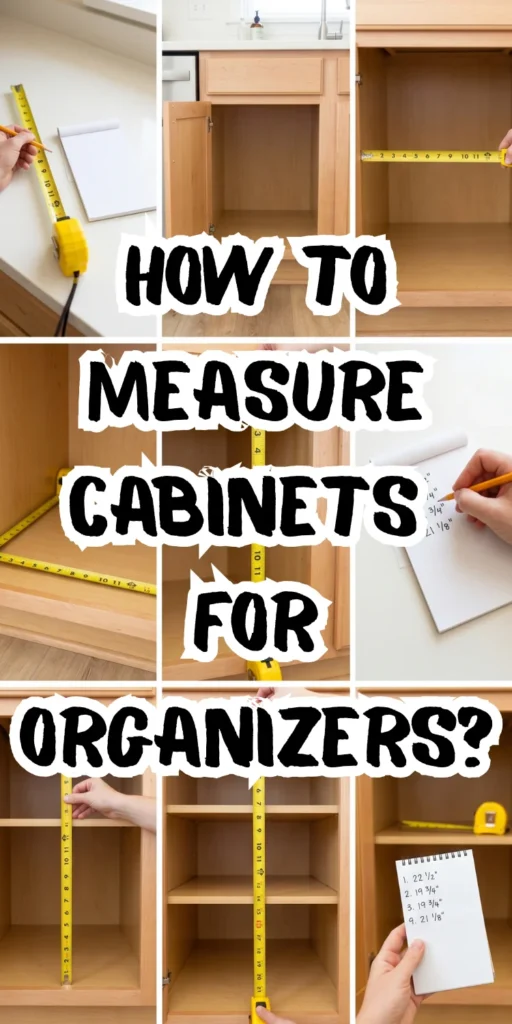
The most practical and genuinely useful guide to measuring your cabinets before buying any organizer — because the single most common reason cabinet organizers get returned is that nobody measured properly before buying, and this guide makes sure that never happens to you again.
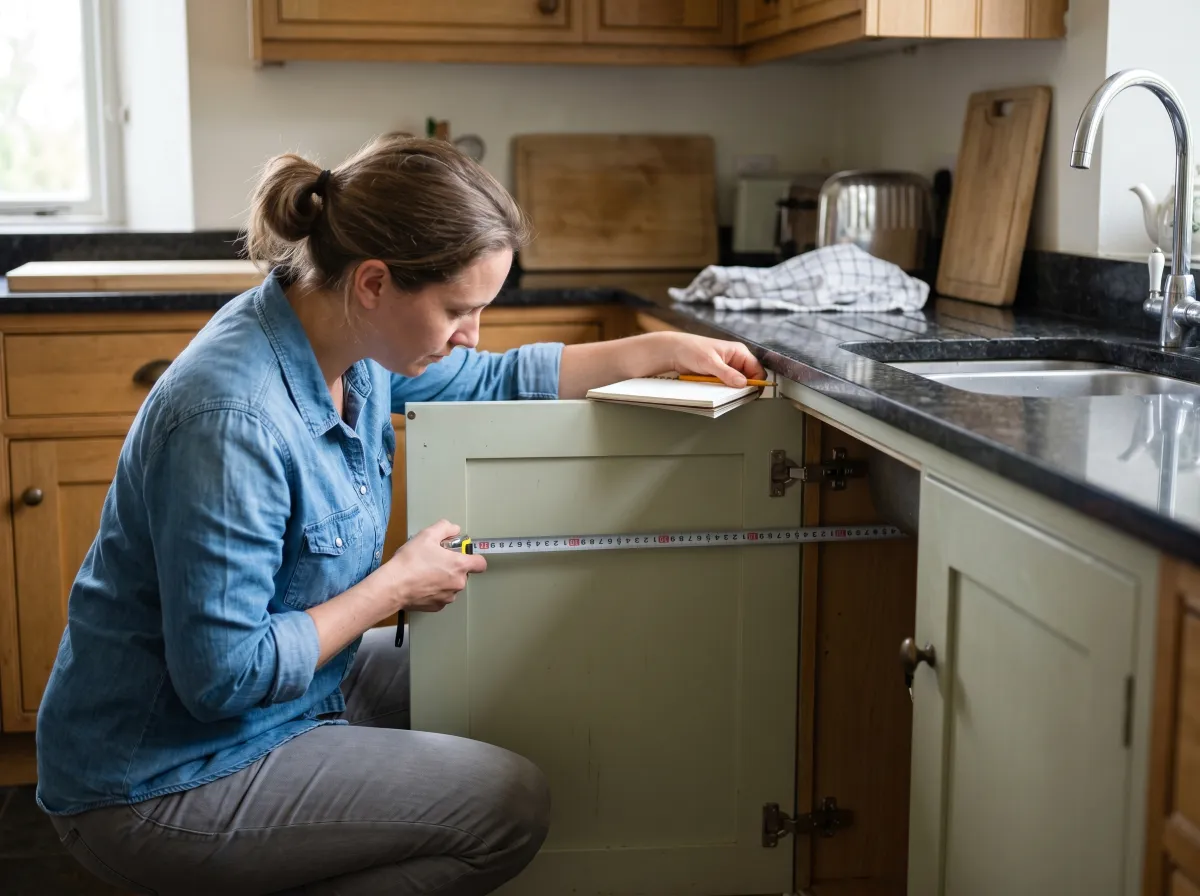
Let me describe a scenario that has happened to more people than I can count — including, embarrassingly, me, more than once. You find the perfect cabinet organizer. The photos are beautiful. The reviews are glowing.
You add it to your cart, you order it, it arrives, you open the box with genuine excitement, you carry it to the cabinet it’s supposed to transform, you hold it up to the opening — and it is three-quarters of an inch too wide to fit.
Or two inches too tall for the shelf clearance. Or too deep to allow the cabinet door to close. Or, in the specific kind of painful irony that the universe occasionally delivers, all three simultaneously.
Back in the box. Print the return label. Feel the specific frustration of time wasted, money temporarily spent, and a cabinet that is still a mess.
I have lived this. My friend Bisan has lived this so many times that she started keeping a running joke about her “cabinet organizer graveyard” — the collection of returned items in her garage that were all technically highly-rated products that simply did not fit the specific cabinets they were bought for. She started measuring properly after organizer return number seven, and has not made a return since.
The entire solution to this problem — which wastes more time, money, and organizational momentum than almost any other mistake in the home organization process — is proper measurement. Not “rough measurement.” Not “eyeballing it.” Not “the description said it fits most standard cabinets.” Precise, complete, documented measurement taken in the specific way this guide is going to teach you.
This is the guide to measuring your cabinets before buying any organizer. It covers every type of cabinet, every critical measurement, every tool you need, and every mistake that causes measurements to be wrong even when you thought you measured carefully.
By the end, you will have the complete measurement data for every cabinet in your home — which means every organizer you buy from this point forward will be the right size for the right space. Let’s do it.
Why Cabinet Measurements Are More Complicated Than They Appear
Before we get into the specific measurements, I want to explain why measuring a cabinet is more nuanced than it sounds — because most people who have measured cabinets and gotten it wrong thought they were measuring correctly.
The reason measuring a cabinet is more complex than measuring a table or a room is that cabinet interiors are frequently not consistent from front to back, not consistent from top to bottom, and not consistent from one end to the other. Cabinets have face frames that reduce the opening width relative to the interior width. They have hinges that protrude into the interior and reduce the effective interior width at certain heights. They have plumbing pipes, electrical outlets, and structural elements that interrupt the interior space in ways that are not visible from the front.
A measurement taken only at the opening of the cabinet tells you about the opening. A measurement taken only at the back of the cabinet tells you about the back. A measurement taken at one height does not tell you anything about the height six inches above or below. Organizers need to fit at the most constrained point of the cabinet — which may not be where you naturally think to measure.
This guide will teach you to measure at every critical point and record every relevant dimension — so that when you are standing in front of a product listing trying to decide whether it fits, you have the complete data you need.
The Tools You Need
Measuring cabinets properly requires simple tools you almost certainly already own.
Tape measure — The most important tool. A standard 25-foot retractable tape measure is ideal. A short 12-foot tape measure works for most individual cabinets but may be limiting for deeper cabinets and pantry spaces. The tape measure needs to lock in position so you can read the measurement while holding it in place.
A pen or pencil and a small notebook or notepad — Write everything down as you measure. Do not rely on memory. Do not type measurements into your phone while holding a tape measure. Write them down in a dedicated notebook that you keep with your home organization materials, labeled with which cabinet each measurement belongs to.
A level (optional but helpful) — For checking whether cabinet shelves are actually level, which affects how certain organizers sit and spin within the cabinet.
A flashlight or phone torch — For seeing inside dark base cabinets and corner cabinets clearly enough to measure accurately.
A sticky note and marker — For labeling cabinets while you measure them so you can easily identify which measurements belong to which cabinet when you are shopping later.
That is genuinely all you need. No special tools, no expensive equipment.
The Measurement Vocabulary: What You Are Measuring and Why
Before you take a single measurement, understanding what each term means and why each measurement matters will make the entire process faster and more accurate.
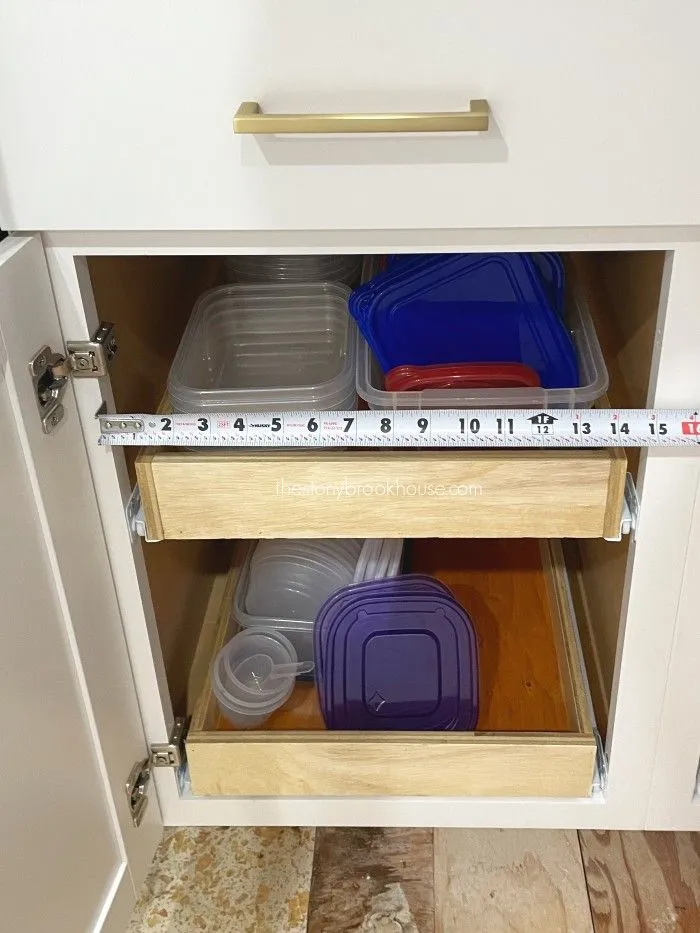
Interior width: The distance between the two interior side walls of the cabinet, measured horizontally. This is not the same as the opening width in a cabinet with a face frame. The interior width is the maximum width that a shelf, tray, or organizer can be before it cannot sit flat on the cabinet shelving.
Opening width: The distance between the inner edges of the face frame on a face-frame cabinet — the actual opening through which you place items in and take items out. An organizer that is wider than the opening width cannot be inserted into the cabinet even if it would fit inside the cabinet once there.
Interior depth: The distance from the front of the interior cabinet space (just inside the face frame or the front edge of the cabinet) to the back wall. This is the maximum depth of any organizer that needs to fit fully inside the cabinet.
Interior height: The vertical distance between the cabinet floor (or the shelf below your organizer’s intended position) and the shelf above (or the top of the cabinet if there is no shelf above). An organizer taller than the interior height will not fit in the position you intend.
Shelf clearance: The distance between the top surface of a shelf and the bottom surface of the shelf above it — the space available for items to stand on that shelf. This is usually less than the interior height of the cabinet between those same two shelves, because the shelf itself takes up some of the space.
Face frame depth: How far the face frame extends into the cabinet interior from the front. On face-frame cabinets, pull-out organizers mounted to the cabinet interior walls need to account for the face frame depth when calculating where the slides can start.
Hinge protrusion: How far the hinges protrude into the interior space of the cabinet. Hinges mounted to the side of the cabinet interior reduce the effective interior width at the hinge height.
Door clearance: When a cabinet door is closed, the clearance between the inside of the closed door and the front of whatever is on the first shelf. This measurement is critical for door-mounted organizers, as the organizer depth plus the item height must fit within this clearance.
Write these terms in your notebook before you begin, one per page or section, so you have a consistent recording format for each cabinet.
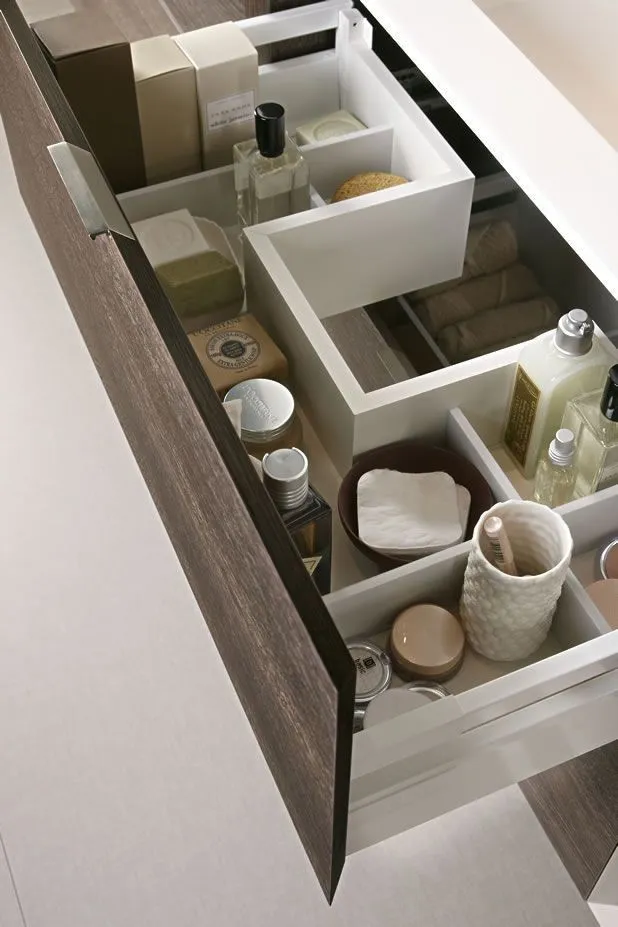
How to Measure Base Cabinets (Under-Counter Kitchen Cabinets)
Base cabinets are the most frequently organized cabinet type and the one where measurement errors most commonly cause expensive returns. Here is the complete measurement protocol.
Measurement 1: Interior Width Open the cabinet door fully. Measure from the inside surface of the left wall to the inside surface of the right wall, at the very front of the cabinet, just inside the face frame. Measure again at the middle depth of the cabinet. Measure again at the back wall. Record all three. Use the smallest measurement when shopping — this is the most constrained point.
Measurement 2: Opening Width On face-frame cabinets (where there is a wooden frame around the door opening), measure the distance between the inner edges of the face frame left and right stiles. This is smaller than the interior width and is the maximum width of any organizer that needs to be inserted through the door opening. On frameless cabinets (European-style, where the door meets the cabinet edge without a frame), the opening width equals the interior width.
Measurement 3: Interior Depth Measure from the front inner edge of the face frame (or the front edge of the cabinet on frameless cabinets) to the back wall. This is the maximum depth of any pull-out shelf, tray, or organizer that must fit fully within the cabinet.
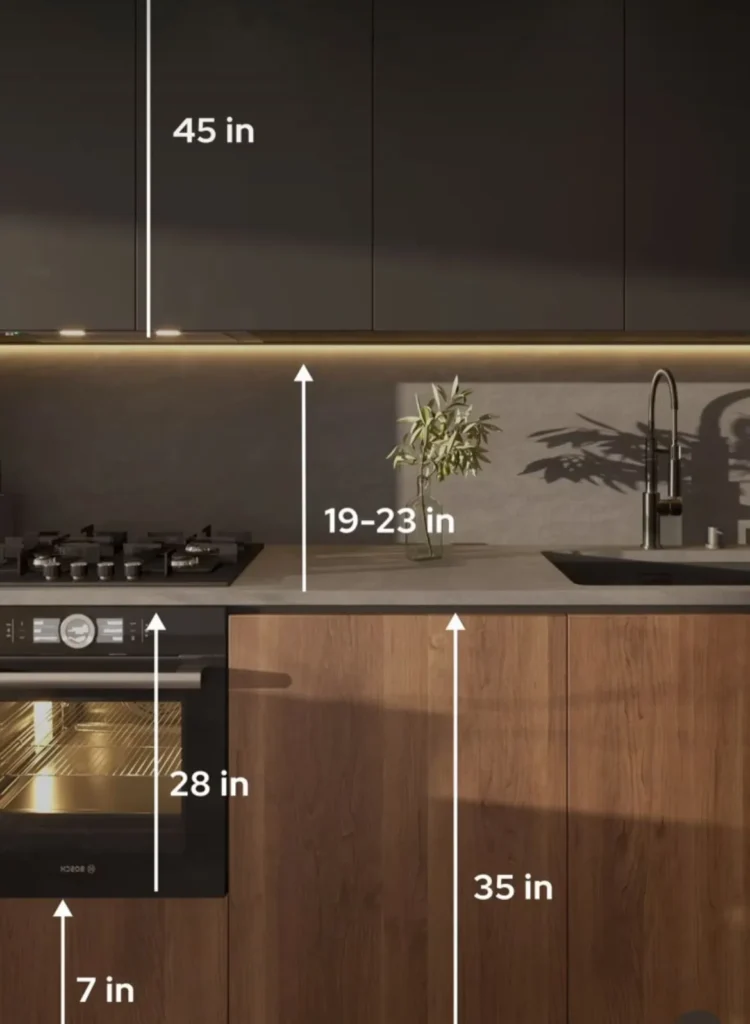
Measurement 4: Interior Height Measure from the bottom of the cabinet (the floor of the base cabinet — not the floor of the room) to the underside of the countertop above. This is the maximum height of any tall organizer, vertical divider, or pull-out shelf unit that will stand in this cabinet.
Measurement 5: Shelf Position (if there is a fixed interior shelf) Some base cabinets have one fixed interior shelf part-way up. If yours does, measure from the cabinet floor to the bottom surface of the fixed shelf. Also measure from the top surface of the fixed shelf to the underside of the countertop. These give you the dimensions of the two zones created by the fixed shelf.
Measurement 6: Hinge Protrusion Open the door and look at the hinges on the interior side. If there are hinges mounted to the interior side walls, measure how far they protrude into the cabinet interior space. Organizers must clear these hinges — their width must not reach the hinge.
Measurement 7: Obstacle Mapping (under-sink cabinets) For under-sink cabinets specifically, measure and record the position of the plumbing pipe: how far from the left side wall, how far from the right side wall, and how far from the cabinet floor the pipe bottom sits. Also note whether the pipe runs vertically, at an angle, or horizontally, and whether there are additional pipes, the garbage disposal unit, or other obstacles.
Record all measurements for this cabinet in your notebook, labeled clearly with the cabinet’s location (“Cabinet under kitchen sink” or “Left base cabinet beside cooktop”).
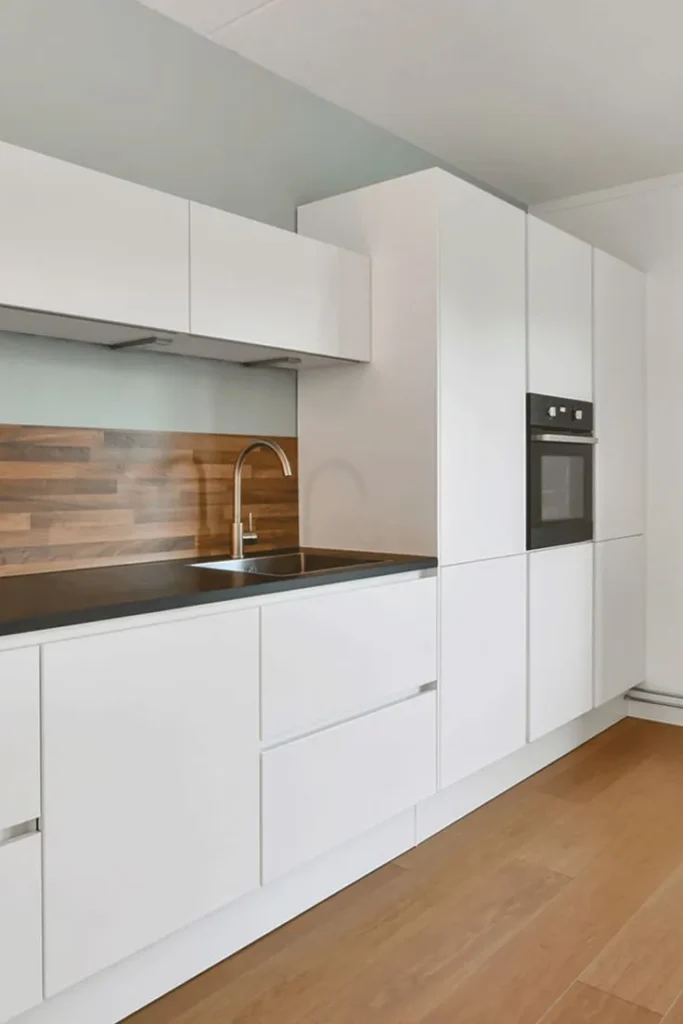
How to Measure Wall Cabinets (Upper Kitchen Cabinets)
Upper cabinet measurements follow the same general principles but have some additional considerations — particularly for the shelf clearance heights that determine which height of organizer fits on each shelf.
Measurement 1: Interior Width — Same process as base cabinets. Measure at front, middle, and back. Record all three and use the smallest.
Measurement 2: Opening Width — Same process as base cabinets.
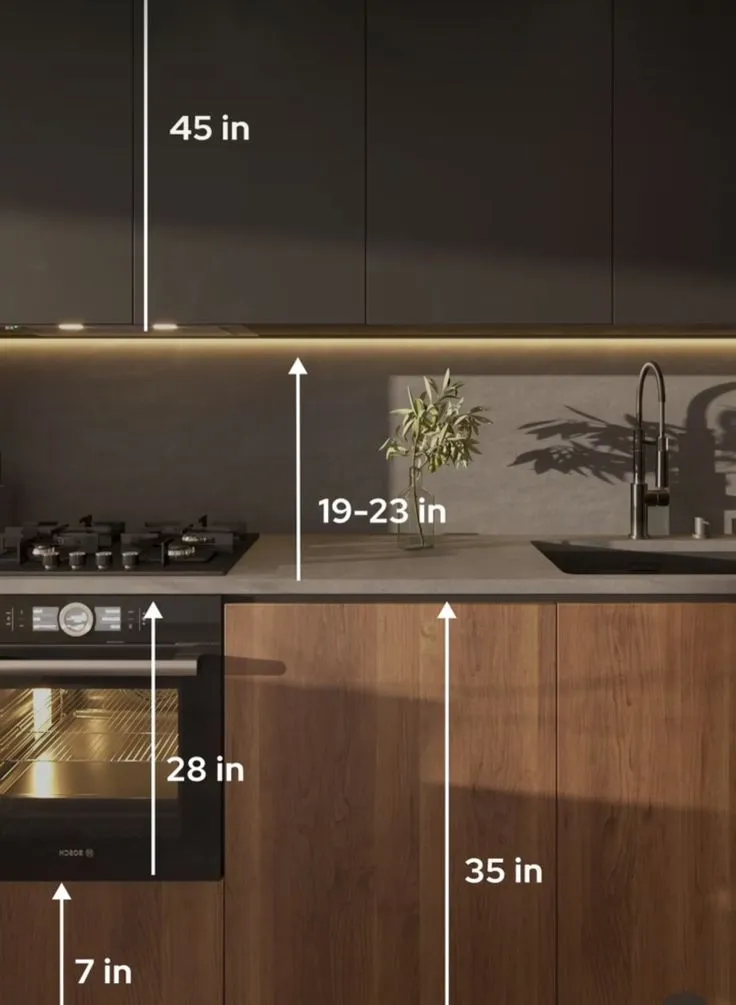
Measurement 3: Interior Depth — Upper cabinets are typically 12 inches deep (versus 24 inches for base cabinets). Measure to confirm.
Measurement 4: Shelf Clearance for Each Shelf Level This is the most cabinet-specific measurement for upper cabinets and the one most frequently forgotten. For each shelf in the upper cabinet, measure the clearance — the distance from the top of that shelf to the underside of the shelf above it (or the top of the cabinet for the highest shelf). Different shelves in the same cabinet may have different clearances depending on adjustable shelf positioning. Record clearance for each shelf separately.
Why this matters: a shelf riser that is 6 inches tall will fit on a shelf with 8 inches of clearance but not on a shelf with only 5 inches of clearance, even though both are shelves in the same cabinet.
Measurement 5: Door Clearance Close the upper cabinet door and open it again, then measure the distance between the inside of the closed door and the front edge of the first shelf. This is the maximum combined depth of any door-mounted organizer plus the tallest item on that organizer that can fit without preventing the door from closing. This measurement is often only 1.5 to 2 inches in upper cabinets — which significantly limits what can be mounted on the door interior.
How to Measure Corner Cabinets
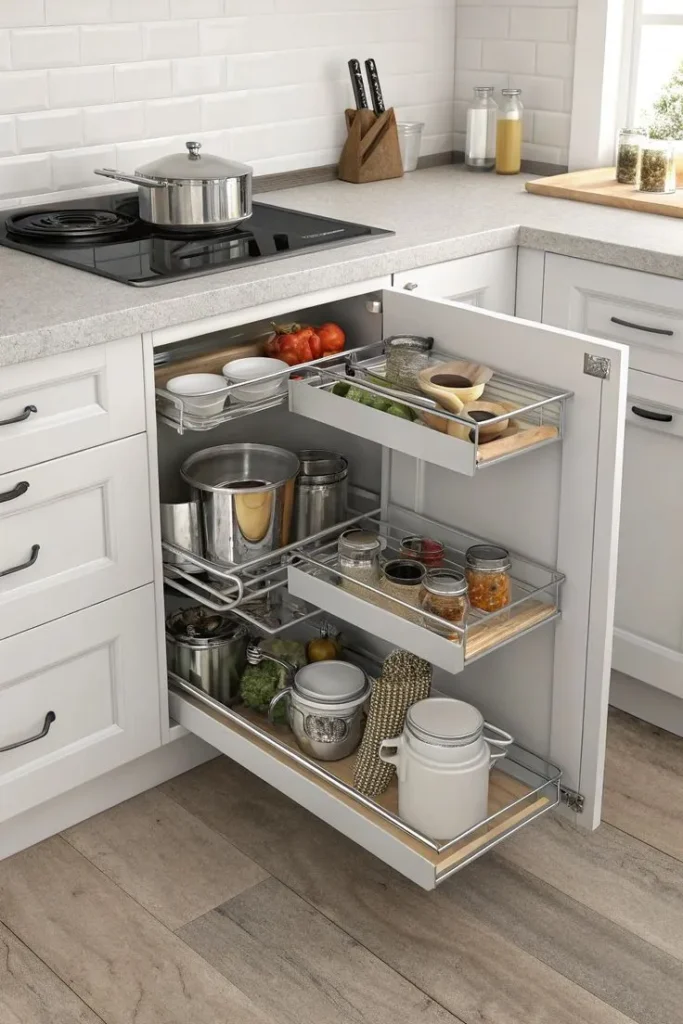
Corner cabinets are the most complex to measure and the cabinets where wrong-size purchases are most expensive — because corner cabinet organizers like lazy Susans and corner pull-out systems are larger, more expensive, and harder to return than standard organizers.
Measurement 1: Cabinet Opening Width Measure the width of the corner cabinet’s door opening. This is typically smaller than the interior cabinet width and is the constraint that determines the maximum diameter of a lazy Susan that can be inserted through the opening.
Measurement 2: Interior Corner Depth Measure from the center of the corner (the very back corner of the cabinet where the two walls meet) to the front inner edge of the cabinet opening. This is the maximum radius of a rotating element — a lazy Susan or swing-out system — that can operate within the cabinet without hitting the back corner.
Measurement 3: Shelf Clearance Same as upper cabinet shelf clearance measurements — measure the clearance on each shelf of the corner cabinet separately.
Measurement 4: The Two-Cabinet Opening Dimensions Many corner base cabinets have two openings — the primary door and a second smaller opening on the adjacent side. Measure both openings’ widths, as some corner organizer systems require access through both.
For D-shaped lazy Susans specifically: Measure the interior width at the widest point of the cabinet interior. The D-shaped lazy Susan’s flat edge goes against the cabinet back wall and the curved edge rotates. The flat dimension must be smaller than the cabinet opening width. The depth of the D must be smaller than the interior corner depth.
How to Measure Pantry Cabinets
Pantry cabinet measurement is similar to upper cabinet measurement but at a larger scale, and pantry cabinets often have a greater variety of shelf heights, shelf depths, and shelf heights per section than standard kitchen cabinets.
For each shelf in the pantry:
- Interior width of the shelf (measure at front, middle, and back)
- Shelf depth (how deep the shelf is, front to back)
- Shelf clearance (from top of this shelf to underside of shelf above)
Record each shelf’s measurements separately and label them by position — “Pantry shelf 1 (eye level),” “Pantry shelf 2 (one below eye level),” and so on. When shopping for pantry organizers, you will need to match product dimensions to specific shelf positions — having them labeled by position rather than just as a list makes this significantly easier.
Pantry door measurements (if door-mounted organizers are planned):
- Door opening width
- Door height (inside surface)
- Door clearance (distance from inside of closed door to first shelf when door is closed)
How to Measure Bathroom Vanity Cabinets
Bathroom vanity cabinets require all the same measurements as kitchen base cabinets, with one critical additional consideration: plumbing.
Standard base cabinet measurements: Interior width, opening width, interior depth, interior height — all measured using the same methods as kitchen base cabinets.
Plumbing obstacle mapping: Nearly every bathroom vanity under-sink cabinet has a P-trap — the curved pipe under the sink — and potentially a drain pipe, a supply pipe, or two supply pipes (hot and cold). These interrupt the interior space in ways that are not visible from outside the cabinet.
Open the vanity door fully. Use your flashlight to see all the plumbing. Measure the position of each plumbing element: how far from the left side wall, how far from the right side wall, how far from the cabinet floor, and how tall the highest point of the plumbing sits. This mapping tells you how much clear floor space is available on each side of the plumbing and whether a two-piece organizer can flank the pipe on both sides.
Draw a simple sketch of the vanity interior in your notebook with the plumbing positions marked. This sketch is invaluable when shopping for under-sink organizers, which often specify the plumbing configurations they accommodate.
The Measurement Recording System: Your Cabinet Measurement Notebook
Having measurements written down is only useful if you can find and use them quickly when you are shopping. Here is the simple recording system that makes your measurements genuinely useful.
Create one page in your notebook per cabinet, labeled clearly with the cabinet location. Record measurements in a consistent format — I recommend this template:
[Cabinet Location Label] Interior Width (front): ___ Interior Width (middle): ___ Interior Width (back): ___ Opening Width: ___ Interior Depth: ___ Interior Height: ___ Shelf 1 Clearance: ___ Shelf 2 Clearance: ___ Door Clearance: ___ Obstacles/Notes: ___
When you are shopping online or in-store for an organizer, bring your notebook (or take a photo of the relevant page). Compare the product dimensions directly against your specific measurements — not against “standard cabinet dimensions” from the product description, but against your actual specific measurements.
The question you are asking for every product is: “Is every dimension of this product smaller than the most constrained equivalent measurement of my specific cabinet?” If yes — it fits. If no — it does not. No guessing. No “it should be close enough.” Precise comparison, every time.
The Five Measurement Mistakes That Cause Wrong-Size Returns
After all that, here are the five specific mistakes that cause cabinet organizer returns even when people thought they measured — because knowing what goes wrong helps you avoid it.
Mistake 1: Measuring interior width but not opening width. The most common measuring mistake. The organizer fits inside the cabinet but cannot be inserted through the opening because the opening is narrower than the interior due to the face frame. Always measure both.
Mistake 2: Measuring shelf clearance as the full height between shelves rather than the usable clearance. The full height between two shelves includes the thickness of the shelf itself. The shelf clearance — the usable space for items — is smaller. Measure from the top surface of the lower shelf to the underside of the upper shelf, not from center to center or from bottom to bottom.
Mistake 3: Measuring once at one point and assuming the cabinet is consistent. Cabinet interiors are frequently not perfectly consistent from front to back. The back may be narrower due to a structural element. The middle may have a hinge protrusion that the front does not. Measure at multiple points and use the most constrained measurement for each dimension.
Mistake 4: Forgetting door clearance for door-mounted organizers. Bought a beautiful door-mounted spice rack, installed it on the inside of the pantry door, loaded it with spices — and now the door does not close because the spice bottles hit the first shelf. Always measure door clearance before buying any door-mounted organizer.
Mistake 5: Not measuring plumbing obstacles in under-sink cabinets. Bought an under-sink organizer that the description said “fits around pipes” — and discovered that your specific pipe configuration is not the configuration the organizer was designed for. Map your specific plumbing before buying any under-sink organizer.
What Bisan Does Differently Now — And What You Should Do From Here
After return number seven, Bisan created what she calls her “cabinet bible” — a small notebook with one page per cabinet, every measurement recorded in her consistent format, and a small sketch of any cabinet with unusual features or obstacles. She updates it whenever she changes a cabinet’s shelf configuration.
She says the notebook has three practical effects that make her home organization better. First, she never buys an organizer that does not fit. Second, when she sees something she wants to buy, she can check her phone photo of the relevant notebook page immediately and know in seconds whether it works. Third, when guests ask what size something is in her kitchen or pantry, she can tell them immediately and accurately — which has led to several friends buying exactly the right organizers on her recommendation.
That notebook — or the phone photos of it — is the practical tool this guide is helping you build. Measure every cabinet once, record everything properly, and you have a permanent resource that makes every future organization decision faster, more accurate, and more satisfying.
Now go get your tape measure, open your first cabinet, and start measuring. You already know exactly what to record.
Pin this and save it — this is the cabinet measuring guide you will come back to every single time you are about to buy an organizer and want to make absolutely certain it is going to fit before you click add to cart!


Leave a Reply