

The most energizing, practical, and genuinely complete guide to the spring cabinet reset — because there is no better time than the turn of the season to open every cabinet, clean every surface, and rebuild every system from scratch with fresh eyes and a fresh start.
Something shifts in the air at the beginning of spring that I genuinely believe is biological. The light changes, it stays longer, it comes in at a different angle, and suddenly you can see everything in your home that the dimmer winter light was hiding. The dust on the high shelves.
The clutter that accumulated in the back corners of cabinets during all those months when going outside required a coat and a reason. The way certain spaces have drifted from how they were organized at the start of the year into something that is still sort of organized but not quite right.
Spring is the season that makes you want to fix it. All of it. And specifically — if you are the kind of person who has been reading the home organization guides in this series — it is the season that makes you want to open every single cabinet in your home and rebuild it into something that works better, looks better, and serves you better for the year ahead.
I have done a spring cabinet reset every year for four years now, and I look forward to it the way some people look forward to a holiday. There is something genuinely satisfying — almost cathartic — about emptying a cabinet completely, wiping it clean, assessing what is actually inside, and then rebuilding it thoughtfully from scratch.
About making decisions that have been deferred since last spring about things that still do not have a real home. About finding the items that slid to the back of a cabinet and were forgotten and either reclaiming them or letting them go. About opening a cabinet when the reset is done and experiencing the particular pleasure of a space that is clean, organized, and completely ready.
My friend Reema does her spring reset as a whole family event — she and her partner take a Saturday in late March and work through the whole house together, each taking different rooms, meeting in the kitchen for the biggest project. She says it is one of the best Saturdays of their year and that the house that comes out the other side of it serves them noticeably better for the months that follow.
This is the complete guide to the spring cabinet reset — room by room, step by step, with the specific actions that turn the annual spring urge to fix everything into an organized, satisfying, and genuinely transformative home reset. Let’s open those cabinets.

Why the Spring Cabinet Reset Is Different From Regular Organizing
Before the room-by-room guide, I want to make a distinction between the spring cabinet reset and regular cabinet organization — because they are the same process at different scales and with different intentions, and understanding that difference will help you approach this project with the right mindset.
Regular cabinet organization is maintenance — catching drift, returning items to their homes, doing the light work that keeps a system functioning. The spring reset is reconstruction — opening every cabinet from scratch, assessing whether the existing system is still right, and rebuilding with fresh eyes and the benefit of knowing exactly how you have lived for the past year.
The spring reset answers questions that regular maintenance cannot: Is this cabinet still serving the right purpose? Have your household’s needs changed enough that this storage system should change too? Are there things in this cabinet that you have been organizing around rather than dealing with? What should this cabinet hold that it currently does not?
These are the questions that make the spring reset feel different from and more significant than regular tidying. You are not maintaining a system. You are evaluating it, improving it, and in some cases replacing it with something better.
Approach the spring cabinet reset with the permission to change things that are not working, to question storage arrangements that have become habits rather than choices, and to use what you have learned about how your household actually lives to build systems that serve it better going forward.
The Spring Reset Supply List
Have everything on this list before you start. Running out of supplies mid-reset is how a project loses momentum.
Cleaning supplies:
- All-purpose cleaner or white vinegar and water spray (excellent for most cabinet interiors)
- Baking soda paste for stubborn spots and grease buildup
- Microfiber cloths — at least eight to ten
- A bucket for cleaning water
- A scrub brush or old toothbrush for grout lines and corners
- Paper towels for initial wiping of very dirty surfaces
- Fresh shelf liner paper if you want to reline shelves (peel-and-stick is easiest)
Organization supplies:
- Donation bags or boxes — have more than you think you need
- Garbage bags for trash
- Cardboard boxes labeled “Relocate” — for items that belong in a different room
- Labels and a marker or a label maker
- New storage containers if you have identified specific gaps (buy only after assessing — do not pre-buy)
Tools:
- Screwdriver for removing any hardware or shelf pins that need cleaning
- A damp sponge for final wipe-downs
- A step stool for upper cabinets and high shelves
The Universal Four-Step Reset Process for Every Single Cabinet.
Every cabinet in every room of this guide gets the same four-step process. Memorize this process once and apply it everywhere.
Step 1: Empty Completely. Every single item out of the cabinet. Nothing stays inside during the reset. Place items on a nearby surface — counter, table, floor on a clean cloth — sorted roughly by category as they come out.
Step 2: Clean the Cabinet Interior. Wipe every surface of the empty cabinet — all shelves (top, bottom, and sides), the back wall, the side walls, and the inside of the door. For kitchen cabinets especially, use a degreaser or baking soda paste on any areas with grease buildup. Wipe dry with a clean cloth. Let the interior air-dry completely before replacing anything.
Step 3: Assess and Declutter What Came Out. Go through every item that came out. Ask: Is this still used? Is it in good condition? Does it belong in this specific cabinet or has it been stored here by default? Sort into Keep, Donate, Trash, and Relocate piles. Be honest. Be thorough. Return nothing to the cabinet by default — only items that genuinely belong there and are genuinely used come back in.
Step 4: Replace With Intention. Return only the Keep items, arranged according to the organizational principles that apply to this specific cabinet — most frequently used at the most accessible position, like items together, proximity to point of use. Add shelf liner if desired, adjust shelf heights if adjustable, and add any new organizational accessories that a specific, identified need calls for.
Four steps. Same for every cabinet. Apply them consistently and the whole house gets done.
Kitchen Cabinets: The Biggest Project, the Biggest Reward
The kitchen gets the most extended treatment in the spring reset because it has the most cabinets, the most variety of cabinet contents, and the highest daily use of any storage in the home. Take at least a full morning or afternoon for the kitchen reset alone, or split it across two sessions.
Start with the pantry.
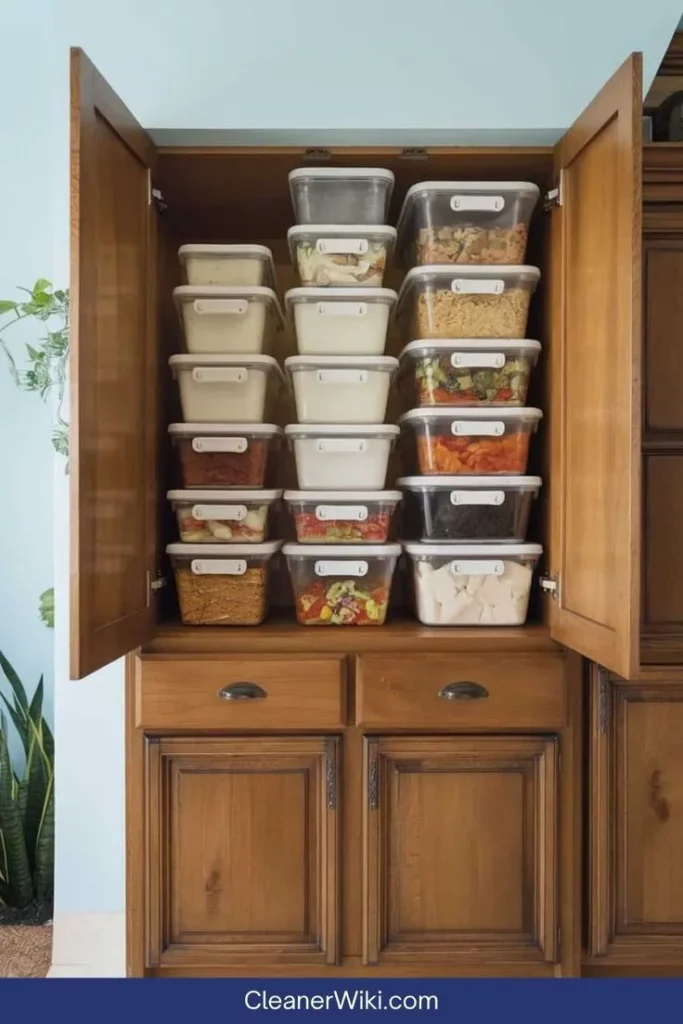
The pantry is where the most accumulated waste lives — expired items, half-used packages, things pushed to the back and forgotten. Empty every pantry shelf completely. Check every expiration date. There is no mercy here — expired items leave, full stop. Group everything that remains by category: baking, pasta and grains, canned goods, breakfast, snacks, beverages, condiments and sauces. Return by category, most-used at eye level and front, least-used on high shelves and at the back. Add shelf risers if needed to create visibility. Label every shelf edge with its category.
While the pantry is empty, wipe every shelf with a damp cloth and let it dry. Check the back wall for any moisture or mold — pantry back walls occasionally develop moisture problems that are invisible when the shelves are full. Address any issues before replacing food.
The everyday dish and glass cabinet.
Empty everything. Wash every item that has been sitting in a cabinet long enough to accumulate dust — yes, even dishes that are washed before use. Spring clean means really clean. Check every dish for chips, cracks, or damage that makes it a safety risk. Retire anything damaged. Reorganize plates stacked neatly by size, bowls nested cleanly, glasses arranged by type. Adjust shelf heights if needed to eliminate wasted air space above your tallest glasses.
The pot, pan, and baking equipment cabinet.
This cabinet is typically the most chaotic in the kitchen because the contents are large, varied in shape, and heavy. Empty everything. Assess: which pots and pans have you used in the past year? Which have been in the cabinet but not on the stove? An unused pot in a kitchen cabinet is using storage space that a used item needs. Donate unused items in good condition. Trash damaged or non-stick pans with damaged coating.
Return pots and pans organized vertically with dividers rather than stacked horizontally — vertical storage makes every individual pan immediately accessible without lifting others. Lids stored vertically in a lid rack beside the pots. Baking sheets and cutting boards stored vertically in a dedicated vertical section.
The junk drawer.
The junk drawer deserves its own reset more than any other single storage location in the kitchen. Empty it completely. Sort the contents with absolute honesty — the pen that doesn’t work goes immediately in the trash, the expired coupon goes immediately in the recycling, the random key that you cannot identify goes in a “mystery box” that gets addressed at the end of the reset session. What should remain: batteries organized in a small container by size, a few working pens, essential takeout menus (or acknowledge that you use your phone and let them all go), basic tools (tape, scissors, screwdriver), and whatever genuinely fits the category of “needs to be accessible in the kitchen but not in a dedicated cabinet.”
Add drawer organizers — small bins, divider trays — that give each category of junk drawer item a designated home within the drawer. A junk drawer with compartments is an organized utility drawer. A junk drawer without compartments is a junk drawer.
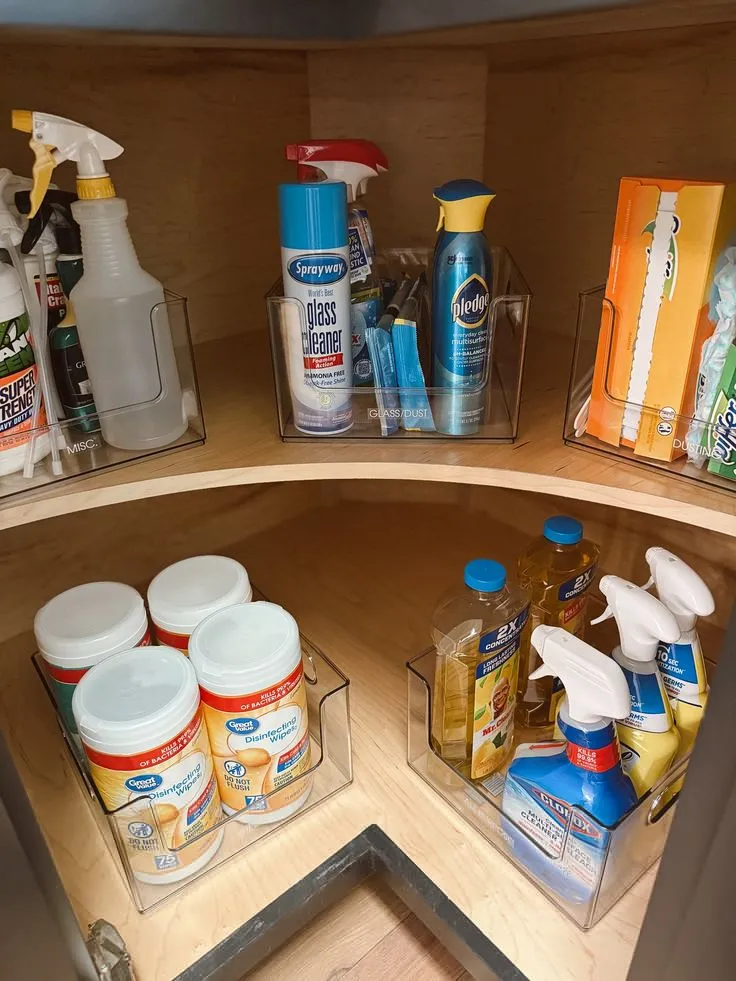
Under-sink cabinet.
Empty completely. This cabinet is typically one of the most neglected in the kitchen — it takes the most abuse from under-sink dampness, spills, and the awkward shape around the plumbing. Clean every surface thoroughly, paying particular attention to the bottom surface which typically shows staining and residue. Check for any signs of moisture damage, mold, or plumbing leaks — the spring reset is when these are discovered before they become serious problems.
Return only cleaning supplies that are actually used in the kitchen. Products for other rooms should be stored in those rooms. Add a pull-out organizer or a lazy Susan to make under-sink items genuinely accessible. Replace any drip pans or liner that shows staining.
Bathroom Cabinets: The Most Product-Heavy Reset

Bathrooms accumulate products faster than almost any other room — sample sizes that were never used, duplicates bought because the original was misplaced, skincare from a routine that changed, makeup that has exceeded its shelf life. The spring bathroom cabinet reset is as much a product audit as an organizational reset.
Under-sink vanity cabinet.
Empty completely. Check every product for expiration — makeup, skincare, sunscreen, and medications all have shelf lives that matter. Toss any products that are expired, mostly empty, or that you no longer use. Organize what remains by routine: morning routine together, evening routine together, occasional-use products in a less accessible position. Add a two-tier organizer or lazy Susan to maximize the awkward space around the plumbing.
Medicine cabinet.
This is a safety-critical reset. Every medication gets checked: is it expired? Is it still prescribed/recommended for your current health situation? Is it properly identified with a clear label? Dispose of expired medications properly — most pharmacies have medication disposal programs; flushing medications is not recommended and is environmentally harmful. Organize remaining medications by type and frequency of use, with daily medications at the most accessible position.
Storage cabinets and linen closet (if bathroom-adjacent).
If your bathroom has additional storage cabinets beyond the vanity, empty and reset those as well. Assess towel quantities — two to three per person is sufficient and anything beyond that is taking storage space from other items. Donate excess towels in good condition to animal shelters, which always need them. Fold remaining towels consistently and stack neatly with like sizes together.
Bedroom Cabinets and Closets: The Clothing Reset
Spring is one of the two natural clothing rotation seasons — the point at which winter clothing moves to storage and spring and summer clothing comes forward. The spring bedroom cabinet reset combines the organizational reset with the seasonal clothing swap.
The closet.
Empty every section completely — not just one side, all of it. Sort into the standard categories with the addition of a seasonal consideration: Keep and Wear Now (spring and summer clothing that stays in the active closet), Store (winter and cold-weather items that move to storage), Donate (anything not worn in the past year regardless of season), and Repair (items worth keeping but that need attention before being returned).
For the Store category: clean every item before storing. Wash everything that will go into storage — storing clothing unwashed means storing bacteria, oils, and potential moth attractants alongside your off-season wardrobe. Use vacuum storage bags for bulky items, breathable garment bags for delicate pieces, and labeled bins for folded items.
For the active closet: return spring and summer clothing organized by category — tops together, bottoms together, dresses together, outerwear at the end. Within each category, organize by color or by frequency of use — whichever system you will actually maintain. Add any organizational accessories that a specific problem calls for: a shoe rack if shoes are currently a floor pile, additional hooks if you regularly use hooks rather than hangers, drawer organizers for the drawer items.
Under-bed storage.
Pull out everything stored under the bed — the spring reset is the moment to assess under-bed storage as a deliberate zone rather than a catch-all. What should be there: off-season clothing in labeled vacuum bags, extra bedding in breathable storage bags. What should not be there: random items that ended up there by default, single items without containers that are impossible to find again, anything that is not part of a deliberate storage plan.
Vacuum under the bed thoroughly before returning any storage — under-bed areas accumulate dust at a rate that is not visible unless the storage is removed.
Home Office Cabinets: The Paper and Supply Reset
Home office storage accumulates paper and supplies faster than almost any other room, and the spring reset is the moment to address the paper backlog that has been building since last spring’s reset.
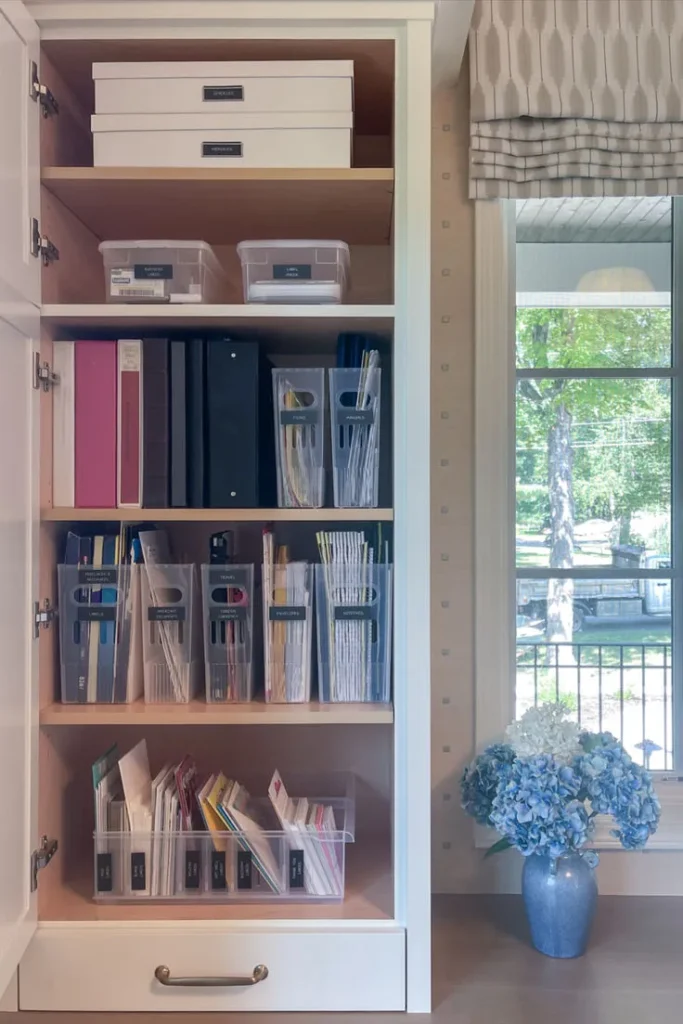
The paper reset.
Every piece of paper that has accumulated in your home office comes out. Every piece. Sort into: File (documents that need to be kept), Shred (documents that contain personal information and need secure disposal), and Recycle (everything else). File what needs filing — in a properly labeled, accessible filing system, not in a pile labeled “to file.” Shred and recycle everything else. The goal is a home office that contains only current, relevant documents in a system where any document can be found in under two minutes.
Supply cabinets.
Empty every supply cabinet or drawer. Assess honestly: how many pens do you need? How many notebooks? How many sticky note pads? The spring reset is the moment to recognize that twenty pens, twelve notebooks, and six rolls of tape do not make a better home office — they make a storage problem. Keep what is genuinely useful in the quantities that are genuinely useful. Donate what is in good condition to schools or community organizations. Organize what remains in a simple, logical system.
Utility Spaces: Laundry Room, Linen Closet, and Storage Closets
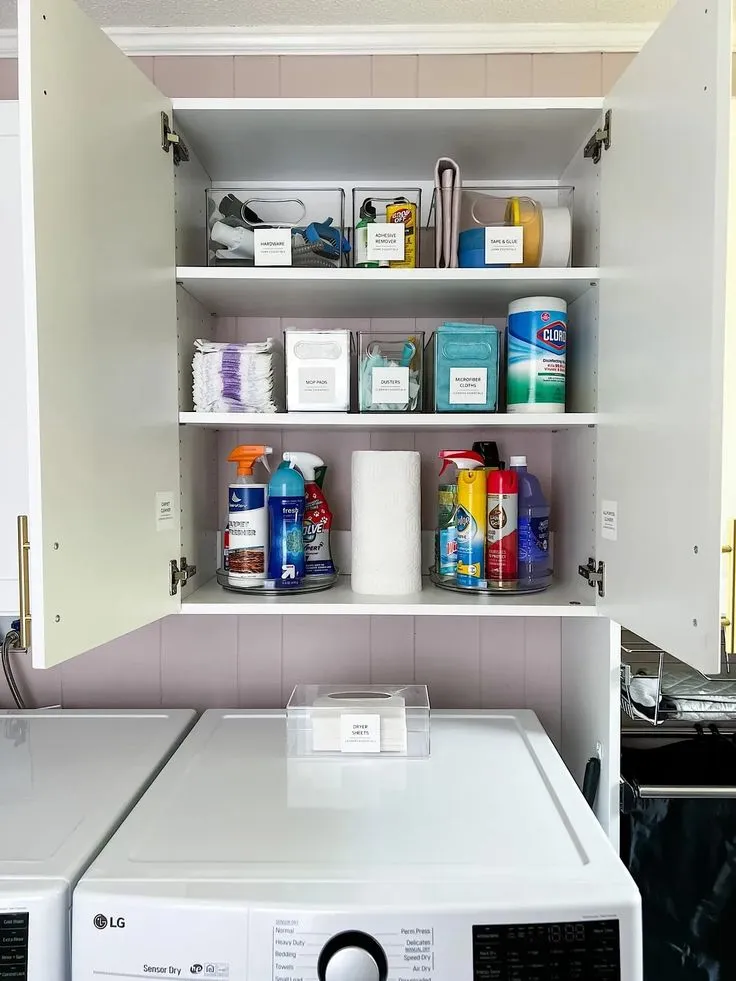
Laundry room cabinets.
Empty and reset. Check every laundry product: is it still used? Is the detergent fresh? (Powdered detergent can clump and lose effectiveness; liquid detergent has a shelf life of about 6 months.) Are there stain treatment products that are dried out or ineffective? Return only what is current, used, and in good condition. Organize by laundry stage: pre-treatment products together, washing products together, drying products together.
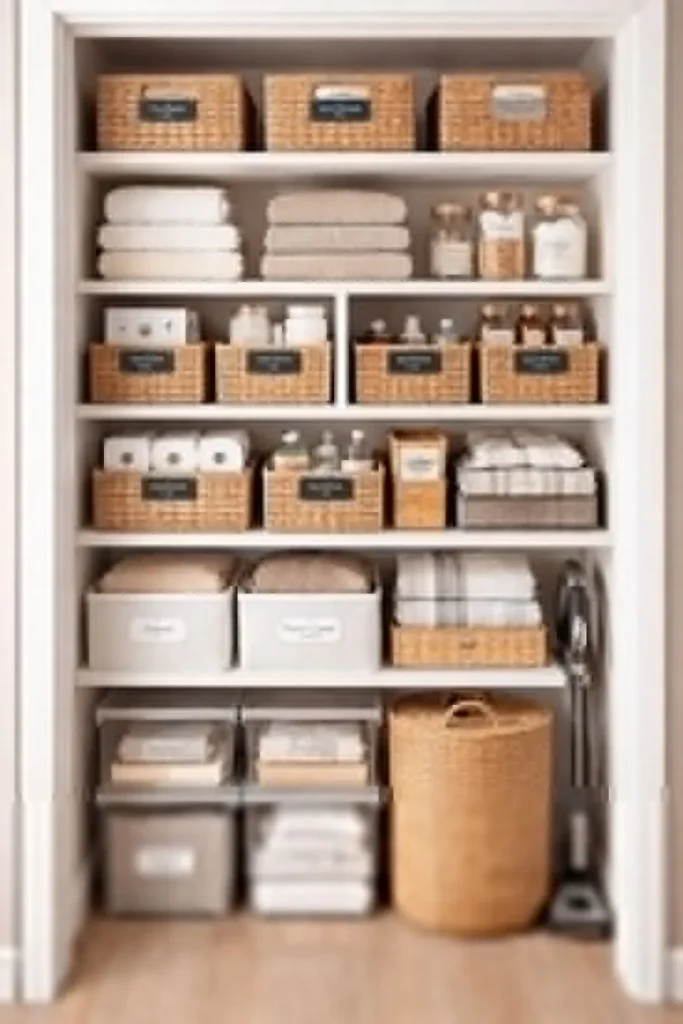
Linen closet.
Every sheet set, every towel, every spare pillow, every tablecloth comes out. Assess quantity — more is not better in a linen closet, more is just more. Keep two to three sheet sets per bed, two to three towels per person, and a modest spare pillow supply. Donate the excess generously — animal shelters, homeless shelters, and domestic violence shelters all welcome good-condition linens. Return everything folded consistently — sheet sets folded and stored inside the matching pillowcase, towels rolled or folded to a consistent size, like items together.
Storage closets and utility closets.
Any closet whose primary function is storage — not bedroom storage or bathroom storage, but general household storage — gets the spring reset treatment. Empty it section by section. Apply the standard Keep/Donate/Trash/Relocate sort. Return only items that genuinely belong in long-term household storage, labeled clearly, organized by category.
The Post-Reset Maintenance Plan: Keeping It Fresh Until Next Spring

The spring cabinet reset is at its most powerful when it is the beginning of a maintenance system rather than a one-time project. After completing the reset, spend fifteen minutes creating the specific maintenance plan that will keep everything you have just built in good condition until the next spring.
The daily habit: Two minutes at the end of each day to return anything that has migrated out of its home back to where it belongs. This is the smallest and most important maintenance habit.
The weekly habit: Ten minutes once a week to walk through every cabinet that was reset and confirm it looks as intended. Catch and correct any small drift before it compounds.
The monthly habit: One cabinet per month gets a mini-reset — five minutes of assessment, any needed decluttering, any needed reorganization. Over twelve months, every cabinet in the house gets a light touch without the intensity of the full spring reset.
The seasonal habit: Two seasonal mini-resets — one in summer/fall to rotate clothing and assess the pantry, one in winter after the holiday season — that bridge the gap between full spring resets.
This four-layer maintenance plan is how the work you have done in the spring reset stays relevant and functional through the rest of the year, rather than requiring a full reset again by September.
The Morning After Your Spring Cabinet Reset

I want to close this guide by describing the morning after the spring cabinet reset is complete — because I think it is worth holding that picture in mind as you work through this process.
You wake up and you go to the kitchen. You make your coffee and you open the cabinet for your mug. The mugs are organized and clean and exactly where you expected them. You make breakfast and you open the pantry. Every shelf is labeled and visible and nothing has expired and nothing is hiding behind anything. You get dressed and you open your closet. Your spring and summer clothes are at the front and you can see all of them at once.
Every cabinet you open is clean and organized and makes sense. Nothing fights you. Nothing creates a small frustration before your day has properly started. The kitchen works. The bathroom works. The closet works. The whole house — which you have just spent a day or a weekend rebuilding from the inside out — works.
That feeling is what the spring cabinet reset is for. Not just the satisfying afternoon of wiping shelves and finding things. The morning after, and every morning for the months that follow, when the organization you built serves you quietly and consistently and well.
My friend Reema says that after four years of doing the spring reset as a family Saturday, the day itself has become something they genuinely look forward to — that there is a specific kind of satisfaction in the reset that they have not found in any other annual household project. She says the house that comes out the other side feels like a decision, not an accident. Like a home that was thought about and cared for. Like a place that is ready for whatever the year ahead brings.
Yours will too.
Now go pin this complete guide, share it with everyone who has been thinking about doing a spring clean and needs a complete plan to actually execute it, and go make your supply list this weekend.
Pin this and save it — this is the spring cabinet reset guide you will pull out every single year when the season shifts and the urge to fix everything strikes, and every year it will help you do it properly and completely!


Leave a Reply