
The most practical and inspiring guide to DIY built-in storage shelves for any budget — because that custom, designer-looking built-in you’ve been dreaming about is closer to reality than you think.
Let me tell you something that the home renovation world doesn’t advertise loudly enough: built-in shelves are one of the most dramatic, high-value home improvements you can make — and they don’t have to cost what a contractor quotes you.
I know, because for years I looked at beautiful built-in shelving in magazines and on Pinterest and assumed it was exclusively the territory of people with renovation budgets I could only dream about. I scrolled past those photos thinking “someday” and “maybe when we have more money” and “that must have cost thousands.”
And then my friend Nadia built the most stunning floor-to-ceiling built-in bookshelf wall in her living room for under $400. With her own two hands. Over two weekends. I am not exaggerating a single word of that sentence.
She had no professional carpentry experience. She had a drill, a level, some basic tools, and a YouTube tutorial she’d watched six times.
What she ended up with looked so professionally crafted and intentional that every single person who walked into her living room assumed it was a feature of the original house or that she’d hired someone expensive to do it. She had not. She had planned carefully, bought smart, and committed to the project.
That was the moment I fell completely and irrevocably in love with the idea of DIY built-in storage shelves — and went down a rabbit hole of research into every method, every budget level, and every approach that real people have used to create the built-in shelving look in their own homes.
What I found genuinely surprised me with how accessible it all is when you have the right information.
Whether you have $50, $500, or $5,000 to work with — whether you’re a complete beginner with a drill or a confident weekend DIYer — there is a DIY built-in storage shelf approach on this list that is exactly right for you. Let’s build something beautiful.
Why DIY Built-In Storage Shelves Are Worth Every Bit of Effort
Before we get into the how, I want to spend a moment on the why — because DIY built-in storage shelves are genuinely one of the highest-return projects you can do in your home, and understanding that makes every hour of the project feel completely worth it.
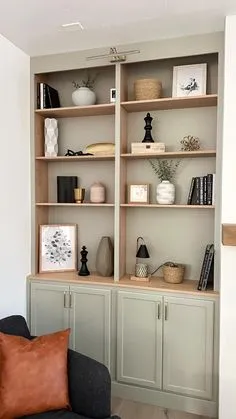
They make any room look instantly more expensive and designed. There is something about built-in shelving that signals “this home has been thought about” in a way that freestanding furniture simply cannot replicate. The way shelves go wall to wall, the way they hug the ceiling, the way they look like they were always supposed to be there — it elevates every room dramatically.
They maximize storage in a way that freestanding furniture cannot. Freestanding bookshelves have gaps at the sides and tops that are wasted space. Built-in shelves use every inch from wall to wall and floor to ceiling. The storage capacity difference is enormous.
They add real value to your home. Unlike most decorating decisions, built-in shelving actually adds to the perceived and real value of a home. Buyers love built-ins. Real estate agents love built-ins. Built-ins are a feature, not just decor.
They are more achievable than you think. This is the one I most want you to hear. With the right approach, the right tools, and the right information — which you are about to have — DIY built-in storage shelves are genuinely within reach for people of all skill levels and budgets. The IKEA hack approach requires almost no carpentry skills at all. The intermediate approach requires basic tool confidence. Even the advanced approach is something a motivated beginner can tackle with patience and good instructions.
Now let’s get into the actual approaches, organized by budget and skill level.
The Budget Tier: IKEA Hack Built-Ins for Under $500
This is the DIY built-in storage shelf approach that has taken over Pinterest and home renovation TikTok for good reason — it produces genuinely stunning, professional-looking results for a fraction of the cost of custom built-ins, and it requires almost no carpentry skills whatsoever.
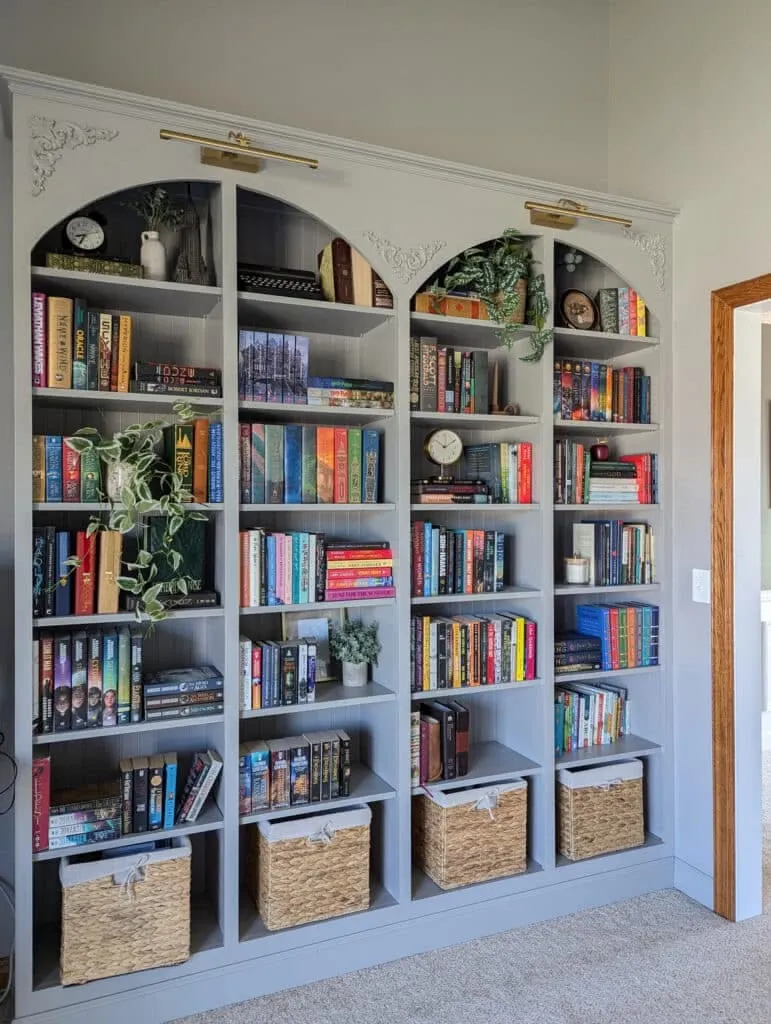
What it is: You use IKEA’s BILLY bookcase (or similar modular shelving units) as the base structure, position them wall to wall and as close to the ceiling as possible, and then use simple trim pieces — crown molding, baseboard, and filler panels — to make the gaps disappear and the whole thing look like one continuous, custom built-in unit.
Why it works so well: BILLY bookcases are inexpensive, come in multiple heights and widths, are designed to sit flush against walls, and when lined up side by side with the gaps trimmed out, they genuinely read as built-in cabinetry. Add crown molding at the top, baseboard at the bottom, and paint everything the same color as the walls and the transformation is jaw-dropping.
The step-by-step:
First, measure your wall carefully — height, width, and any obstacles like outlets, windows, or vents. Plan your BILLY arrangement on paper: which widths you need, how many units, and whether you need the height extension panels to reach the ceiling. BILLY comes in 40cm and 80cm widths, and the height extensions bring standard units closer to ceiling height in many homes.
Second, purchase your BILLY units and all supplies before you begin. In addition to the bookcases, you’ll need: wood filler or caulk for gaps, sandpaper, primer, paint in your chosen color, crown molding for the top, thin trim or baseboard for the bottom and side gaps, finishing nails or a nail gun, wood glue, and a level.
Third, assemble the BILLY units completely before positioning them. Then move them into place along the wall, shimming the bottoms if your floor isn’t perfectly level. Push them tight against the wall on the back and against each other on the sides. If you’re filling a full wall, the outermost units should be flush against the side walls.
Fourth, add the trim work that makes the hack look custom. Crown molding along the top bridges the gap between the top of the shelves and the ceiling. Baseboard trim along the bottom makes the units look like they grew from the floor. Thin strips of trim fill any gaps between units or between the outer units and the side walls. Caulk all the seams where trim meets wall and where units meet each other.
Fifth — and this is the most important step — paint the entire thing, including the back wall of the alcove if it’s visible, in one unified color. White is classic and clean. A deep color like navy or forest green makes a statement. When everything is one color, the individual IKEA units completely disappear and what remains is one seamless, beautiful built-in wall.
Budget breakdown:
- 4 BILLY bookcases (40cm wide, with height extensions): approximately $200–$280
- Crown molding and trim: approximately $40–$80
- Paint, primer, caulk, and supplies: approximately $60–$100
- Total: $300–$460 for a full wall of built-in shelving that looks custom
Tools you need:
- Drill and drill bits
- Level (non-negotiable — don’t skip this)
- Miter saw or hand saw for cutting trim (or have the hardware store cut it for you)
- Nail gun or hammer and finishing nails
- Caulk gun
- Paintbrushes and roller
The Mid-Range Tier: Plywood Built-Ins for $500–$1,500
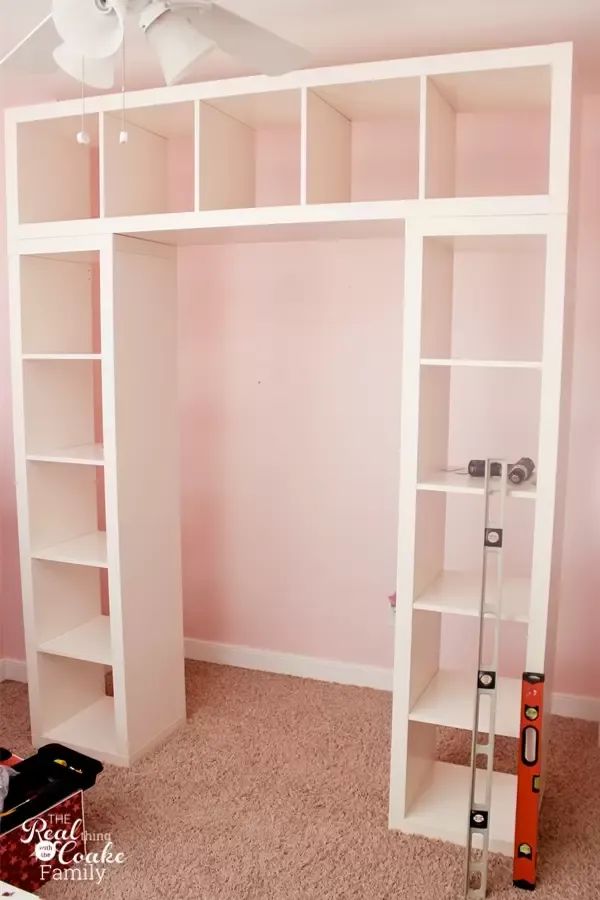
This is the approach for someone who wants fully custom built-in storage shelves — meaning shelves sized exactly to their space, at exactly the depths and heights they want — and who is comfortable with basic carpentry tools and willing to spend a weekend or two on the project.
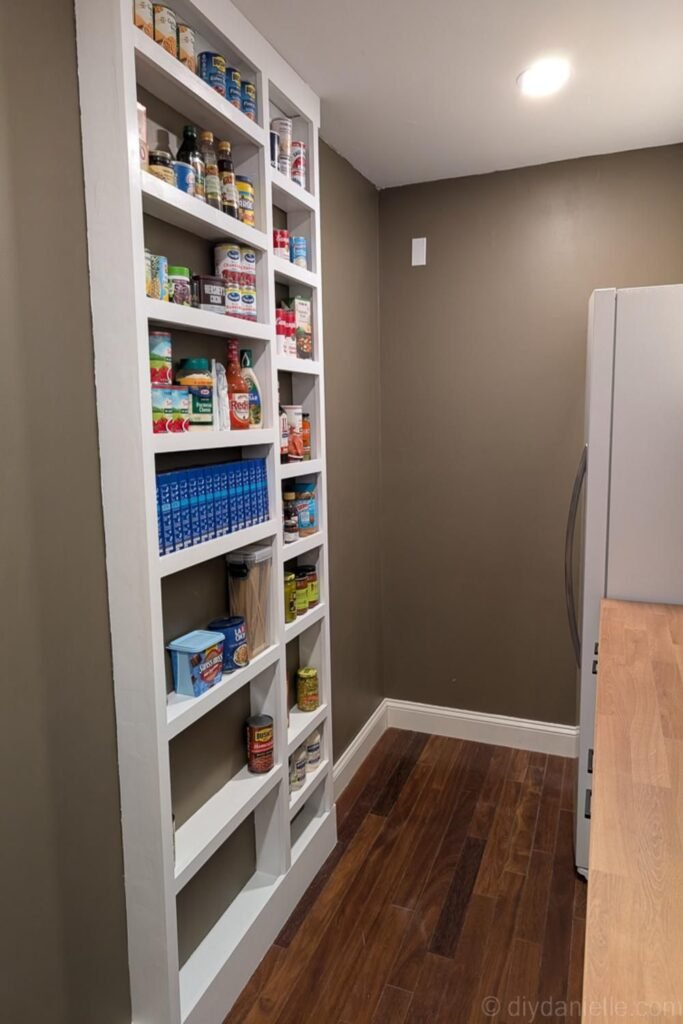
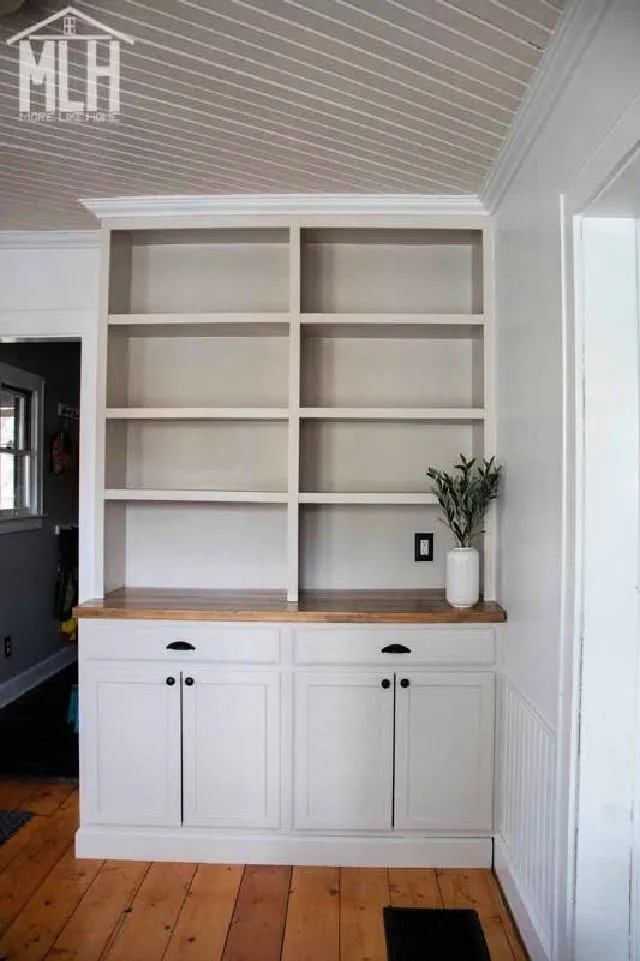
What it is: You build the shelving structure from scratch using plywood for the shelf surfaces and sides, with a face frame of poplar or pine boards that gives the front a furniture-quality finished look. The result is a completely custom unit built specifically for your space.
Why plywood: Plywood is the material of choice for DIY built-in shelving for several excellent reasons. It’s stronger than MDF for horizontal shelves (less sagging over time, especially important for book storage). It’s dimensionally stable. It’s available at every hardware store in multiple thicknesses. And when you use plywood with a paint-grade veneer, painted it looks completely smooth and professional.
The step-by-step:
Start with a detailed plan. Draw your shelving unit to scale on paper, noting every dimension: total width, total height, number of shelves, shelf spacing, shelf depth, and side panel dimensions. Decide whether your shelves will be fixed or adjustable — adjustable shelves require drilling a line of shelf pin holes in each side panel, which takes a little more time but gives you a lot more flexibility.
Take your plan to the hardware store and have them cut your plywood to size on their panel saw. Most hardware stores will make cuts for a small per-cut fee and the accuracy of their cuts is much better than what most people can achieve with a circular saw at home. Get everything cut at the store and you show up at home ready to assemble.
Build the carcass first — the two side panels connected by a top panel and a bottom panel. Use wood glue and screws at every joint. Then add your shelf supports: either fixed with screws, or adjustable using shelf pins in pre-drilled holes. Make sure every corner is square using a carpenter’s square before the glue dries.
Add the face frame — a border of 1×3 or 1×4 poplar boards that covers the raw plywood edges at the front of the unit. The face frame is what gives DIY built-ins their furniture-quality, finished look. Attach it with wood glue and finishing nails, flush with the inside edges of the carcass.
Install the unit — or units, if you’re filling a full wall — by securing them to the wall studs using screws through the back panel or the top of the unit. This step is critical for safety, especially if you’re building tall units. Always secure to studs. Always.
Add trim, caulk all gaps and seams, fill all nail holes with wood filler, sand smooth, prime, and paint. Two coats of a quality semi-gloss or satin paint gives the most durable, beautiful finish for built-in shelving.
Budget breakdown:
- Plywood sheets (4×8, paint grade): approximately $40–$60 per sheet, 4–8 sheets depending on project size
- Face frame lumber (poplar or pine): approximately $60–$120
- Screws, wood glue, shelf pins, sandpaper, wood filler: approximately $40–$60
- Paint, primer, and supplies: approximately $60–$100
- Total: $500–$1,000 for a custom plywood built-in wall
Tools you need:
- Circular saw or jigsaw (or use the hardware store’s panel saw)
- Drill and drill bits
- Pocket hole jig (for joining the face frame — a Kreg jig is the standard and worth the investment)
- Level
- Carpenter’s square
- Nail gun or hammer and finishing nails
- Clamps (you can never have too many clamps)
- Sandpaper and sanding block
- Caulk gun
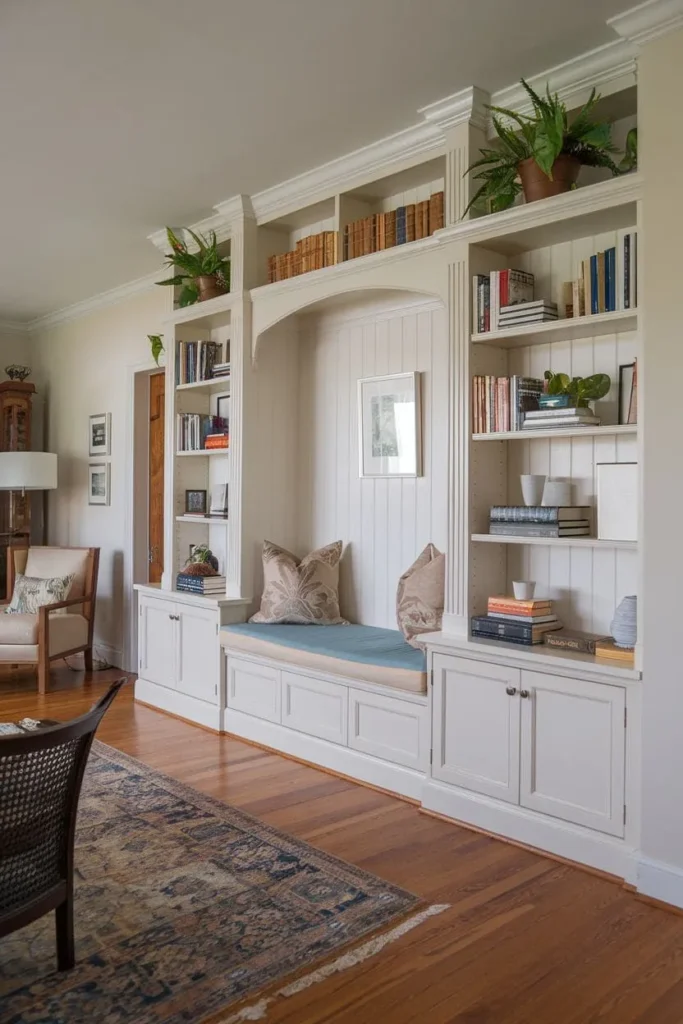
The Splurge Tier: MDF and Trim Built-Ins for $1,500–$5,000+
This is the approach that produces the most polished, most furniture-like, most legitimately custom-looking DIY built-in storage shelves — the kind that make people genuinely unable to tell whether they’re looking at a DIY project or a professional installation.
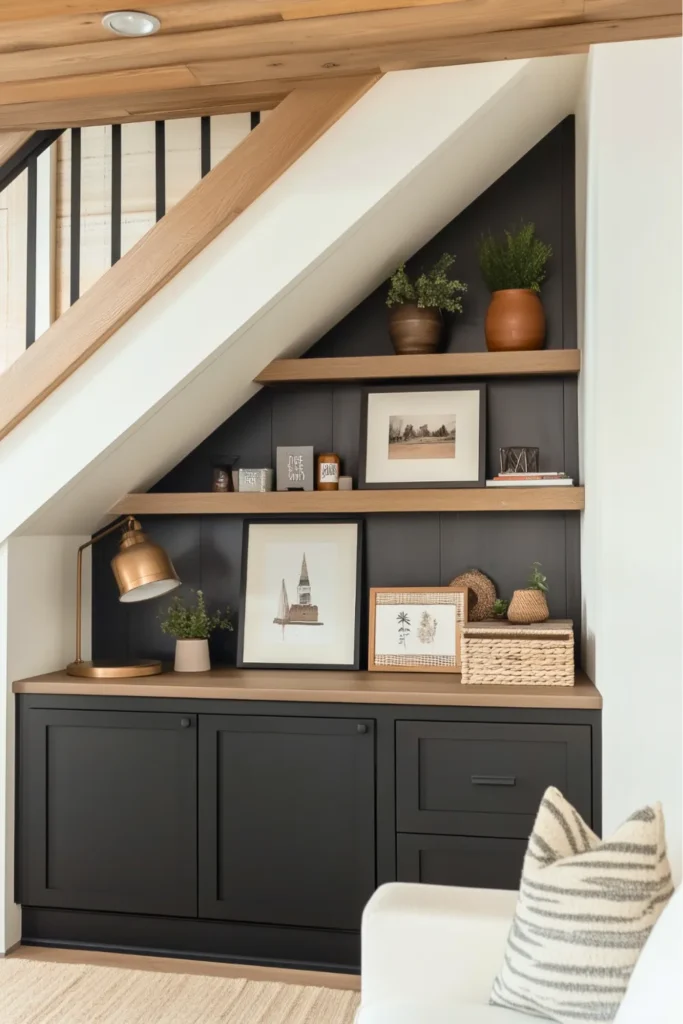
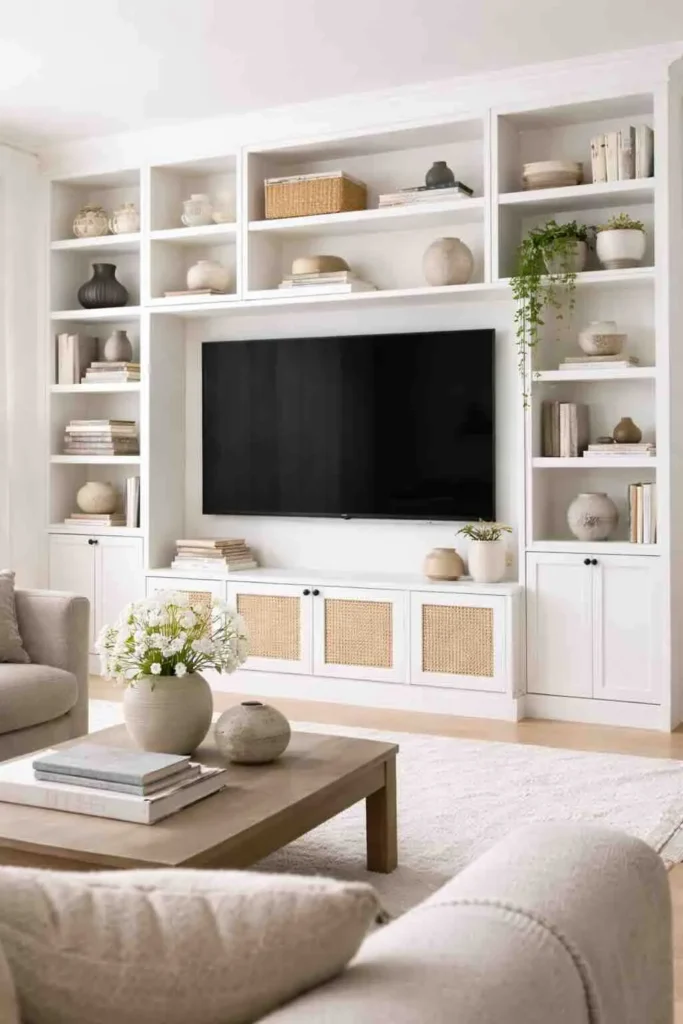
What it is: You use MDF (medium-density fiberboard) for the body of the shelves — which paints to a beautifully smooth, glass-like finish — combined with detailed trim work including crown molding, base molding, pilasters, and decorative panel molding on the face frame, to create built-in shelving that looks like it belongs in a luxury home.
Why MDF for this tier: MDF has one enormous advantage over plywood when you want a perfectly smooth painted finish — it has no wood grain, no voids, and no texture. When painted, MDF looks absolutely flawless. It is heavier and less moisture-resistant than plywood, which is why it’s not recommended for garages or bathrooms, but for living rooms, offices, and bedrooms it is the material of choice for high-end DIY built-ins.
What makes this tier more involved: The additional complexity at this budget level comes from the trim detail work. Adding crown molding, pilasters between shelving sections, panel molding details on the face frame, and decorative corbels or brackets at the top requires more precise measuring, more careful cutting (miter cuts at angles for crown molding are notoriously tricky for beginners), and more time. But the result — when done well — is extraordinary.
The step-by-step:
Plan with even more detail than the mid-range project, because at this level you’re planning the trim details too — the profile of your crown molding, the spacing of any panel molding details on the face frame, whether you’re adding a desk surface or window seat as part of the unit, and whether you want integrated lighting.
Build the carcass from MDF using the same principles as the plywood approach — sides, top, bottom, and shelves, joined with glue and screws. Sand every edge with increasingly fine sandpaper until it’s completely smooth.
Build a more detailed face frame that includes not just flat boards but decorative elements: a wider bottom rail for a furniture-quality look, pilasters (vertical decorative columns) between shelving sections, and potentially panel molding details routed or applied to the flat surfaces of the face frame doors or panels.
Install and then add the premium trim work: full crown molding at the ceiling junction, substantial base molding at the floor, and any additional decorative details. This is the step that takes the most time and patience but creates the most dramatic visual impact.
Prime with a high-build primer, sand between coats, apply finish paint in semi-gloss or satin. At this level, consider having a professional painter do the final coat — the quality of the paint application is much more visible on this higher-detail work.
Optional upgrades for this tier:
- Integrated LED lighting inside shelves or under the top cabinet — this is a massive wow factor and relatively easy to add during the build before the shelves are installed
- Glass-front upper cabinet doors above the open shelving — gives a built-in the look of a library or a high-end hutch
- A built-in desk surface or window seat at the base — incorporates additional function and creates a complete built-in feature
- Outlet and USB ports built into the shelving — incredibly practical and looks incredibly professional
The Rental-Friendly Tier: No-Damage Built-In Look for Under $200
Oh my — this is the tier I get most excited about sharing because it’s the one that feels most impossible and yet absolutely isn’t, and it proves that you do not have to own your home to have the built-in storage shelves of your dreams.
What it is: A combination of freestanding shelving units, tension rod systems, and Command strip mounting techniques that create the visual impression of built-in shelving without a single hole drilled into a wall or floor — making the entire setup completely reversible and landlord-approved.
The leaning floor-to-ceiling approach: Furniture-grade tension pole shelving systems — like the TENAK system or similar products — use floor-to-ceiling tension poles as the vertical supports, with horizontal shelves attached between them. They require no wall mounting, are completely adjustable, and look remarkably like built-in shelving from a short distance. Style them beautifully and the tension mechanism at the top is barely visible.
The furniture arrangement approach: A row of matching bookcases pushed flush against a wall, positioned side by side from wall to wall, with the same trim and paint treatment as the IKEA hack approach — but using Command strips instead of screws to attach the trim, and removable caulk instead of permanent caulk for the seams. Every element is reversible.
The floating shelf approach: Command strip floating shelves have become genuinely impressive in their load capacity — the large Command strips can hold up to 16 pounds per strip, and when multiple strips are used per shelf, you can create a full wall of floating shelves that hold real books and real objects without touching a wall stud. They come off cleanly when you leave.
What you cannot do at this tier: I want to be honest here because I genuinely care about you not getting into trouble with your landlord. You cannot achieve the full, seamless, floor-to-ceiling custom look of the higher-budget tiers without some permanent installation. The rental-friendly approach creates a convincing approximation that looks beautiful — but it is not identical to a nailed-in, caulked, painted-in-place built-in. And that’s okay. It’s beautiful for what it is, it costs almost nothing, and it comes with you when you move.
Budget breakdown:
- Tension pole shelving system: approximately $80–$150
- Command large strips for floating shelves: approximately $20–$40
- Coordinating bookends and styling accessories: approximately $30–$50
- Total: $130–$240 for a beautiful rental-friendly built-in look
Styling Your DIY Built-In Storage Shelves
You have built the structure. Now let’s talk about the part that makes people stop scrolling — the styling. Because a beautifully built set of shelves styled thoughtlessly is still a missed opportunity, and a well-planned, gorgeously styled shelf wall is the thing that makes your living room or office look like it belongs in a magazine.
The rule of thirds for shelf styling. Divide each shelf visually into thirds. Fill one third with books (spines facing out, or covers facing out for a more curated look). Fill one third with decorative objects — a plant, a vase, a small sculpture, a candle. Leave one third with breathing room — empty space that gives the eye somewhere to rest. Shelves that are packed completely full feel claustrophobic. Shelves with intentional empty space feel curated and calm.
Vary the height of objects. A shelf full of items all at the same height looks flat and boring. Mix tall items (a large vase, a tall book stack) with medium items (a plant, a framed photo) with small items (a small sculpture, a little dish). The variation in height creates visual interest and movement across the shelf.
Use a consistent color palette. The most beautiful styled shelves have a cohesive color story. It doesn’t have to be strictly monochrome — but the colors should relate to each other and to the rest of the room. Neutrals with one or two accent colors is a classic approach that almost always works beautifully.
Books are your best friend. Books add color, texture, personality, and that intellectual warmth that styled shelves need. Don’t hide your books — feature them. Mix books horizontal and vertical. Stack some horizontally with a small object on top. Turn some with spines facing in for a tonal, neutral look if that suits your palette.
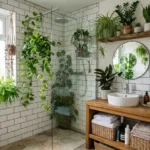
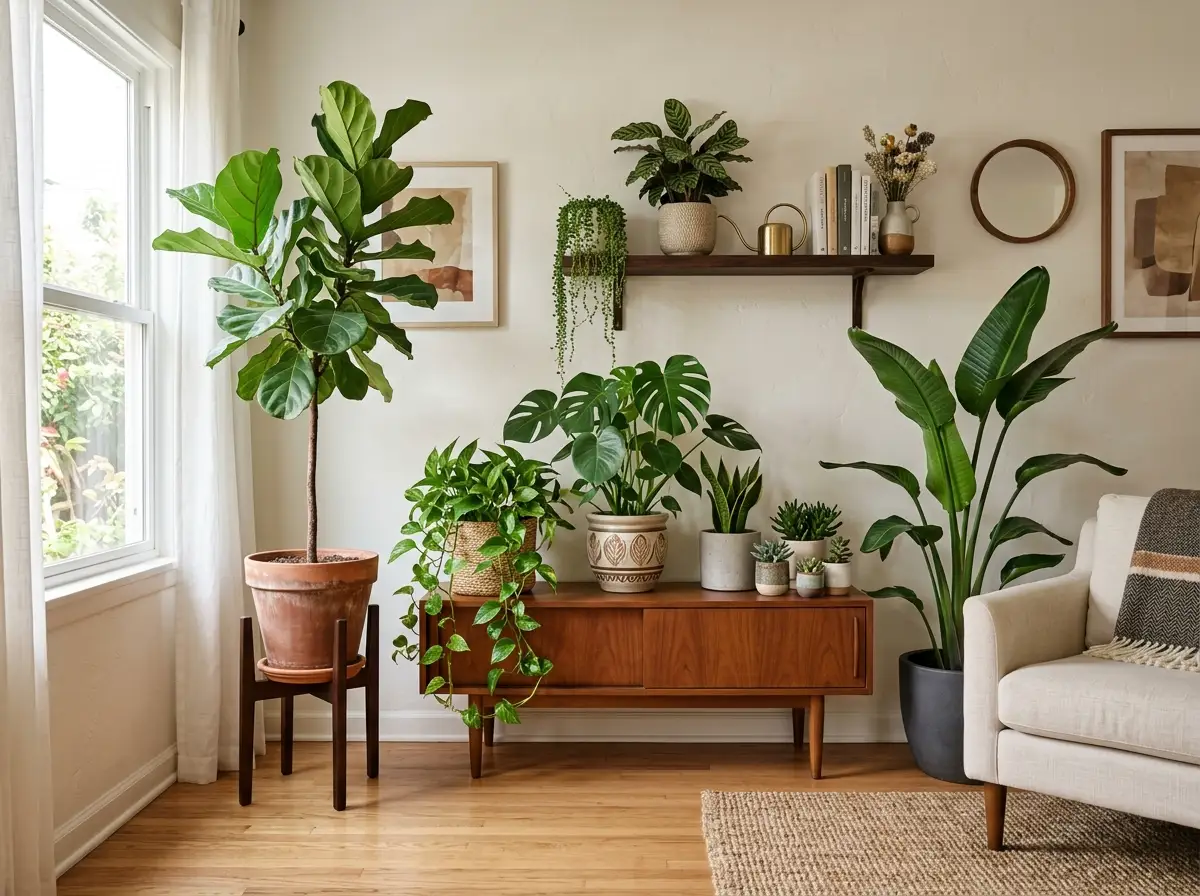
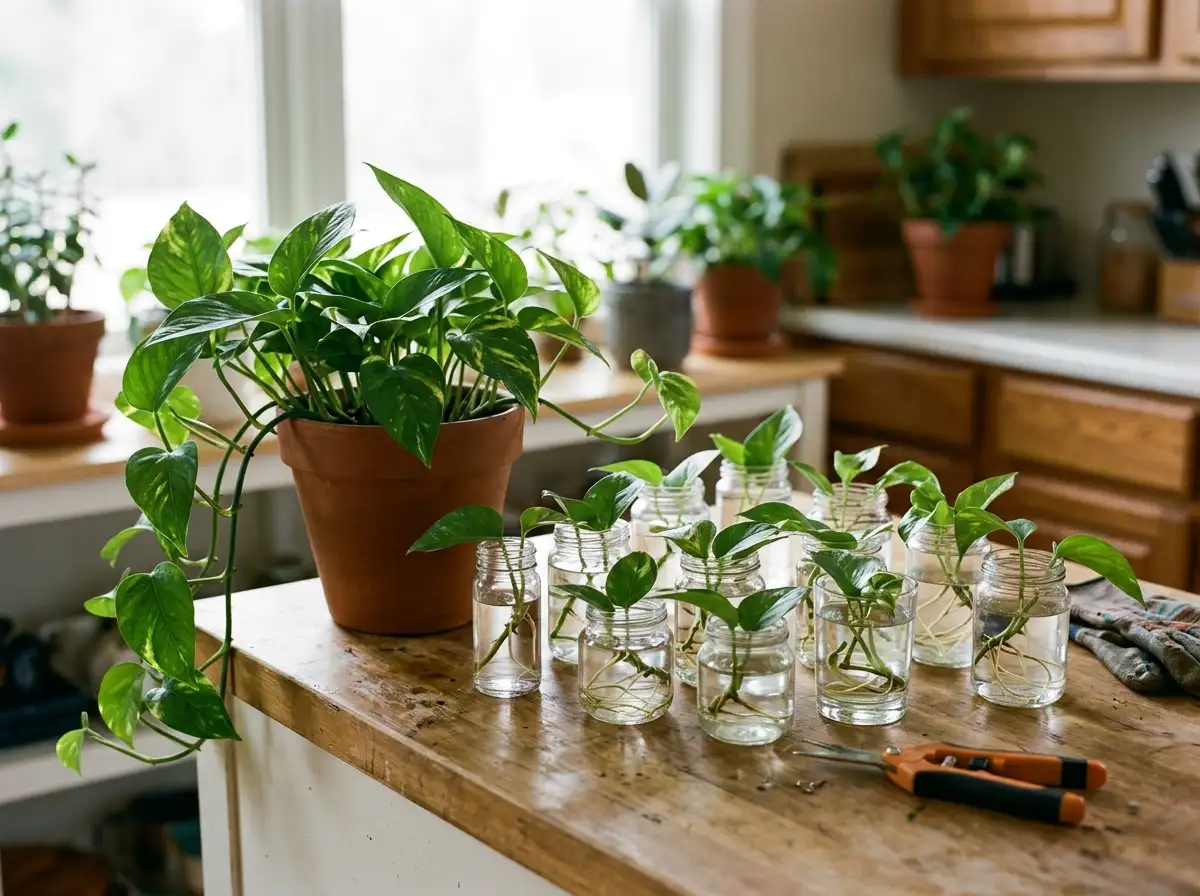
Add at least one trailing or draping plant per shelf grouping. A trailing pothos, a string of pearls, or a draping ivy adds organic life and movement to shelves that can otherwise feel static. The trailing element softens the architectural rigidity of shelving in a way that nothing else does quite as well. I am seriously obsessed with what a trailing plant does to a shelf and I will not apologize for it.
The Most Common DIY Built-In Shelf Mistakes (And How to Avoid Them)
I want you to go into this project with your eyes open, so here are the mistakes I see most often in DIY built-in shelf projects — and exactly how to avoid every single one of them.
Not measuring twice (or three times). Measure your space more times than feels necessary. A mistake in measurement that you catch on paper costs nothing. A mistake in measurement that you catch after cutting costs you materials, time, and genuine frustration. Measure the height at multiple points across the wall — floors and ceilings are almost never perfectly level and the variation matters.
Skipping the level. I cannot stress this enough. A shelf that is even slightly off-level looks wrong to the human eye in a way that is immediately noticeable and impossible to un-see. Use a level at every single step. A long spirit level or a laser level is worth every penny for this project.
Not securing to wall studs. Tall shelves that are not secured to wall studs are a safety hazard, full stop. Find your studs before you install using a stud finder, mark them clearly, and drive your securing screws into them. This is not optional, especially if children are in the home.
Skimping on the paint prep. The finish on your built-in shelves is ninety percent of the visual result and the paint prep is ninety percent of the finish. Fill every nail hole with wood filler. Sand everything smooth. Prime before you paint. Sand lightly between coats. Use quality paint and quality brushes. Rushed paint prep shows forever on a painted built-in.
Forgetting to account for baseboard. If your room has existing baseboard molding running along the bottom of the walls, your shelving units need to either sit on top of it (requiring a scribe to fill the gap at the back) or you need to notch the bottom of your units to fit around it. Forgetting this detail leads to a frustrating surprise on installation day.
Not planning for outlets and switches. Before you finalize your shelf placement, identify every outlet and light switch on the wall. Your shelving plan needs to account for these — either leaving them accessible through the shelving or relocating them, which requires an electrician. Never cover an outlet with cabinetry.
Your DIY Built-In Storage Shelves Are Closer Than You Think
Here is what I want you to take away from this entire guide, more than any specific technique or budget breakdown: DIY built-in storage shelves are not exclusively for people with professional carpentry skills, unlimited budgets, or decades of home improvement experience. They are for people who want them badly enough to make a plan, gather the information, and start.
Nadia had never built anything before her bookshelf wall. She watched YouTube tutorials, she measured carefully, she took her time, and she created something that genuinely transformed her living room and her confidence in her own abilities. That transformation — the one that happens in you, not just in the room — is honestly just as good as the shelves themselves.
Start with the tier that feels right for your budget and your current skill level. The IKEA hack is genuinely extraordinary and there is zero shame in starting there — or staying there, because the results are legitimately beautiful. Let the project teach you. Let it surprise you with what you’re capable of. And then stand back when it’s finished, with paint on your hands and sawdust on your clothes, and look at the beautiful, custom, built-in storage shelves that you made — in your home, for your home, with your own two hands.
Now go pin every single approach from this guide, share it with whoever in your life has been dreaming about built-in shelves and assuming they can’t have them, and go take measurements of that wall you’ve been staring at. Your built-in shelves are waiting.
Pin this complete guide and save it — you are going to want every single one of these approaches, the styling tips, and the mistake-avoidance section bookmarked for when you start building!


Leave a Reply