
The ultimate step-by-step guide to creating a whole-home storage system from scratch — because organized homes aren’t born, they’re built with the right plan.
Let me ask you something. Have you ever spent an entire Saturday organizing one room — really going all in, buying the bins, labeling everything, feeling incredibly proud of yourself — only to walk into the rest of your house and feel completely defeated? Because the kitchen is still a mess.
The hallway is still a disaster. The spare room is still the room you close the door on when guests come over.
Yeah. I have been there too. And for a long time I thought that was just the reality of trying to keep a home organized. You fix one thing and everything else stays broken. You organize the pantry and the bathroom explodes.
You tackle the bedroom and the entryway falls apart. It feels like you’re playing a game you can never actually win.
It wasn’t until I started thinking about home organization completely differently — not as a series of individual room projects but as one whole-home system — that everything finally clicked. And I mean everything.
The kind of organized that lasts. The kind where you can find anything in your home in under two minutes. The kind where tidying up takes twenty minutes instead of two hours because everything already has a home.
My friend Noura is the most organized person I know and I used to think she was just born that way. One afternoon over coffee she told me that her house wasn’t always like this — that three years ago it looked exactly like mine did at the time, which is to say chaotic and overwhelming.
She didn’t do a series of room makeovers. She built a whole-home storage system from scratch, room by room, using a deliberate process that she had mapped out from the beginning. The result is a home that has been consistently, sustainably organized for three years and counting.
I made her walk me through every single step. And everything she shared — plus everything I’ve learned since then from doing it in my own home — is in this guide. This is the complete, honest, practical guide to creating a whole-home storage system from scratch. Let’s build something that actually lasts.
Why a Whole-Home Storage System Is Different From Just Organizing Individual Rooms
Before we get into the how, I want to talk about the why — because understanding this distinction is what makes the difference between organizing that lasts and organizing that falls apart within a month.
When you organize room by room without a bigger plan, you’re solving surface problems. You’re finding better homes for the things that are already in each room, but you’re not addressing why things end up in the wrong place, why clutter accumulates the way it does, or how storage in one part of your home affects clutter in another.
A whole-home storage system thinks about your home as one interconnected organism. It asks: where do things enter the house? Where do they get used? Where do they naturally want to live? Where do they leave? And it builds a logical, consistent flow based on those answers. When the system is right, things almost put themselves away — because their home is exactly where you’d naturally put them down anyway.
This guide is going to walk you through building that system from scratch. It takes more thought upfront than a single room organization project. But the result is something sustainable, something scalable, and something that genuinely changes how your home feels to live in every single day.
Step 1: Do a Complete Whole-Home Audit Before You Buy Anything
I cannot stress this enough — and it is the step that most people skip because it’s not as satisfying as buying pretty bins — but you absolutely cannot build an effective whole-home storage system without first understanding exactly what you’re working with.
Set aside two to four hours — yes, really — to do a complete walk-through of your entire home with a notebook. Go room by room, space by space, and honestly assess what you see. What is consistently cluttered? What storage exists but isn’t being used well? What categories of items don’t have a designated home? Where do things tend to pile up, and why?
Be brutally honest with yourself during this audit. Don’t tidy things up before you assess them — look at the natural state of each space and ask what it’s telling you. A pile of shoes at the front door is telling you that the shoe storage system isn’t working or doesn’t exist. A pile of mail on the kitchen counter is telling you there’s no designated home for incoming paper. A cluttered bathroom counter is telling you the storage inside the cabinets isn’t meeting your needs.
Write everything down. At the end of your audit you’ll have a complete picture of your home’s storage problems, which is exactly what you need to build a system that solves them. This is the foundation of everything.
What to note in your audit:
- Every area of consistent clutter and what categories of items are in that clutter
- Storage that exists but isn’t being used effectively and why
- Categories of items that seem to have no designated home
- Transition zones where things come in, get set down, and never move (front door, kitchen counter, bedroom chair)
- Rooms or areas that feel chaotic despite having storage
Step 2: Declutter Every Single Room Before You Organize Anything

You knew this was coming. I know you knew. And I know it’s the step you most want to skip. But creating a whole-home storage system on top of things you don’t need is like building a house on an unstable foundation — it looks fine at first and then gradually everything falls apart.
The declutter has to happen before the organizing. Not after. Not alongside. Before.
Go through every room, every cabinet, every drawer, every closet, and make honest decisions about what stays and what goes. The questions to ask yourself are simple: Do I use this? Do I love this? Would I buy this again today? If the answer to all three is no, it goes. Donate it, sell it, or toss it — but it does not stay in your home and it does not go into your new storage system.
I know decluttering feels overwhelming at the whole-home scale, so break it into sessions. One room per weekend, or even one zone per weekend — the kitchen one Saturday, the bedroom closet the next. The important thing is that every space gets properly decluttered before you start building its storage system.
The reward for doing this properly is enormous. After a real whole-home declutter, the storage problem in most homes reduces by thirty to fifty percent. You don’t need as many bins, as many shelves, or as much space as you thought — because half of what was taking up that space shouldn’t have been there in the first place.
Declutter categories to tackle:
- Clothing and accessories (including seasonal items stored elsewhere)
- Books, magazines, and media
- Kitchen equipment, gadgets, and duplicates
- Toys, games, and kids’ items
- Paper — bills, mail, manuals, documents
- Sentimental items (be gentle with yourself here but be honest)
- Bathroom and personal care products
- Tools, hardware, and hobby supplies
Step 3: Map Out Your Home’s Natural Traffic Flow and Use Patterns
This is the step that separates a storage system that genuinely works from one that looks great but nobody actually maintains — and it’s the step my friend Noura said was the most important one she took.
Every family has patterns. Things that happen the same way every day, in the same sequence, in the same locations. Kids come home and dump their backpacks. Mail gets brought in and set on the nearest surface. Coffee cups migrate from bedroom to kitchen. Shoes come off at the door, or by the couch, or in the bedroom. Charging happens in the kitchen, or the living room, or the nightstand.
Your storage system needs to work with these patterns — not against them. If everyone in your family takes their shoes off at the front door, the shoe storage needs to be at the front door. If the mail always lands on the kitchen counter, the mail system needs to be in or near the kitchen. If your kids always do homework at the kitchen table, the homework supplies need to be stored near the kitchen table.
Fighting human nature with organizational systems is a battle you will lose every single time. The best whole-home storage system is the one that puts things where people are already naturally putting them — just organized, contained, and intentional.
Walk through your home and map out where each category of daily activity actually happens. Then design your storage around the reality of your life, not the idealized version.
Questions to map your use patterns:
- Where does everyone enter and exit the house, and what do they bring with them?
- Where does mail and paper come into the home and where does it tend to land?
- Where do people charge their devices?
- Where do kids or family members do homework or work from home?
- Where do things get used most frequently vs stored most conveniently?
- Where are the natural “drop zones” that attract clutter no matter what?
Step 4: Assign Every Category of Item a Permanent Home
This is the heart of the whole-home storage system and the step where everything starts coming together — because a truly organized home is one where every single category of item has a permanent, logical, designated home. Not a vague area. Not a general vicinity. A specific home.
Go back to your audit notes and your use pattern map and start assigning homes for each category. The logic is simple: things should live as close as possible to where they’re used most frequently, and in a storage solution that makes it as easy to put them away as it is to take them out.
Keys live on the hook by the front door — not in a drawer, not on the counter, not in a bag. Scissors live in one specific drawer in the kitchen — not in three different places around the house. Batteries live in the junk drawer — but now it’s an organized junk drawer with a dedicated battery section. Spare guest towels live on the shelf in the hall closet — always, reliably, in the same place.
When every category has a home, two things happen. First, you always know where to find things because everything is always where it belongs. Second, putting things away becomes effortless because there’s no decision-making involved — the home is already assigned, so you just return the item there. The cognitive load of maintaining an organized home drops dramatically when the system exists.
Write out your category-to-home assignments. Literally make a list. This becomes the blueprint for your whole-home storage system.
Common categories to assign homes:
- Incoming mail and paper
- Keys, wallets, and everyday carry items
- Shoes by location in home
- Coats and outerwear
- Charging cables and devices
- Cleaning supplies (by zone — kitchen, bathroom, general)
- Medications and first aid
- Tools and hardware
- School and work supplies
- Sports and hobby equipment
- Seasonal items
- Pet supplies
- Entertainment and media
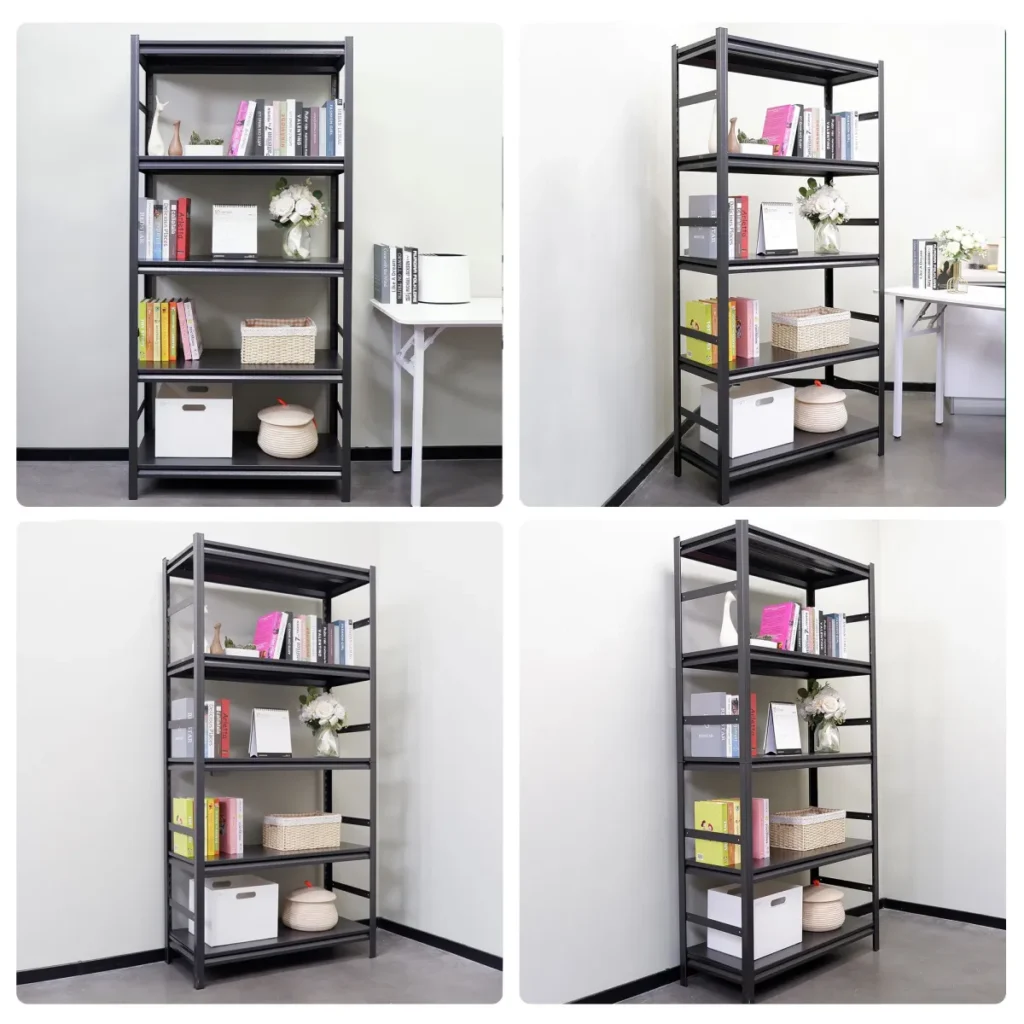
Step 5: Choose Your Storage Solutions Room by Room
Now — and only now — is it time to start thinking about bins, baskets, shelves, and organizers. Because now you know exactly what you need to store, where it needs to live, and how much space you’re working with. You’re buying solutions for specific, identified problems, not buying pretty things and hoping they fix something.
Go room by room and choose storage solutions that fit both the physical space and the category of items being stored. The general principles to follow for every room are the same: maximize vertical space, use the insides of cabinet doors, keep frequently used items accessible and less-used items in higher or harder-to-reach spots, and choose matching, cohesive containers for visual calm.
Here is how to think through the storage solutions for each major zone of your home:
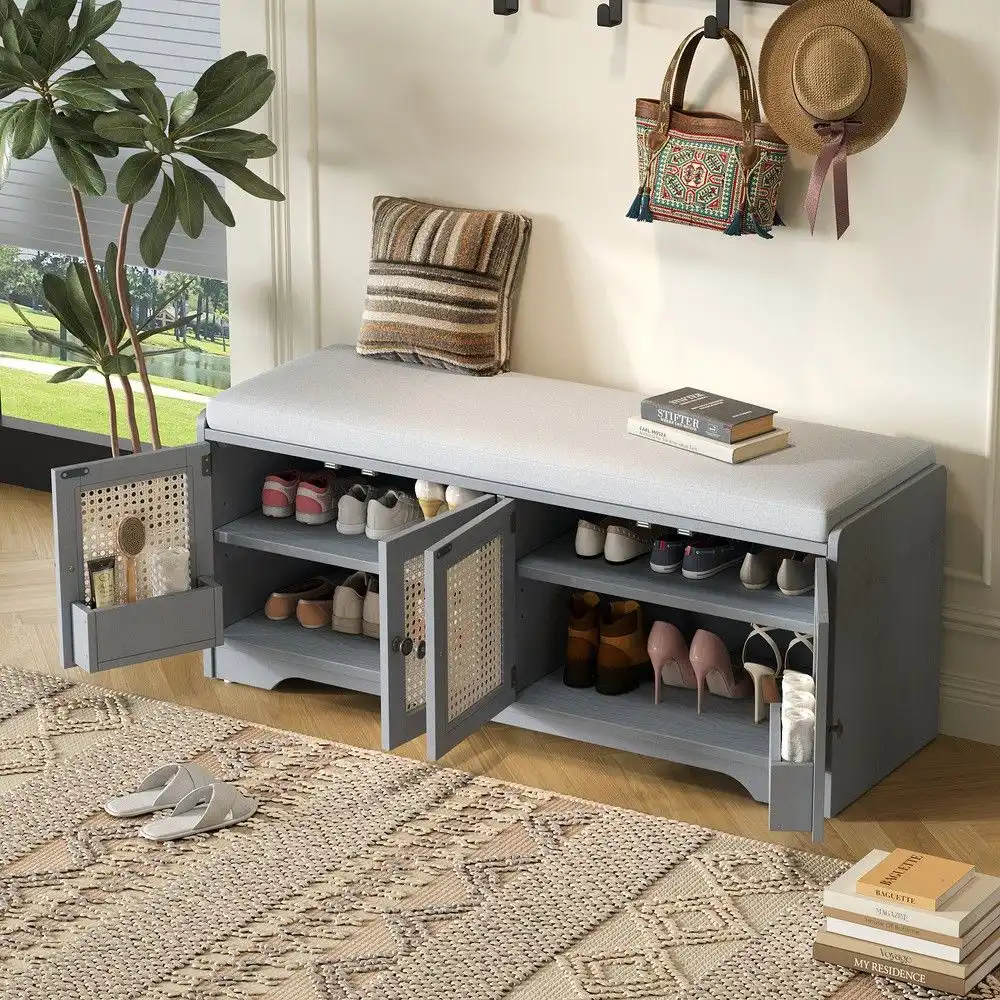
The Entryway / Mudroom Zone: Hooks at multiple heights, a bench with storage inside, a shoe system, a mail and key station, a basket for bags and accessories. Every item that enters and leaves the house daily needs a home at this zone.
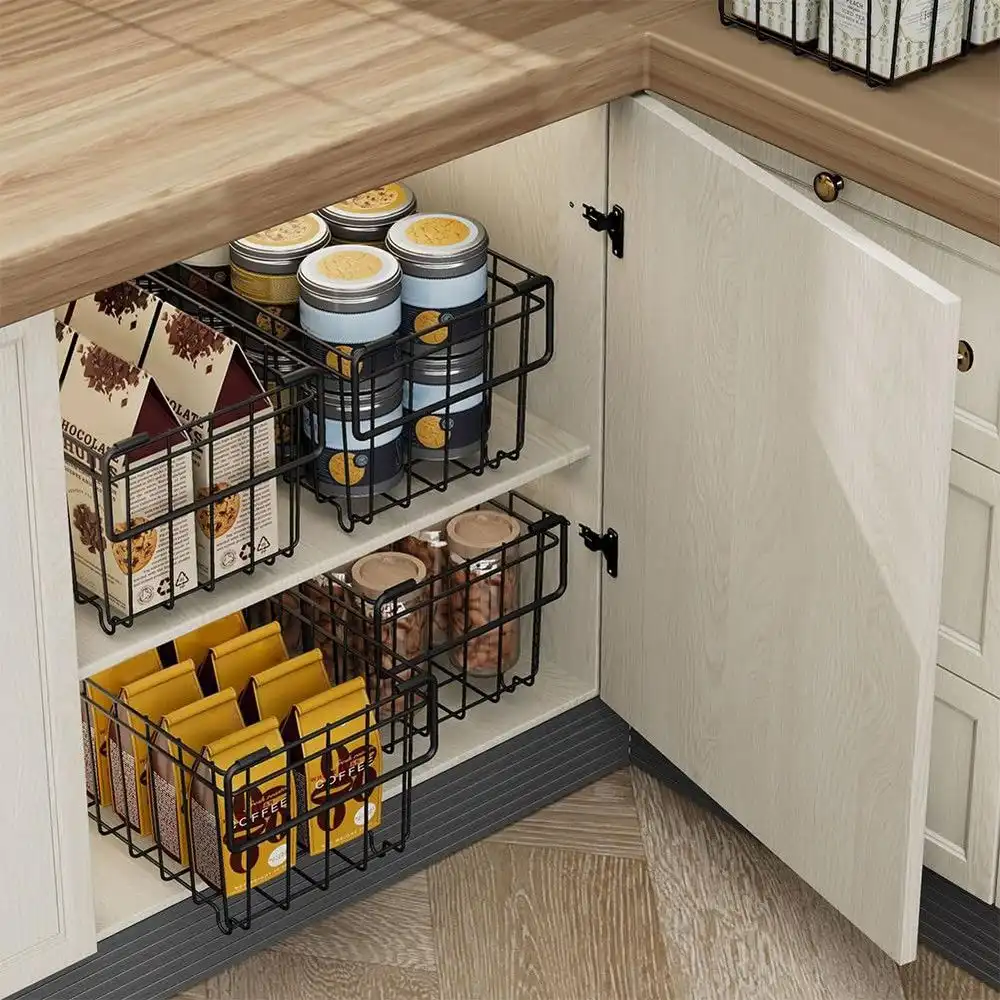
The Kitchen: Drawer organizers for every drawer, shelf organizers inside cabinets to create two levels of storage, a pantry system with labeled bins for categories of food, a cleaning supply zone under the sink, a designated spot for every appliance.
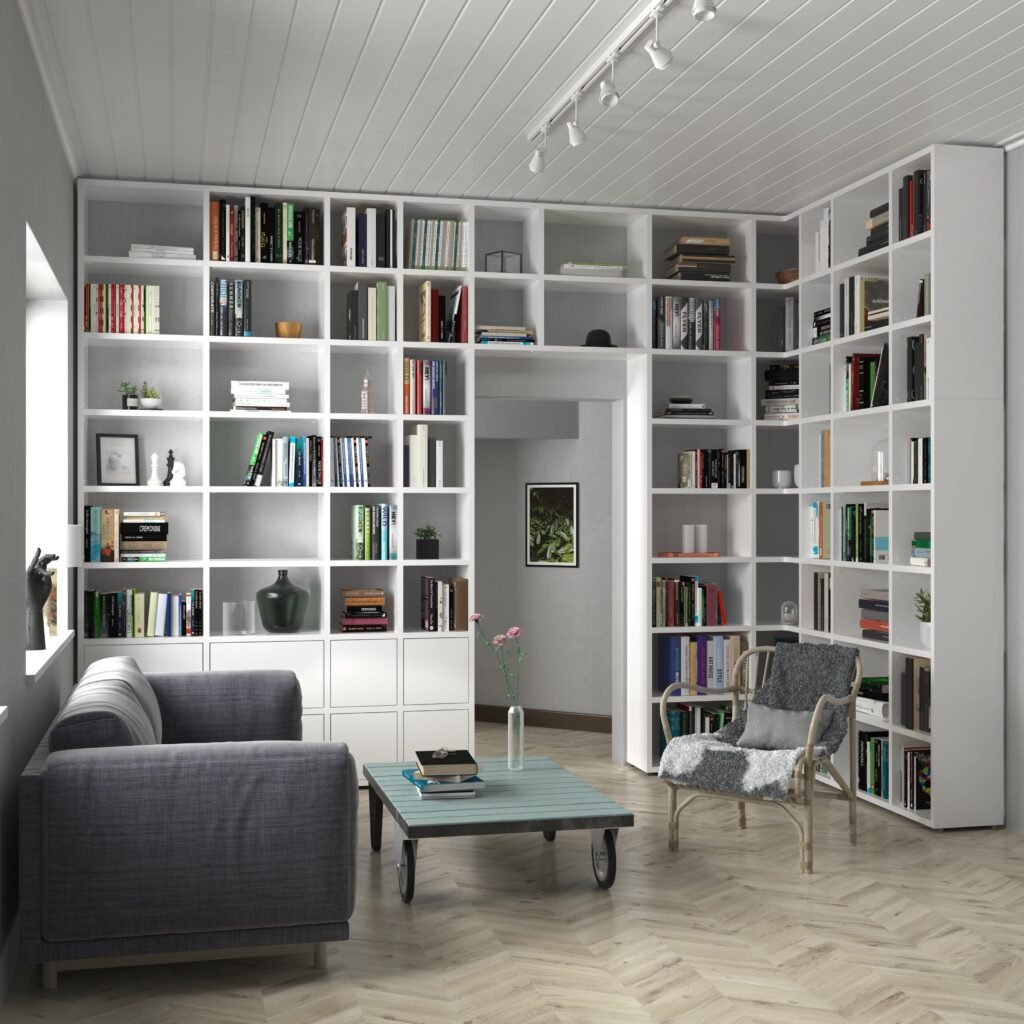
Living Room: Closed storage for visual calm — an ottoman or coffee table with storage inside, a media console with doors, baskets on shelves for blankets and remotes, a designated home for books and magazines.
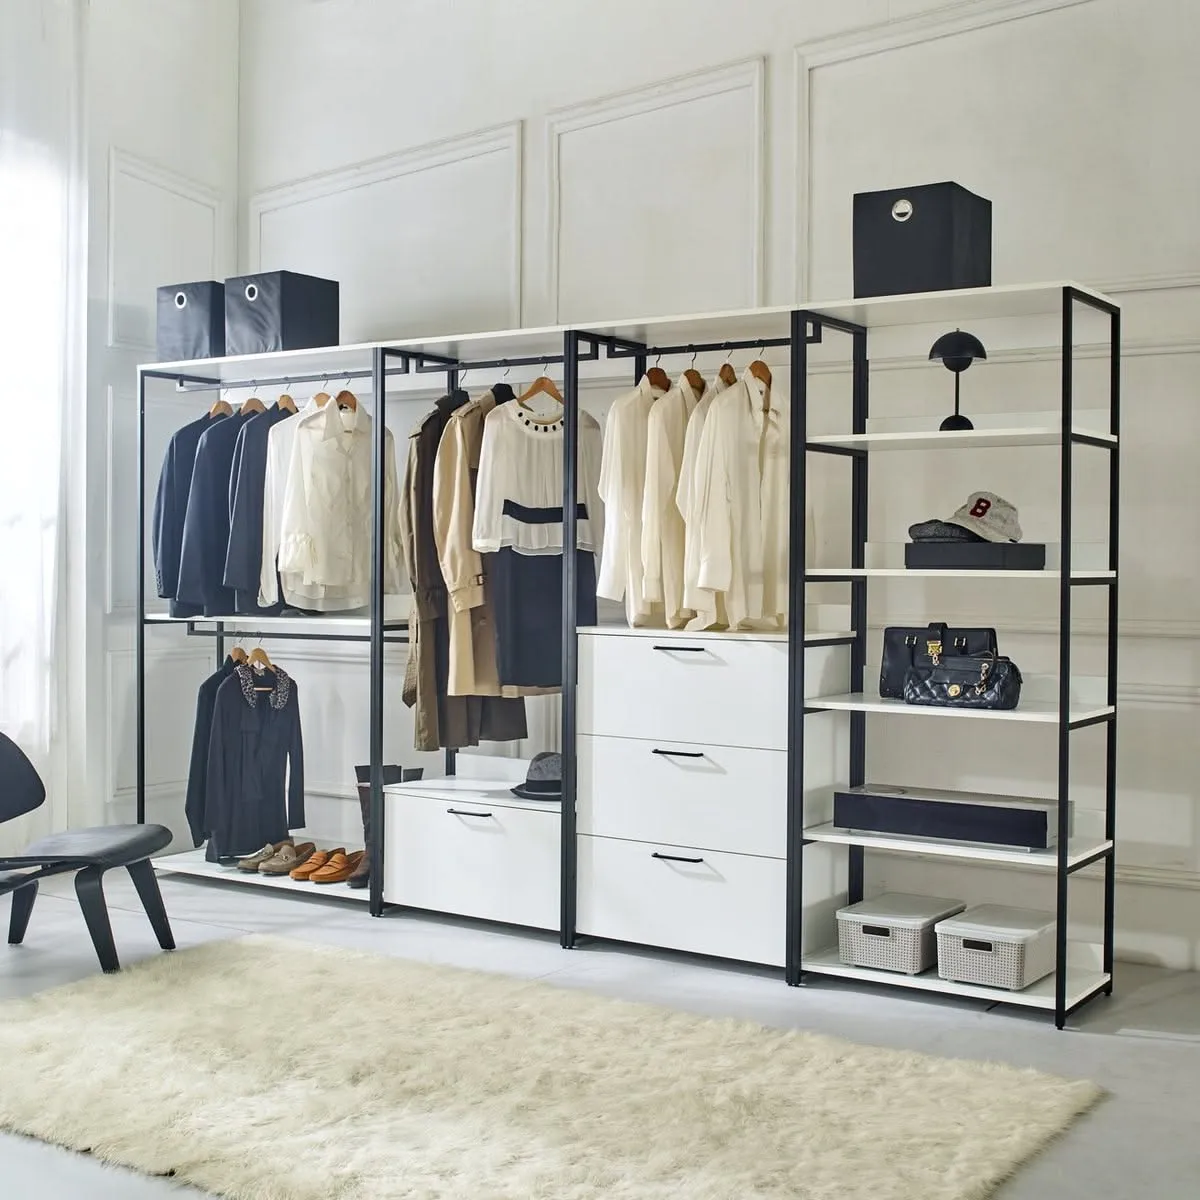
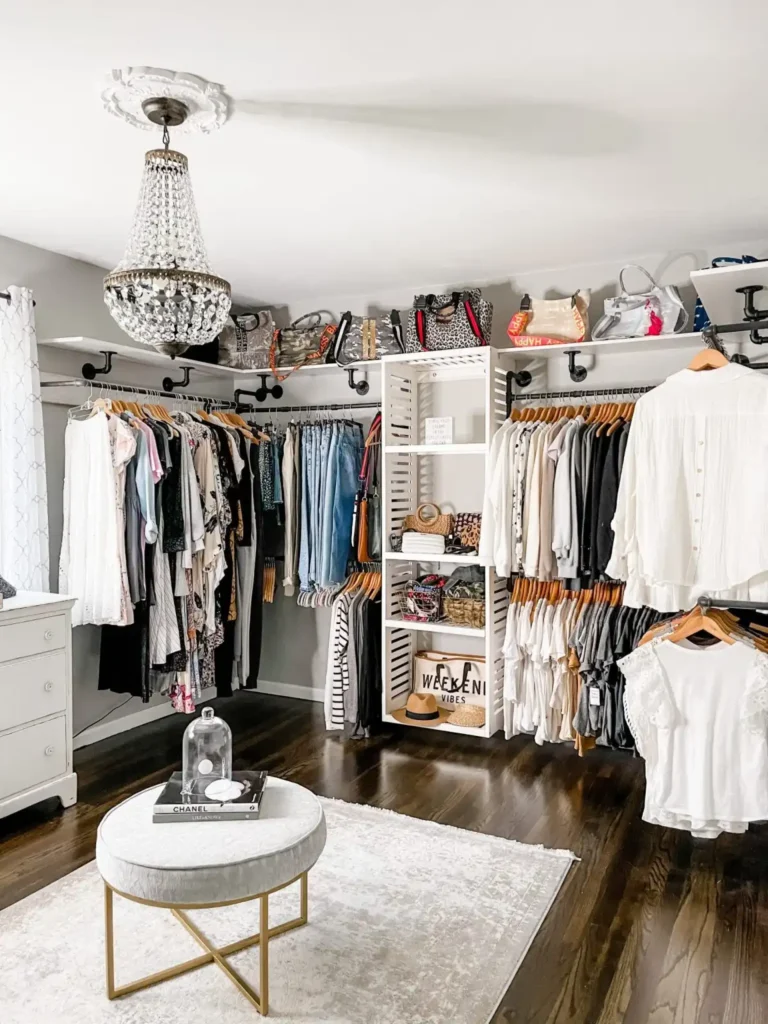
Bedrooms: A closet system that matches how you actually get dressed, drawer organizers for every dresser drawer, under-bed storage for seasonal items, a nightstand with drawers for bedtime essentials.
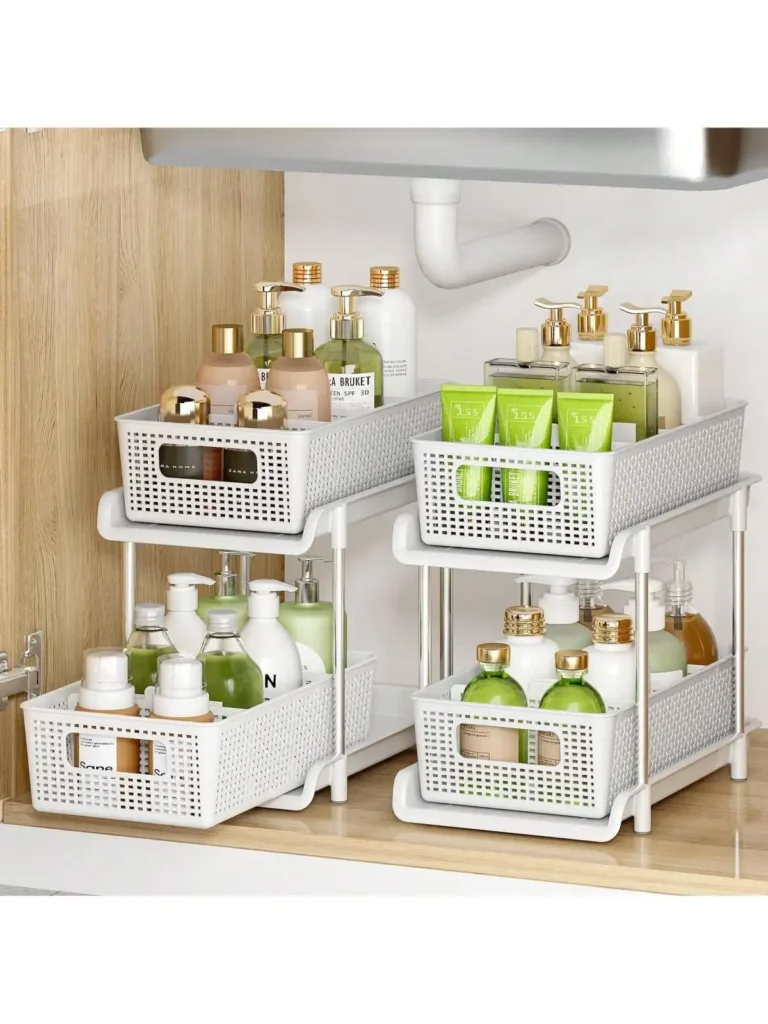
Bathrooms: Cabinet organizers inside every cabinet, a drawer organizer for personal care items, decanted products in matching containers, a designated spot for each person’s items if the bathroom is shared.
Home Office: A filing system for paper, desk organizers for supplies, cable management for tech, a clear system for incoming and outgoing documents and tasks.
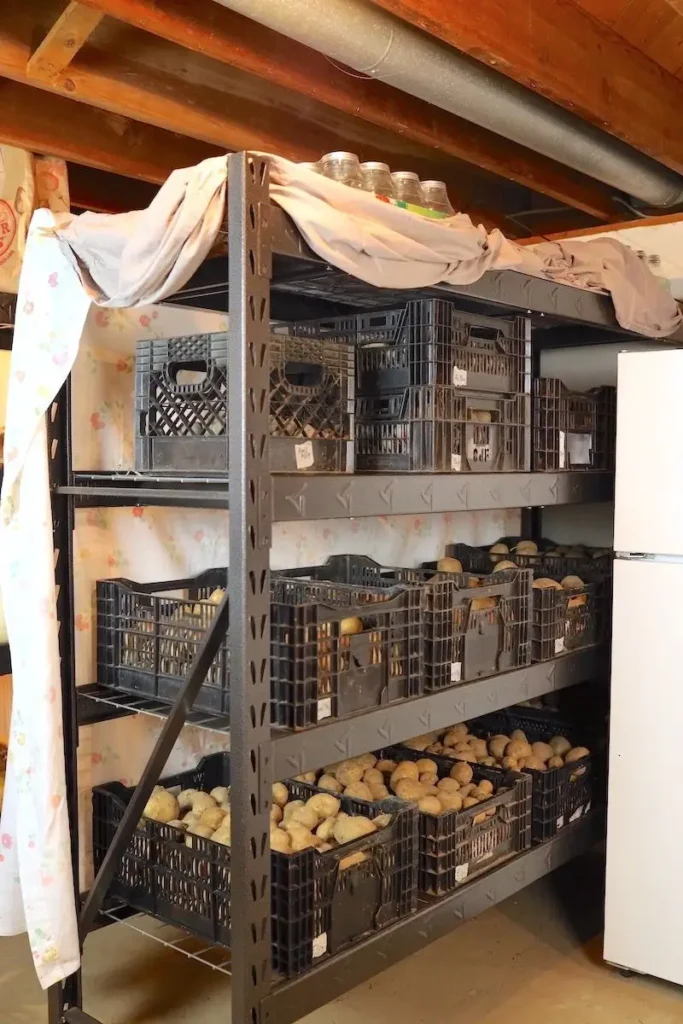
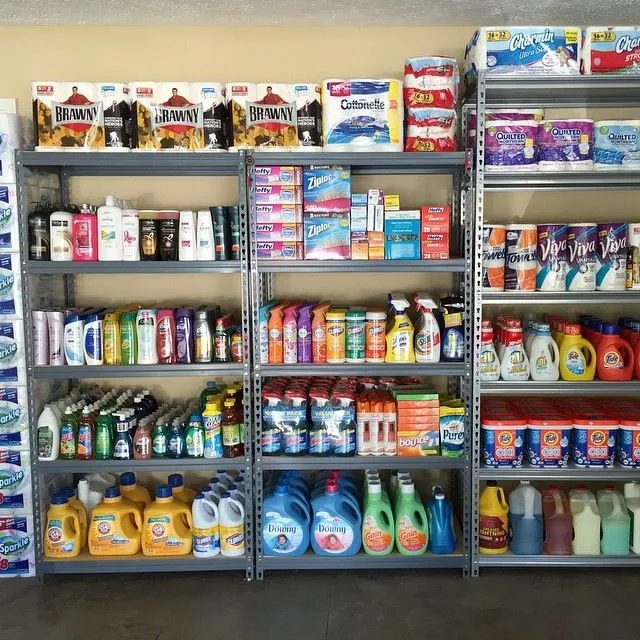
Utility Spaces (laundry, garage, attic, basement): Shelving units along walls, clear labeled bins for categories, a dedicated zone for each category of stored item, good lighting.
Step 6: Set Up Your Paper Management System
Oh my — this is the whole-home storage system component that most guides leave out entirely, and it is the one that causes the most daily chaos in the most households. Paper. The endless, relentless, incoming stream of mail, bills, school forms, receipts, warranties, manuals, and miscellaneous documents that appears in your home every single day.
Without a paper management system, paper accumulates on every flat surface in the house — the kitchen counter, the dining table, the bedroom dresser — because there’s no clear system for what to do with it when it comes in.
A simple paper management system has three components. First, a landing zone — a tray or folder right where mail comes in, usually near the front door or in the kitchen, where all incoming paper goes immediately. Second, a weekly processing habit — once a week you sit down with the landing zone tray, go through everything, pay what needs paying, respond to what needs responding, file what needs filing, and recycle the rest. Third, a filing system — a simple accordion folder or binder organized by category (bills, insurance, medical, school, home) where documents that need to be kept are stored.
The landing zone is the key. When every piece of paper that comes into the house goes directly into the landing zone tray — not on the counter, not on the table, not on the dresser — the paper stops spreading across every surface in the home. It accumulates in one place, in a contained and intentional way, waiting to be processed.
Set up your paper system:
- One inbox tray near the point of entry for incoming mail (Amazon / Target)
- Weekly calendar reminder to process the inbox (fifteen to twenty minutes maximum)
- Simple accordion folder for filing kept documents (Amazon)
- Recycle bin or shredder near the processing area for immediate disposal
Step 7: Create a Maintenance Routine That Keeps the System Working
Here is the truth about whole-home storage systems that nobody tells you when they show you the beautiful before-and-after photos: the system doesn’t maintain itself. You have to maintain it. And the way you maintain it is with a simple, consistent routine that takes far less time than you think.
A good whole-home maintenance routine has three levels. The first is the daily reset — ten to fifteen minutes at the end of each day where everything that has migrated out of its home gets returned to it. Every item back to its designated home. Every surface cleared. Every room walked through. When everything has a home and the reset is daily, fifteen minutes genuinely handles it.
The second level is the weekly reset — thirty to sixty minutes once a week where you do a more thorough pass through the whole home. Laundry caught up, paper processed, any areas that got away from you during the week brought back into order.
The third level is the seasonal reset — once every three to four months, a deeper pass through each room to reassess what’s working, what isn’t, what has accumulated that doesn’t have a home, what needs to be decluttered, and what might need a better storage solution. This is also when you rotate seasonal items in and out of long-term storage.
The daily reset is the non-negotiable. When that fifteen-minute habit is consistent, the weekly reset barely takes any time at all and the seasonal reset is mostly just a check-in. Miss the daily reset for a week and the home starts to feel overwhelming again. The routine is the system’s maintenance engine.
Your maintenance routine:
- Daily: 10–15 minute whole-home reset every evening (or morning, whichever works for your family)
- Weekly: 30–60 minute deeper reset including paper processing and laundry
- Seasonal: 2–4 hour deeper reassessment, declutter, and seasonal item rotation
- Annually: Full reassessment of the whole-home system — what’s working, what needs to change
Step 8: Get the Whole Household On Board
This is the whole-home storage system step that determines whether the system works for one person in the household or for the entire household — and I want to be honest with you because a system that only one person maintains is not a system, it’s a burden.
A whole-home storage system only works long-term when every person who lives in the home understands it, buys into it, and participates in maintaining it. That means communicating where things live clearly and consistently, making the system easy enough that returning things to their home takes less effort than not doing it, and involving family members in the setup so they feel ownership of the system rather than compliance with someone else’s rules.
With kids, this means making storage solutions at their height and easy to use — low hooks they can reach, bins with pictures instead of written labels for younger children, simple categories that they can understand. The easier the system is to use, the more they will actually use it.
With partners or housemates, this means having an honest conversation about the system, explaining the logic behind where things are stored, and making sure the homes you’ve assigned for things make sense to them too. A storage system that makes perfect sense to you but none to your partner is not going to be maintained by your partner.
The whole-home storage system is a shared infrastructure. Build it together, communicate it clearly, and maintain it together.
Getting the household on board:
- Walk every family member through the new system and explain the logic
- Make a simple visual guide (photos or a map) of where key categories live
- Use labels consistently so nobody has to remember or ask where things go
- Make children’s storage accessible and intuitive at their level
- Celebrate wins together — notice when the system is working and acknowledge it
Step 9: Evaluate, Adjust, and Improve Over Time
This is the step that most organizational guides don’t include because it doesn’t have the satisfying finality that a good before-and-after story wants to have — but it is genuinely one of the most important parts of creating a whole-home storage system that works long-term.
Your life changes. Your family changes. Your needs change. A storage system that was perfect for your life eighteen months ago might need adjustment today. A new baby changes everything. Kids getting older changes what they need to access independently. Working from home changes your paper and tech storage needs. A new hobby brings new equipment that needs a home.
A great whole-home storage system is not a static thing that you set up once and never touch again. It’s a living system that you evaluate periodically and adjust as your life evolves. The seasonal reset is a good opportunity to do this — ask yourself what’s working, what’s creating friction, what categories have grown or shrunk, and what needs a better solution.
The adjustment doesn’t mean the system failed. It means the system is responsive to your life, which is exactly what a good system should be. Give yourself permission to change things when they’re not working, try new solutions, and iterate toward something better. Every improvement makes the system stronger.
Questions for your periodic evaluation:
- What is consistently out of place, and what does that tell me about the storage solution for that category?
- What parts of the daily reset feel most effortful and why?
- Have any new categories of items entered the home that don’t have a proper home yet?
- Is everyone in the household using the system, and if not, why not?
- What has changed in our daily life that might need a storage system adjustment?
Step 10: Enjoy the Home You Have Built

Last but absolutely most importantly — and I mean this sincerely — take a moment to appreciate what you have built.
Creating a whole-home storage system from scratch is not a small thing. It requires honesty during the audit, courage during the declutter, thoughtfulness during the planning, effort during the setup, and consistency during the maintenance. Most people never do it. Most people live their whole lives in homes that feel one step behind the chaos. You are choosing something different.
When the system is working — when you can find your keys in five seconds, when the daily reset takes twelve minutes, when guests walk in and your home just feels calm and welcoming rather than stressful, when your kids know where their things go and actually put them there — that feeling is everything.
My friend Noura described it as “the tax you pay every day being so small compared to the peace you get back.” That daily fifteen-minute reset, that weekly processing session, that seasonal check-in — they feel like nothing once the system is established, because the alternative — living in constant low-grade chaos — cost so much more in stress, time, and mental energy.
You are building a home that works for you. That supports your days instead of complicating them. That welcomes you instead of overwhelming you. That is worth every single step of this process.
Now go pin this entire guide, share it with anyone who has ever looked at their home and felt defeated by the mess, and start with Step 1 this weekend. The home you want is completely within reach — one step at a time.
Pin this complete guide and save it — you’re going to want to come back to each step as you build your whole-home storage system, and every time you do this guide will be right here waiting for you!

Leave a Reply