
The most practical and encouraging guide to installing pull-out shelves in any cabinet — because the deep, inaccessible cabinet shelves you avoid dealing with are about to become the most useful storage in your entire home.
I want to describe something that happens in virtually every home with standard kitchen cabinets, every single day, multiple times a day. You need something from the back of a base cabinet — the one under the counter where you store your pots or your pantry overflow or your small appliances.
You open the door and immediately face the fundamental problem of deep cabinet storage: everything you want is behind everything you do not want. You get on your knees. You lean into the cabinet.
You move three things to reach the fourth thing. You knock something over. You find what you were looking for, slightly dented from whatever fell on it, at the back of a shelf that apparently exists specifically to test your patience.
Now compare that to what life is like after installing a pull-out shelf in the same cabinet. You open the door. You pull the shelf toward you — one smooth, effortless motion.
The entire contents of the shelf roll forward and present themselves to you, fully visible, fully accessible, nothing hidden behind anything. You take what you need in five seconds. You push the shelf back. You close the door.
The difference between those two experiences — happening dozens of times a day, every day of your life in your home — is the entire case for pull-out shelves.
And the extraordinary thing about them is that installing them is well within the reach of anyone with basic DIY confidence, a drill, and an afternoon. You do not need to hire a cabinet maker. You do not need custom cabinetry. You do not need to spend thousands of dollars on a kitchen renovation.
My friend Walid installed pull-out shelves in every base cabinet in his kitchen over the course of three weekends, using materials from Home Depot and instructions he assembled from a combination of YouTube videos and a Saturday of trial and error.
His kitchen went from a deep-storage nightmare to the most organized, accessible kitchen I have ever seen up close — and he said the total materials cost for eight cabinets was under $400.
The first time I opened one of his pull-out shelves and watched the entire contents of a deep cabinet glide effortlessly forward to meet me, I went home and immediately planned my own installation.
This is the complete guide to installing pull-out shelves in any cabinet. It covers the tools you need, the measurements you must take, the different types of slides and systems available, the step-by-step installation process, and the most common mistakes that turn a satisfying DIY project into a frustrating redo. Every step is explained in the level of detail that makes this genuinely doable for a first-time installer. Let’s get into it.

Why Pull-Out Shelves Are the Single Best Upgrade for Any Cabinet
Before we get into the how, let me make a brief but genuine case for the why — because pull-out shelves are one of those upgrades that many homeowners have seen and admired in other people’s kitchens but have not yet gotten around to installing in their own, and understanding the full scope of what they provide might be the motivation that gets you to actually do it this month.
They solve the deep cabinet accessibility problem permanently. The fundamental problem with standard deep cabinet shelves is that the back half of the shelf is essentially inaccessible during normal use. Things stored at the back get forgotten, get pushed further back, and eventually get discovered expired or broken months later. A pull-out shelf eliminates the distinction between the front and back of the shelf entirely — everything is equally accessible because everything comes to you.
They work in any cabinet in any room. Kitchen base cabinets are the most common application, but pull-out shelves are equally transformative in bathroom vanity cabinets, linen closets, laundry room cabinets, home office cabinets, and garage storage cabinets. Any enclosed cabinet with a fixed or adjustable shelf can be retrofitted with a pull-out system.
They are more affordable than most people expect. A single pull-out shelf for a standard base cabinet typically costs between $30 and $80 depending on quality, size, and whether you choose a DIY option or a pre-built system. For the improvement in daily life they produce, this is one of the highest-value home upgrades available.
They add genuine value to your home. Pull-out shelves are a feature that appeals to every home buyer who sees them. They are the kind of detail that makes a kitchen feel considered and high-quality — and they photograph well in listing photos, which matters more than most homeowners realize.
Types of Pull-Out Shelf Systems: Which One Is Right for Your Cabinet
Before you measure and buy anything, understanding the different types of pull-out shelf systems helps you choose the right one for your specific cabinet and your specific needs.
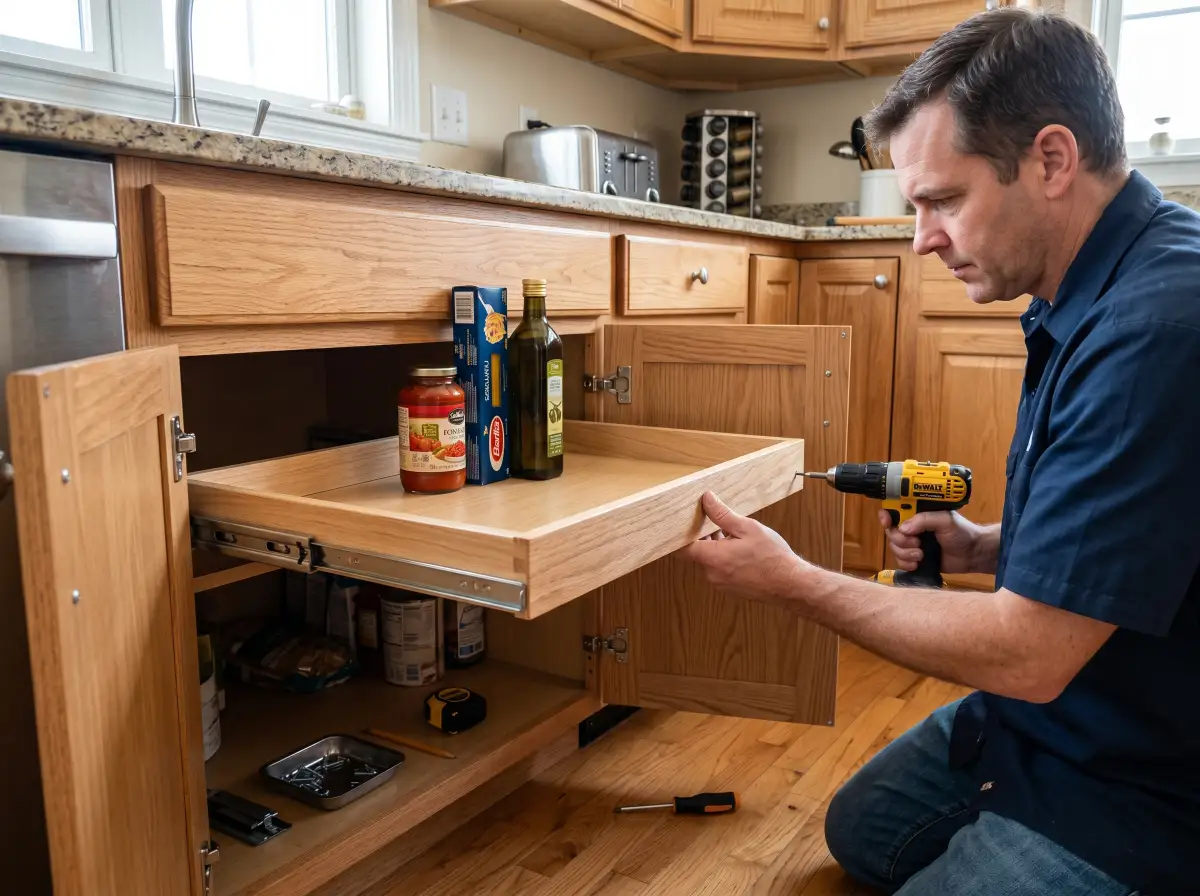
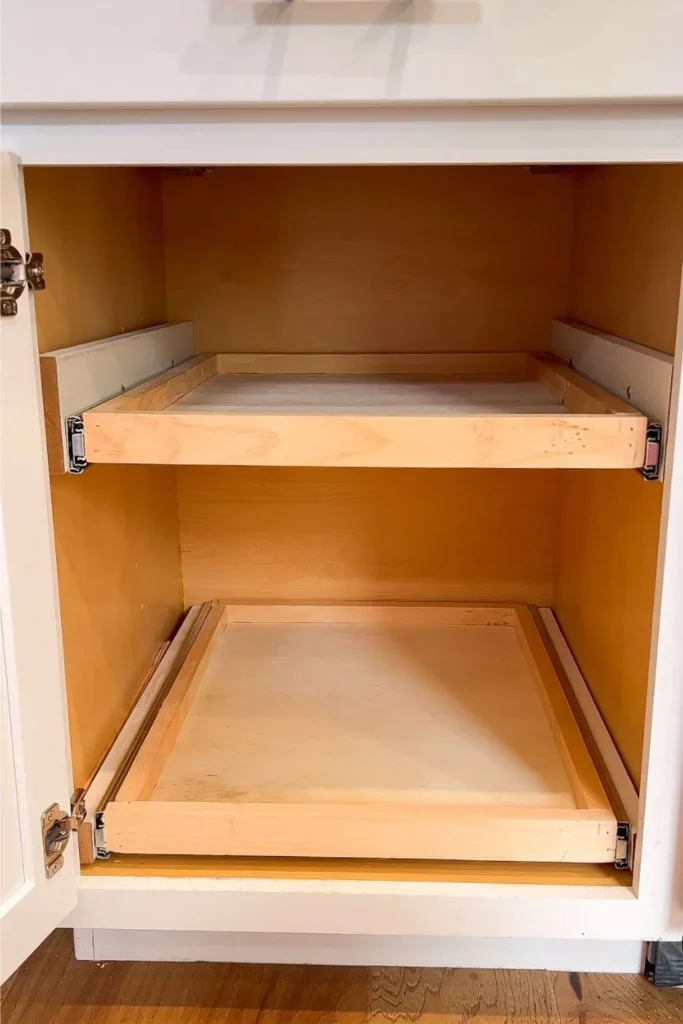
Type 1: Full-Extension Ball-Bearing Drawer Slides
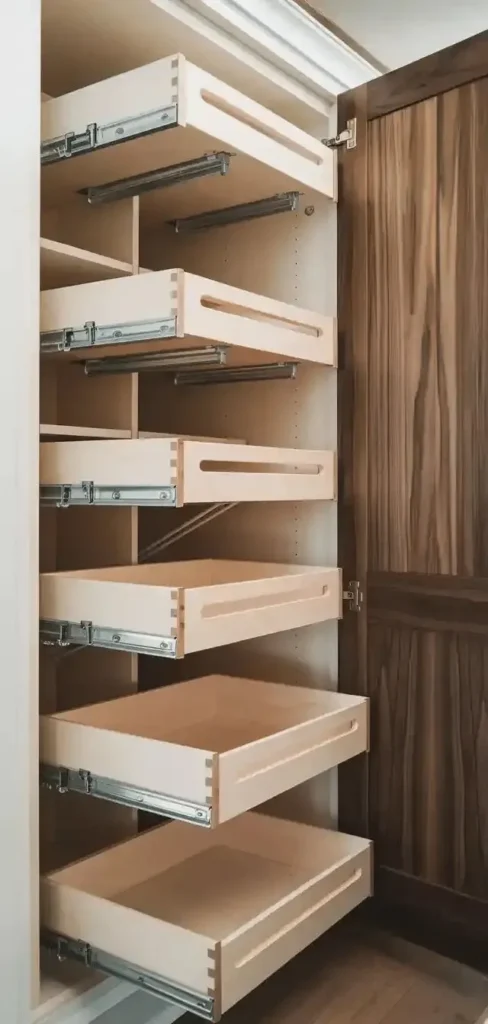
This is the most versatile and DIY-friendly pull-out shelf approach — you build or buy a shallow box or tray, attach ball-bearing drawer slides to the sides, and mount the slides to the interior walls of the cabinet. The result is a pull-out shelf that extends fully out of the cabinet (full-extension slides bring the shelf all the way out to where you can see and access the very back of it), rolls smoothly on ball bearings, and holds significant weight.
Ball-bearing drawer slides are what professional cabinetmakers use in quality cabinetry. They are smooth, durable, and available at every home improvement store. The full-extension version is worth the slight premium over partial-extension slides because the accessibility of the fully extended shelf is the whole point of the installation.
This approach requires building or buying the shelf tray, which adds a step but also gives you complete control over the dimensions, material, and style.
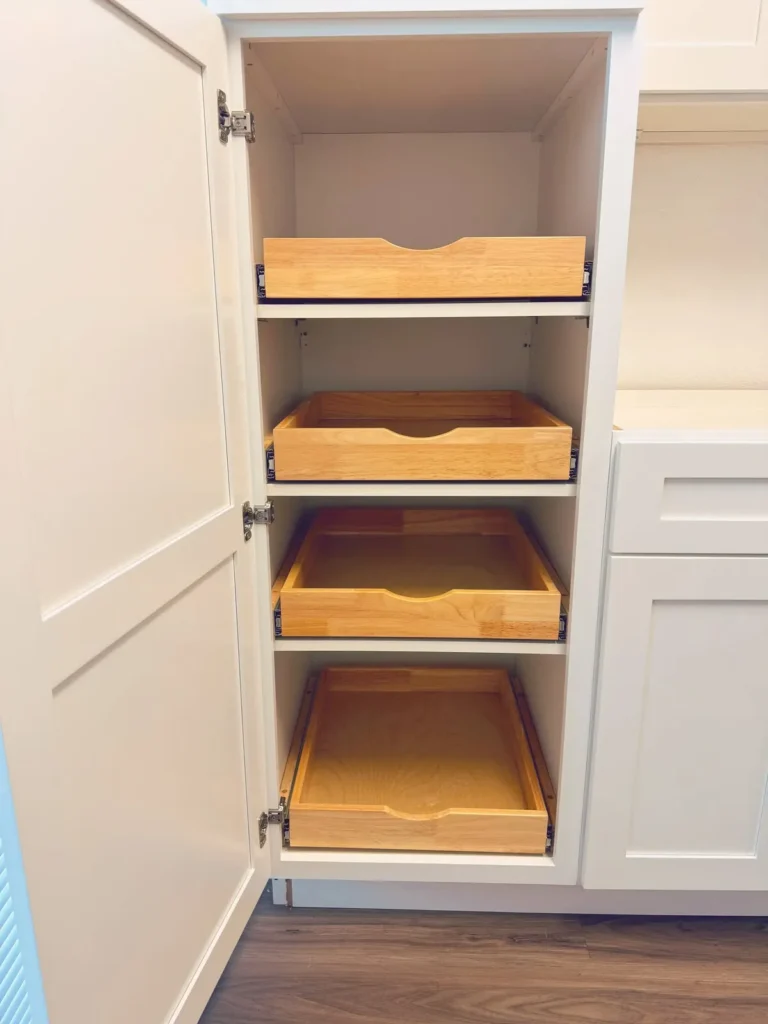
Type 2: Pre-Built Pull-Out Shelf Units
These are complete, ready-to-install units — the tray and the slides already assembled — that you simply measure for, buy in the right size, and mount. Brands like Rev-A-Shelf, Knape & Vogt, and YouCopia make excellent pre-built pull-out shelf systems in a range of sizes and configurations.
Pre-built units are faster and simpler for someone who is less comfortable with DIY construction — the only skill required is measuring accurately and drilling accurately. The tradeoff is less flexibility in dimensions and typically a higher per-shelf cost than buying slides and building your own tray.
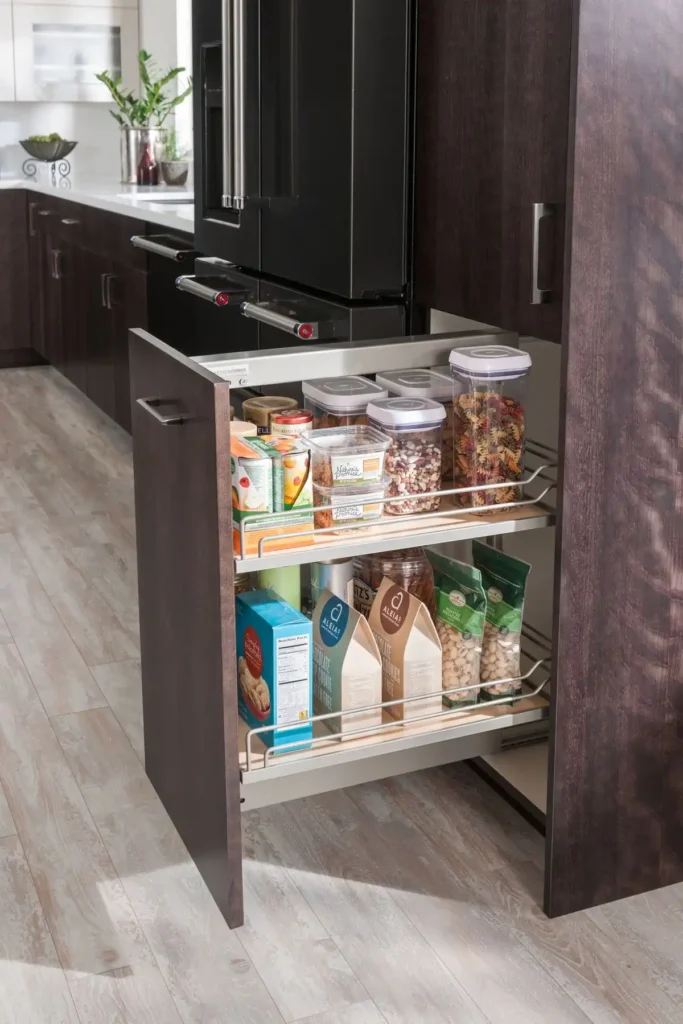
Type 3: Wire Pull-Out Baskets
Wire pull-out baskets — the open-wire construction kind that you commonly see in kitchen shows and renovation photos — are another excellent option, particularly for cabinets where you want the ventilation of open wire rather than the enclosed tray approach. They are typically wall-mounted on side brackets within the cabinet rather than slide-mounted, which makes them simpler to install but limits how far they pull out.
Wire baskets are particularly well-suited to under-sink cabinets, pantry cabinets, and cleaning supply storage where ventilation is beneficial and contents do not need the solid floor that a tray provides.
The Tools You Need
Having the right tools before you start is the difference between a smooth, satisfying installation and a frustrating afternoon.
Essential tools:
- Drill with drill bits appropriate for your cabinet material
- Countersink bit (creates a slightly wider hole at the surface so screw heads sit flush — makes a much neater installation)
- Level (non-negotiable — a pull-out shelf that is not level will drift to one side under load)
- Tape measure (and a pencil for marking)
- Square (for checking that your slide mounting marks are perpendicular to the cabinet front)
- Screwdriver for final tightening
- Clamps (helpful for holding slides in position while drilling)
- Safety glasses
Helpful but not strictly essential:
- Pocket hole jig (if you are building your own tray from wood — makes joinery fast and clean)
- Brad nailer (for assembling a wood tray)
- Cabinet installation spacers or shims (for leveling slides in cabinets with uneven floors)
Step 1: Measure Your Cabinet Interior Precisely — This Step Cannot Be Rushed
Pull-out shelf installation failures almost always trace back to inaccurate measurements. A slide that is a quarter inch too wide will not fit in the cabinet. A tray that is too tall will hit the shelf above. A shelf that is installed at the wrong height will be covered by the cabinet door frame when you try to open it. Measure precisely and measure multiple times.
You need four key measurements for each cabinet you are installing in.
Interior width: Measure the interior width of the cabinet at the front opening, at the middle of the cabinet depth, and at the back wall. Cabinets are not always perfectly square and the width can vary. Use the smallest measurement. Your pull-out shelf system must fit within the narrowest point of the cabinet interior.
Interior depth: Measure from the front face frame of the cabinet to the back wall. This tells you the maximum depth your pull-out shelf can be — your shelf should be slightly shorter than this measurement so it does not hit the back wall when pushed in.
Available height: Measure the vertical clearance available for your pull-out shelf — from the cabinet floor (or the shelf below your installation point) to the shelf above (or the bottom of the fixed shelf above). Your pull-out shelf, including the slide mechanism, must fit within this height.
Face frame opening width: Many kitchen cabinets have a face frame — the frame of wood that surrounds the cabinet opening at the front. This frame reduces the interior opening width slightly. Measure the width of the opening within the face frame, because your pull-out shelf needs to fit through this opening when it is extended.
Write all measurements down in a table with one row per cabinet. Label each measurement clearly. Do not rely on memory. Do not assume that two cabinets that look the same size actually are the same size — measure each one individually.
Step 2: Choose Your Pull-Out Shelf Size and Purchase Materials

With your measurements in hand, you are now ready to choose the right size pull-out shelf for each cabinet.
For pre-built units: Find a unit whose width is 1 to 1.5 inches narrower than your interior cabinet width measurement (the slide mechanisms need a small amount of clearance on each side). Ensure the unit depth is at or slightly less than your cabinet depth measurement. Ensure the total height of the unit including slides falls within your available height measurement.
For DIY ball-bearing slide installations: Choose drawer slides that are equal in length to your desired shelf depth (standard drawer slides come in 2-inch increments — choose the size closest to but not exceeding your cabinet depth). Choose slides rated for more weight than you expect to put on the shelf — always buy a higher weight rating than you think you need.
For the tray itself in a DIY build: 1/2-inch or 3/4-inch birch plywood is the standard cabinet material choice. Cut it to the dimensions your measurements dictate — the width should be 1 inch less than your interior cabinet width (1/2-inch clearance for the slide on each side), and the depth should be 1 inch less than your cabinet depth. The tray sides should be 2 to 3 inches tall if you are building a box tray, or 0 inches if you are building a flat shelf.
If you are building your own tray, the simplest construction is four pieces of plywood — a bottom panel, two side rails, a front piece, and a back piece — assembled with pocket hole screws and wood glue.
Step 3: Mark the Slide Mounting Positions Inside the Cabinet
This is the step that requires the most precision and the most patience, and it is the step where using a level and a square becomes genuinely critical rather than just best-practice.
Open the cabinet door fully. Look inside at the interior walls — these are where your slides will be mounted. Decide the height at which you want your pull-out shelf to sit inside the cabinet. Mark this height on both interior side walls using a pencil and a level — the marks need to be at exactly the same height on both sides for the shelf to be level.
Using your level, draw a horizontal line at the marked height on both sides of the cabinet interior. These lines are where the bottom edge of your drawer slides will be positioned.
If your cabinet has a face frame (the wooden frame around the front opening), the slides will need to clear the inside edge of the face frame. Hold a slide against the interior wall, positioned at your marked height, and check that the front of the slide clears the face frame opening enough that the shelf can extend fully forward. If the face frame is too deep and the slide would be blocked, you need to use a spacer or a specific face-frame mount system to bring the slide forward.
Mark the screw hole positions on both walls simultaneously — use the slide as a template, holding it at your marked height with a clamp, and mark through the slide’s pre-drilled holes onto the cabinet wall. Remove the slide and verify that the marks on both walls are level with each other using your level across the full width of the cabinet.
Step 4: Mount the Cabinet Slides to the Cabinet Interior Walls
With your mounting positions marked, it is time to drill and mount.
Pre-drill all screw holes using a drill bit slightly smaller than your screw diameter. Pre-drilling prevents the cabinet wall material from splitting and makes driving the screws much easier. Use a countersink bit after pre-drilling if you want the screw heads to sit flush with the surface.
Hold the slide in position aligned with your marks and drive the first screw partially — do not fully tighten yet. Drive a second screw at the other end of the slide, partially. Now use your level to confirm the slide is perfectly level, adjusting if necessary. Once confirmed level, fully tighten all screws.
Repeat the exact same process on the other side of the cabinet. After both slides are mounted, use your level across the front of both slides (setting the level across the front brackets of both slides simultaneously) to confirm they are at exactly the same height. If one side is slightly higher, loosen its screws, adjust, and retighten.
This leveling check across both slides is the step most DIY installers skip, and it is the step whose omission causes the shelf to drift to one side under load. Take the two minutes to do it.
Step 5: Attach the Slides to the Shelf Tray
The drawer slides have two components: the part that mounts to the cabinet wall (the outer slide, which you just installed) and the part that attaches to the shelf tray (the inner slide, which rides inside the outer slide).
Separate the slides into their two components — most ball-bearing slides separate by pressing a small release lever or tab while pulling the inner portion out. Set the inner slide portions aside — these are what you attach to your tray.
Position the inner slide component on the exterior side of your tray — the bottom of the slide aligns with the bottom face of the tray side, and the front of the slide is flush with the front face of the tray. Clamp it in position. Pre-drill and drive screws through the inner slide’s pre-drilled holes into the tray side.
Repeat on the other side of the tray. Both inner slide components should be at exactly the same position on their respective tray sides — if one is lower than the other, the tray will sit at an angle when installed.
Step 6: Install the Tray Into the Cabinet and Test
Align the inner slide portions (attached to your tray) with the outer slide portions (mounted to your cabinet). Slide them together — they should click into engagement and the tray should roll smoothly in and out of the cabinet on the ball bearings.
Push the tray in completely. It should sit level within the cabinet, clear the cabinet door when it swings closed, and not bind against any part of the cabinet interior. Pull the tray out to full extension — it should pull out smoothly, reach full extension with a slight stop, and remain stable at full extension without tipping or falling.
Test the installation with the expected load — put some weight on the tray similar to what you intend to store. A pots-and-pans pull-out should be tested with a few pots. A pantry pull-out should be tested with a representative weight of canned goods. The slides should handle the load smoothly and the tray should remain level under load.
If the tray binds or is stiff, check that both slides are perfectly parallel and at the same height — binding is almost always caused by slides that are not perfectly aligned. If the tray tilts under load, check that the inner slides are at the same position on both sides of the tray.
Step 7: Repeat for Every Cabinet and Enjoy the Result
Once your first pull-out shelf is installed, tested, and confirmed to work correctly, you have the complete skill set and the calibrated eye to install every remaining shelf efficiently. The first installation takes the longest because you are building the skill. Every subsequent installation is faster.
Work through your remaining cabinets using the same measurement, marking, mounting, and testing process. Keep your measurement notes from Step 1 — they are your reference for each cabinet. Do not assume that because two cabinets look the same, they are exactly the same — verify dimensions for each one.
By the end of your installation session, step back and open each cabinet in sequence. Pull out each shelf, one after the other. Watch the entire contents of each cabinet glide smoothly forward to meet you. Notice how every single item in every cabinet is now fully visible, fully accessible, fully findable in three seconds.
This is what my friend Walid experienced when he finished his eight-cabinet installation, and this is what I experienced when I finished mine, and this is what you are going to experience when you finish yours. It is one of those home improvement moments that produces a specific and genuine joy — the joy of a problem that plagued you every single day, permanently and elegantly solved.
The Most Common Pull-Out Shelf Installation Mistakes (And How to Avoid Them)
Measuring once instead of multiple times. Cabinet interiors are not always square. Always measure at multiple points. Always use the smallest measurement.
Choosing slides that are too short. Non-full-extension slides are cheaper but they defeat the purpose — if the shelf only comes out halfway, the back half is still inaccessible. Buy full-extension slides.
Not checking slide level across both sides. The most common cause of a shelf that drifts or binds under load. Two minutes with a level prevents this entirely.
Mounting slides on face-frame cabinets without accounting for the face frame depth. The face frame reduces the effective opening width. If you do not account for it, the slide may block the shelf from extending fully. Use face-frame mounting brackets or spacers.
Overloading the shelf. Slides have weight ratings. A slide rated for 75 pounds carrying 100 pounds of cast iron pots will eventually fail. Buy slides rated for more than your expected maximum load.
Not pre-drilling holes. Driving screws into cabinet material without pre-drilling risks splitting the wood and stripping the screw hole. Pre-drill every time.
Pull-Out Shelves: The Upgrade That Changes How You Use Your Home Every Single Day
I said at the beginning that the difference between reaching into a dark cabinet and having a pull-out shelf bring the cabinet contents to you happens dozens of times a day. I want to land on that number one more time as this guide closes, because the cumulative effect of dozens of small daily improvements is genuinely significant.
Cooking is faster because ingredients are accessible. Cleaning is easier because nothing gets lost at the back of a cabinet. Grocery put-away is more efficient because everything has a visible, accessible home. You stop buying duplicates of things you forgot you had. You stop discovering expired items you did not know were there. You stop losing a small piece of patience every time you reach into a deep cabinet and find yourself on your knees.
My friend Walid says that of all the home improvements he has made in the years he has owned his house — and there have been many — the pull-out shelf installations are the ones he uses and appreciates the most every single day, by a significant margin. Not the new floors. Not the renovated bathroom. The pull-out shelves, because they made the most-used storage in his home work the way storage is supposed to work.
Yours can do the same. The tools are accessible. The materials are affordable. The process is completely learnable. And the reward — that smooth, satisfying glide of a full cabinet presenting itself to you on demand — is going to make you wonder why you waited as long as you did.
Now go pin this complete installation guide, share it with everyone in your life who has ever lost something in the back of a deep cabinet, and go take those measurements this weekend.
Pin this and save it — this is the pull-out shelf installation guide you will come back to every time you tackle a new cabinet and want to finally make it fully accessible and fully organized!


Leave a Reply