
The most honest, practical, and genuinely professional guide to organizing kitchen cabinets — because your kitchen cabinets should make cooking easier, not harder, and after reading this they absolutely will.
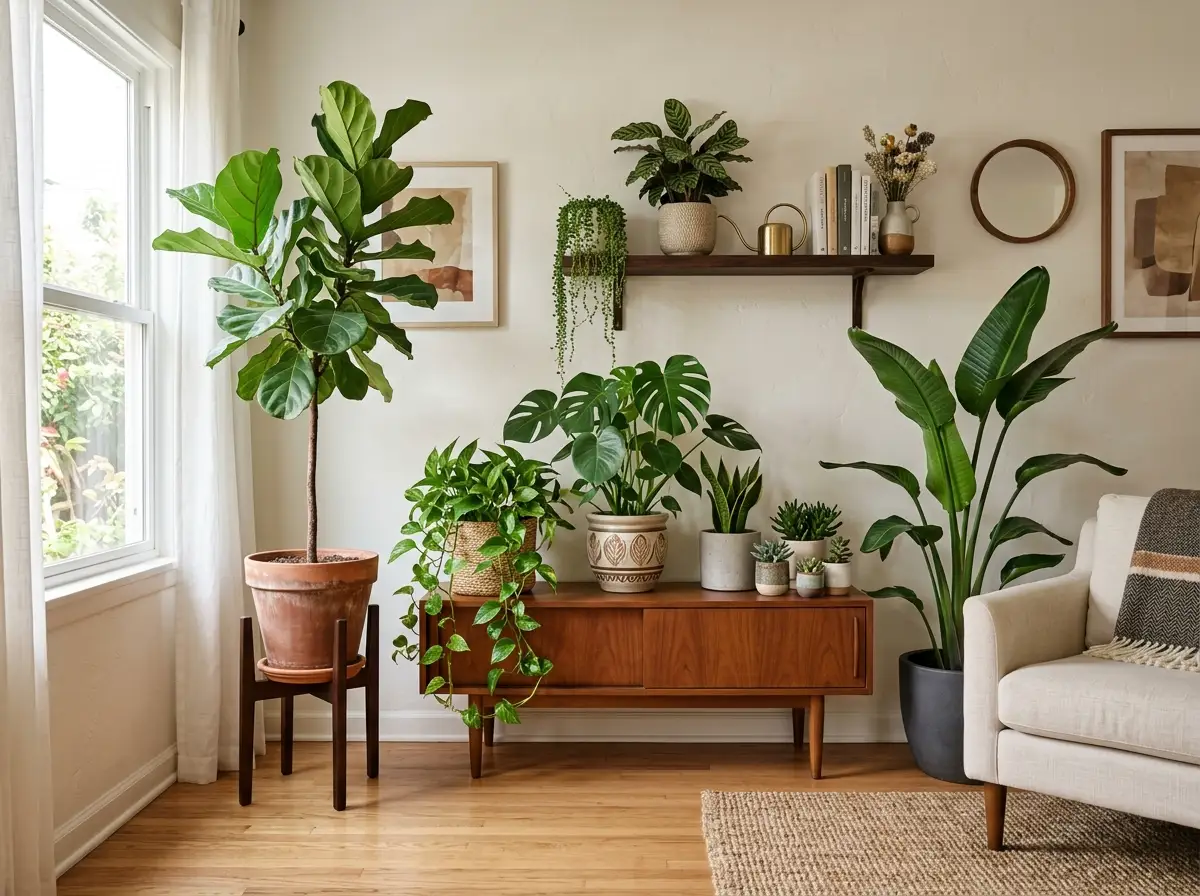
Let me paint you a picture of what a genuinely well-organized kitchen cabinet looks like in practice. You’re making dinner and you reach for the sauté pan — it’s right there, in the cabinet beside the stove, hanging on a hook at exactly the right height.
You need the olive oil — it’s in the cabinet directly above where you’re cooking, with the other frequently used oils and vinegars.
You want the pasta — it’s in the pantry cabinet, in a clear labeled canister, visible and accessible in three seconds. You need the pasta pot — it’s in the cabinet below the cooktop, stacked neatly with its matching lid stored vertically beside it.
Every single thing you need is exactly where it makes sense to be. Nothing requires searching. Nothing requires moving other things to reach what you want. The entire dinner comes together with a fluency and ease that makes cooking feel genuinely pleasurable rather than a battle against your own kitchen.
That kitchen exists. And it is not the exclusive property of people with professional designers and custom cabinet installations. It is the result of applying the same organizational principles that professional organizers use in every kitchen they work in — principles that are completely accessible, completely achievable, and that I am going to walk you through in complete detail in this guide.
My friend Ghada is a professional organizer who has worked in hundreds of kitchens across every size and style imaginable, and the single observation she makes most consistently is this: no kitchen cabinet problem is a space problem. They are always a system problem.
She has never walked into a kitchen and found that there genuinely was not enough cabinet space for the items that needed to live in the kitchen. What she finds instead is items stored in the wrong places, space being wasted by poor arrangement, and the absence of the organizing principles that make a cabinet system actually work.
That observation — no space problem, only system problem — is the philosophical foundation of everything that follows. Your kitchen has enough cabinet space. It just needs a professional organizer’s system applied to it. Here is exactly how to do that.
The Professional Organizer’s Golden Rules for Kitchen Cabinets
Before we get into the specific how-to, I want to share the five golden rules that professional organizers apply to every kitchen they work in. These rules are the lens through which every specific decision in this guide is made — understand them first and everything that follows will make complete intuitive sense.
Golden Rule 1: Proximity to point of use is everything. Items should be stored as close as possible to where they are used. Cooking tools near the cooktop. Dishes near the table or dishwasher. Coffee and breakfast items near where you eat breakfast. The further an item lives from where it is used, the more effort every use requires. Eliminate the walking and reaching and the kitchen becomes dramatically more efficient.
Golden Rule 2: Frequency of use determines accessibility. The most frequently used items get the most accessible positions — at eye level, at the front of shelves, in the cabinet that opens most naturally to the work area. Rarely used items — the fish poacher, the holiday serving pieces, the specialty baking equipment — go in the least accessible positions — high shelves, back corners, deep storage. Never store a rarely used item where a frequently used item should live.
Golden Rule 3: Like with like, always. Every cooking oil lives with every other cooking oil. Every baking supply lives with every other baking supply. Every plastic container lives with every other plastic container. When like items are together, you always know where to look and you always know where to return. The exception to this rule is the proximity rule — a cooking oil used at the cooktop lives at the cooktop even if other oils live elsewhere.
Golden Rule 4: Everything needs a home, and the home needs a reason. Every item in your kitchen needs a designated, specific location — and that location needs to be based on logical principles (use proximity, frequency, category) rather than availability of space. “I put it here because there was room” is not a storage system. “I put it here because this is where I use it” is a storage system.
Golden Rule 5: If it’s hard to put away, it won’t be put away. This is Ghada’s single most frequently cited rule and the one she says is most consistently violated in homes she organizes. Every item’s home needs to be as easy to return to as it is to take from. If putting the pan back requires lifting three other things, the pan will live on the cooktop permanently. If putting the lid back requires careful placement in a specific orientation, the lid will live on the counter permanently. Make return as easy as retrieval and your kitchen will stay organized with almost no maintenance effort.
Step 1: Empty Every Cabinet Completely Before You Organize Anything

I know this feels like a daunting instruction. I know that “empty every cabinet” sounds like a commitment to a full day of chaos. I am asking you to do it anyway because it is the single most important step in the entire process and the one that makes everything that follows possible.
When you organize cabinet by cabinet, putting things back and rearranging as you go, you are constrained by the existing arrangements. You see what is there and you work around it. When you empty everything completely and look at your kitchen’s cabinet space as a blank slate, you can assign items to their logically correct homes based purely on the principles above — proximity to use, frequency, category — rather than being influenced by where they happened to end up in previous arrangements.
Empty everything onto your kitchen counters, your kitchen table, and any available surface. As you empty, do a preliminary sort — group like items together as they come out. All pots together. All baking equipment together. All plastic containers together. All pantry items together. This pre-sorting will make the next step significantly faster.
This is also the moment to declutter. As items come out of the cabinets, assess each one honestly. When did you last use this? Would you buy it again today? Is it in good condition? Items that are broken, that haven’t been used in over a year, or that you genuinely don’t need go in a donation box or the trash before anything goes back into the cabinets. Ghada says the average kitchen she works in has thirty to forty percent more items than it actually needs — and that the declutter alone, before any reorganization happens, significantly reduces the perceived storage problem.
Step 2: Map Your Kitchen’s Work Zones Before Deciding What Goes Where
With your cabinets empty and your items sorted on the counters, the next step is to identify your kitchen’s primary work zones — and this step is what separates professional kitchen organization from amateur rearrangement.
Every kitchen has natural work zones that correspond to the activities that happen there. Identifying these zones before you decide where anything lives ensures that every item ends up in the right place based on logic rather than habit.
The Cooking Zone: The area around your cooktop and oven. This zone needs cooking tools (spatulas, tongs, wooden spoons), oils and frequently used spices and seasonings, pot holders and oven mitts, and the pots and pans you use most frequently. Everything that gets grabbed during active cooking should be within arm’s reach of this zone.
The Prep Zone: Your primary countertop work area, ideally near the sink. This zone needs cutting boards, knives, mixing bowls, food processors and other prep appliances, colanders, and peelers and other prep tools. The closer to the prep surface these items live, the more efficiently your prep work flows.
The Cleanup Zone: The area around your sink and dishwasher. This zone needs dish soap and cleaning supplies under the sink, clean dishes and glasses in the cabinet above or beside the dishwasher (so unloading is a one-step process from dishwasher to cabinet without crossing the kitchen), and drying racks and dish cloths within reach.
The Breakfast and Coffee Zone: If you make coffee or breakfast from the same spot every day, that area is its own zone. Everything for morning coffee, tea, breakfast items, and morning supplements should be concentrated in one cabinet in this zone.
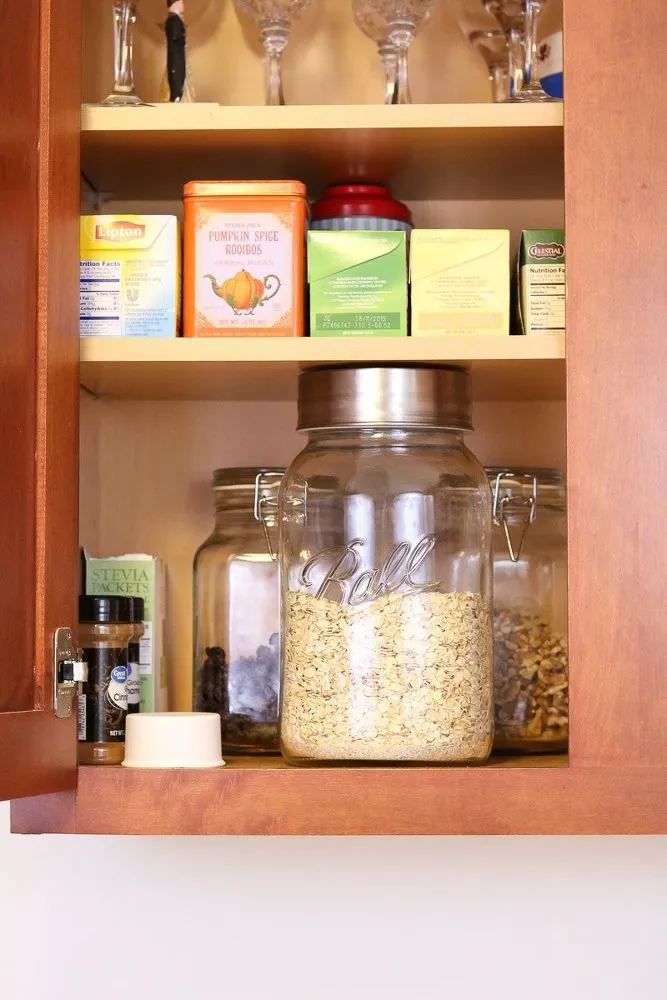
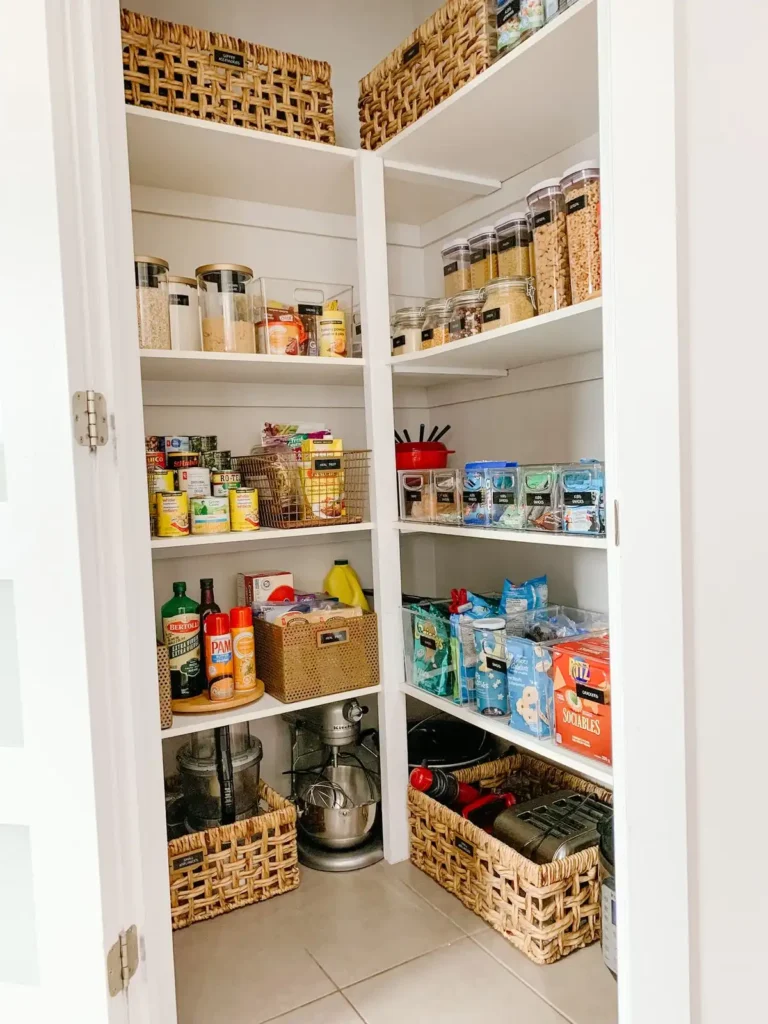
The Pantry or Food Storage Zone: Wherever your dry goods, canned goods, and pantry items live. This should be as close as possible to both the prep zone and the cooking zone.
Mark these zones on a rough sketch of your kitchen if that helps you visualize. Now you have the map that tells you where every item belongs.
Step 3: Assign Every Item to Its Zone and Cabinet
Now comes the most satisfying step — assigning every item that came out of your cabinets to its correct zone, based on the golden rules and the zone map you just created.
Work through each category of kitchen item and assign it to its logical zone and cabinet. Here is how professional organizers think through the most common kitchen categories.
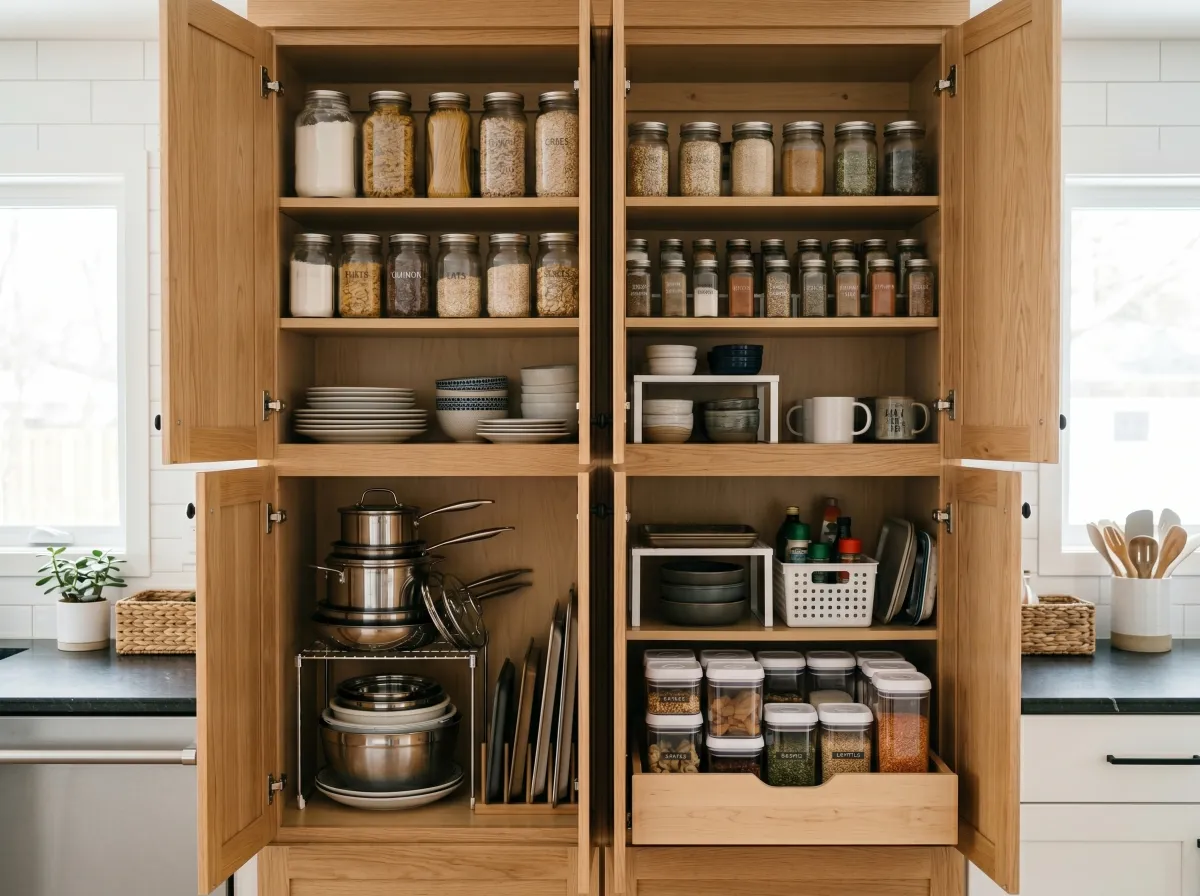
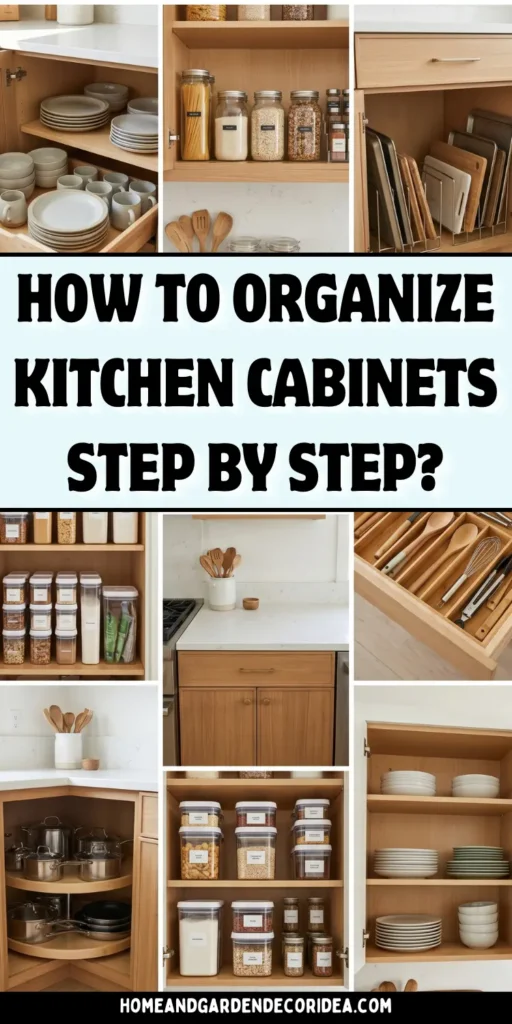
Pots and Pans: These live in the cabinet directly below or beside your cooktop — as close to the cooking zone as possible. Stack smaller pans inside larger ones to save space. Store lids vertically in a lid rack or on a dedicated lid shelf rather than stacking them on top of pans, which makes every individual pan difficult to access. A deep drawer below the cooktop is the single best possible storage solution for pots and pans if your kitchen has one.
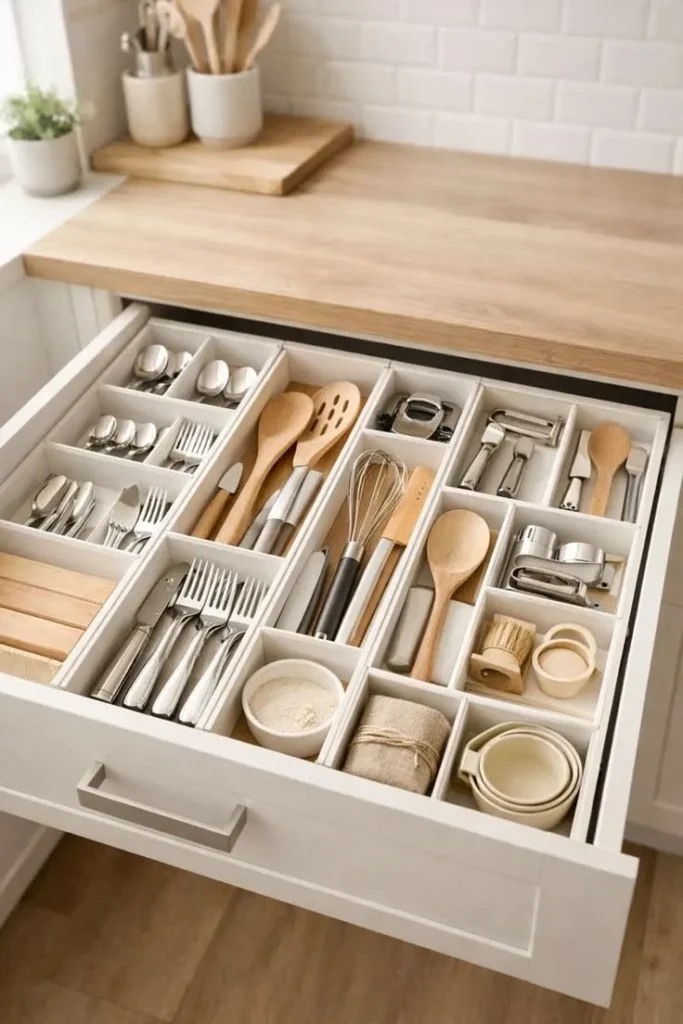
Cooking Tools and Utensils: A crock or jar on the counter beside the cooktop holds the five to eight tools you reach for every time you cook — spatula, tongs, wooden spoon, ladle, whisk. Everything else goes in a drawer in the cooking zone. Drawer organizers keep utensil drawers from becoming a jumble — assign a compartment to each category of tool.
Knives: On a magnetic knife strip on the wall in the prep zone — accessible, safe, and space-efficient. Or in a knife block on the counter. Never loose in a drawer where they dull each other and create a safety hazard.
Cutting Boards: In the prep zone, stored vertically in a vertical organizer or against the side of a cabinet. Taking a cutting board out of a vertical organizer requires one motion. Lifting a cutting board from a horizontal stack requires removing everything above it.
Spices: In the cooking zone, on a pull-out or lazy Susan inside a cabinet near the cooktop, on a magnetic strip mounted to the side of a cabinet, or on the inside of the cabinet door. Organized alphabetically within each category grouping (baking spices together, cooking spices together). Every jar labeled clearly on the top so you can read the label looking down into a drawer or basket.
Baking Supplies: All in one dedicated baking cabinet or section — mixing bowls, measuring cups and spoons, baking sheets and pans, stand mixer accessories, and dry baking ingredients in clear labeled canisters. Grouped together so every baking session starts with one cabinet opening rather than a kitchen-wide gathering expedition.
Plates, Bowls, and Glasses: In the cabinet directly above or beside the dishwasher so unloading is a direct transfer. At the most accessible height in the cabinet — never above shoulder height for items used daily. Plates stacked neatly, bowls nested inside each other, glasses right-side up in rows or upside down on a shelf liner to prevent dust accumulation.
Plastic Containers and Food Storage: This category causes more cabinet chaos than almost any other, and the professional organizer’s approach is specific: store container bodies nested inside each other sorted by size, and store all lids separately in a dedicated lid organizer that keeps them vertical, visible, and easy to grab. Never store containers with their lids on — it wastes enormous amounts of space. Match your container set so lids are interchangeable across sizes.
Cleaning Supplies: Under the sink, in the cleanup zone. Organized with a pull-out under-sink organizer so nothing gets lost at the back of the cabinet. Cleaning supplies used in the bathroom and bedroom do not live in the kitchen — only kitchen-specific cleaning items belong here.
Appliances: Appliances used daily (coffee maker, toaster) live on the counter. Appliances used weekly (blender, food processor) live in an accessible cabinet near the prep zone. Appliances used occasionally (stand mixer, waffle iron) live in a less accessible cabinet or in pantry storage. Appliances used rarely (juicer, bread machine) go in deep storage.
Step 4: Maximize Every Cabinet’s Actual Storage Capacity
Once items are assigned to their correct zones and cabinets, the professional organizer’s next move is to evaluate each cabinet and ensure it is using its full storage potential — because most kitchen cabinets, as originally configured with one or two fixed shelves, waste a significant amount of their potential storage capacity.
Add shelf risers to create two levels on a single shelf. Most kitchen cabinets have shelf heights set for the tallest items that might live there — but most items are shorter, leaving a gap of several inches above everything on the shelf. A shelf riser sits on the existing shelf and creates a second level that uses that gap, effectively doubling the storage capacity of the shelf for shorter items.
Install pull-out drawer inserts for deep cabinet shelves. Any cabinet shelf deeper than about 12 inches loses items to the back — things slide to the back, are forgotten, and eventually expire there. A pull-out insert turns a deep shelf into a functional drawer that brings everything to the front. For base cabinets especially, pull-out drawers are the single most impactful cabinet upgrade available.
Use the inside of cabinet doors. The inside surfaces of cabinet doors are storage real estate that almost every kitchen completely ignores. Door-mounted spice racks for the spice cabinet door. Pot lid organizers on the inside of the pan cabinet door. Wrap and bag dispensers on the inside of the pantry cabinet door. Small hooks for hanging measuring spoons and small tools on the inside of any relevant cabinet door.
Install lazy Susans in corner cabinets. Corner cabinets are the notoriously inaccessible storage zones of every kitchen — items get pushed to the back and never seen again. A two-tier lazy Susan that rotates brings every item in a corner cabinet to the front with a simple spin.
Use vertical dividers for flat items. Baking sheets, cutting boards, serving platters, and pan lids all stack horizontally in most kitchens — which means accessing any individual item requires removing everything above it. Vertical dividers in a deep cabinet or a deep drawer store these items vertically like files in a folder, making every individual item immediately accessible with no removal required.
Step 5: Label Everything That Needs a Label
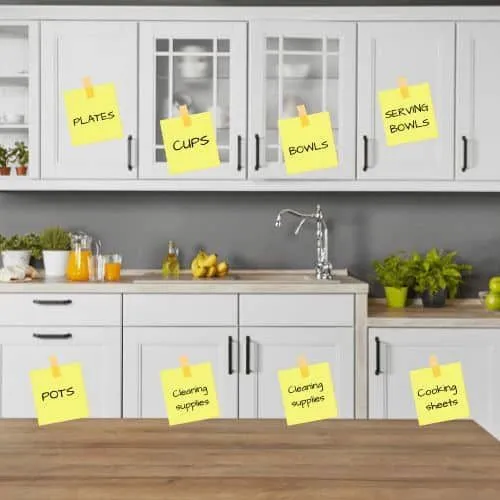
Professional organizers label everything — and they do it for a specific practical reason that goes beyond aesthetics. Labels remove decision-making from the maintenance process. When a cabinet shelf is labeled “Baking — Dry Goods,” there is no decision to make about whether the flour goes here. It goes here. When a drawer is labeled “Prep Tools,” there is no decision to make about whether the peeler goes here. It goes here.
Labels work in kitchen cabinets even when you live alone — because memory is unreliable and the labeled system runs automatically even when you are tired, distracted, or not particularly motivated to put things back carefully.
In a household with multiple people, labels are non-negotiable. They create a shared language for the kitchen storage system that means every person who uses the kitchen can maintain it correctly without requiring instruction or reminders.
Label the shelf within each cabinet rather than just labeling the cabinet itself — “Everyday Dishes,” “Large Serving Pieces,” and “Specialty Bakeware” on three shelves in the same cabinet is more useful than “Dishes” on the outside of the cabinet door.
Use a label maker for the most professional, most consistent, most legible result. If you don’t have one, clearly handwritten labels on white label stickers are equally functional. The label matters more than its font.
Step 6: Maintain the System With a Weekly Cabinet Reset
The final step in organizing your kitchen cabinets like a professional organizer is building the simple maintenance habit that keeps everything you have set up working properly for the long term.
A weekly cabinet reset takes under ten minutes and consists of one simple action for each cabinet: open it, look at the current state, and return anything that has drifted back to its correct home. The pan that got put on the wrong shelf goes back to the right one. The stack of containers that has gotten muddled gets re-sorted. The spice jars that are out of order get straightened.
Ten minutes, once a week, is the entire maintenance cost of a professionally organized kitchen. This is achievable because the system is logical — when everything has a home that makes sense, maintenance is just the act of completing the return that was started when an item was put away imperfectly.
Ghada ends every kitchen organization session by walking her clients through the maintenance habit. She says the clients who maintain their organized kitchens perfectly are not the most naturally tidy ones — they are the ones who established the weekly reset as a consistent habit from day one.
What Your Kitchen Feels Like After This Process
I want to close this guide by describing what the result of this process actually feels like in daily life — because the goal was never a beautifully organized cabinet for its own sake. The goal was always a kitchen that works better for the person cooking in it.
After organizing your kitchen cabinets with these professional principles, cooking dinner on a Tuesday night feels different. Everything you reach for is where you reach for it. The pan is in the cabinet beside the stove. The lid is in the vertical organizer in the same cabinet. The oil is in the cabinet above the cooktop. The spices are on the lazy Susan that spins to present the right one immediately.
You stop losing time in your kitchen. You stop feeling frustrated by your kitchen. You stop discovering expired items at the back of cabinets you forgot existed. You stop cooking with less-than-optimal tools because the right one is buried somewhere inaccessible. You start cooking more — more confidently, more experimentally, more joyfully — because the kitchen gets out of your way and lets you cook.
That is the result of organizing your kitchen cabinets like a professional organizer. And it is genuinely available to you, in your current kitchen, with your current cabinets, this weekend.
Now go pin this complete guide, share it with every person in your life who complains about their kitchen storage, and go clear that first counter to start emptying those cabinets. Your best kitchen experience is waiting just on the other side of this process.
Pin this and save it — this is the kitchen cabinet organization guide you will come back to every time you move, renovate, or simply decide it is time to make your kitchen actually work the way it should!


Leave a Reply